
Creating a well-organized and visually appealing table of contents (TOC) slide in PowerPoint can dramatically enhance the professionalism and navigability of your presentations. A thoughtfully designed table of contents not only helps your audience understand the structure of your presentation but also allows easy navigation to key sections. In this comprehensive guide, I’ll walk you through a step-by-step tutorial to craft a dynamic and interactive PowerPoint table of contents design that is both functional and stylish.
This tutorial is inspired by expert techniques used by POWERPOINT UNIVERSITY, an acclaimed creator of PowerPoint tutorials and free templates. By following these instructions, you’ll learn how to create a clickable, animated table of contents slide with color-coded sections, shadow effects, icons, and smooth transitions. Whether you are a beginner or an intermediate PowerPoint user, this tutorial will equip you with practical skills to elevate your presentations.
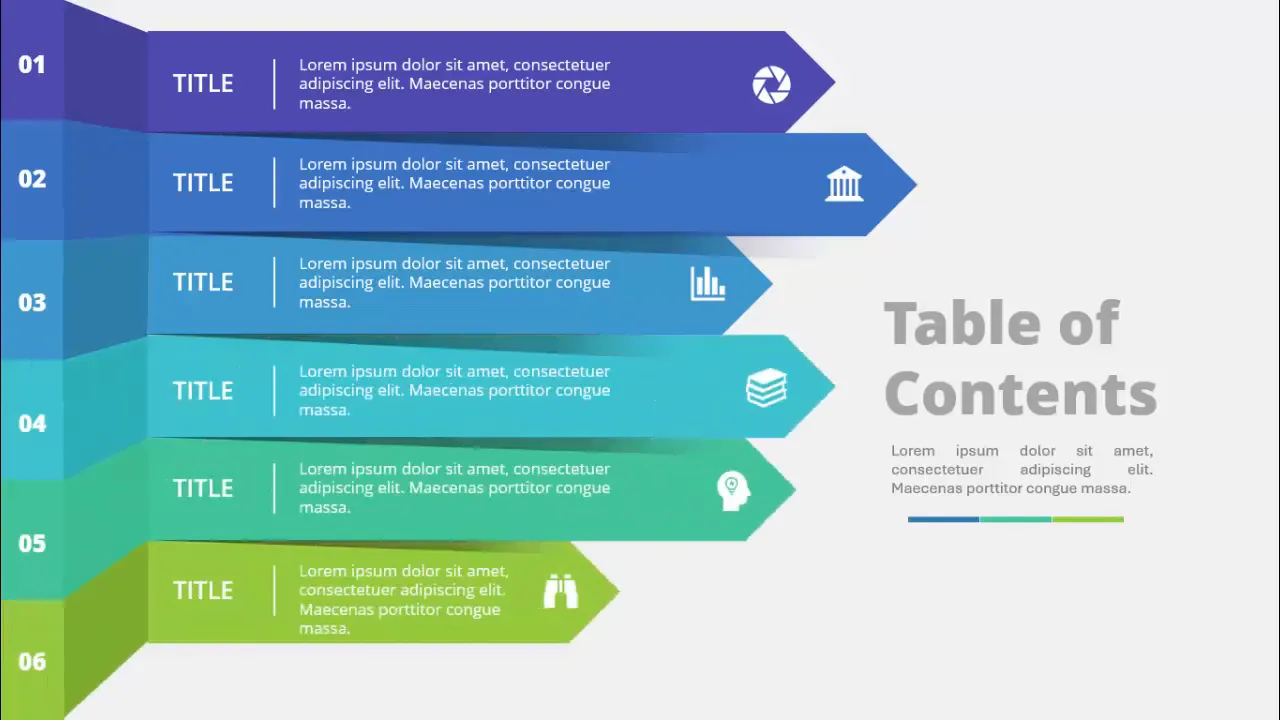
Table of Contents
- Why Create a Table of Contents in PowerPoint?
- Preparing the Slide and Creating Rectangular Sections
- Color Coding Each Section Using Eyedropper Tool
- Duplicating and Grouping Elements for Consistency
- Connecting Rectangles with Freeform Shapes
- Customizing Shapes: Arrow Pentagons
- Adding Shadow Effects with Gradient Filled Triangles
- Inserting Text Boxes, Titles, Detail Text, and Icons
- Grouping Elements and Adding Basic Animations
- Final Tips for a Polished Table of Contents Slide
- Frequently Asked Questions
Why Create a Table of Contents in PowerPoint?
A table of contents slide is an essential feature in professional presentations for several reasons:
- Structure and Navigation: It clearly outlines the flow of your presentation, helping your audience anticipate what’s coming next.
- Interactivity: When designed with clickable sections, it allows presenters and viewers to jump directly to specific slides.
- Visual Appeal: A well-designed TOC slide adds polish and professionalism to your deck, making it easier to engage your audience.
- Consistency: It sets the tone for the rest of the presentation by establishing a consistent style and color scheme.
Creating a dynamic PowerPoint table of contents design is a strategic way to make your presentations more user-friendly and visually captivating.
Preparing the Slide and Creating Rectangular Sections
Start by adding a new blank slide to your PowerPoint presentation. This will serve as your table of contents slide. Follow these steps:
- Go to the Insert tab and select Shapes.
- Choose the Rectangle shape (the first option under rectangles).
- Click on the slide to insert the rectangle.
- Adjust the rectangle’s dimensions by going to the Shape Format tab. Set the height to 1.25 inches and the width to 7 inches.
- Remove the outline by setting Shape Outline to No Outline.
- Position the rectangle at the top-left corner of the slide.
- Press Ctrl+D to duplicate the rectangle and drag the duplicate directly below the first one.
- Repeat the duplication until you have six rectangles stacked vertically, representing six sections/pages of your table of contents.
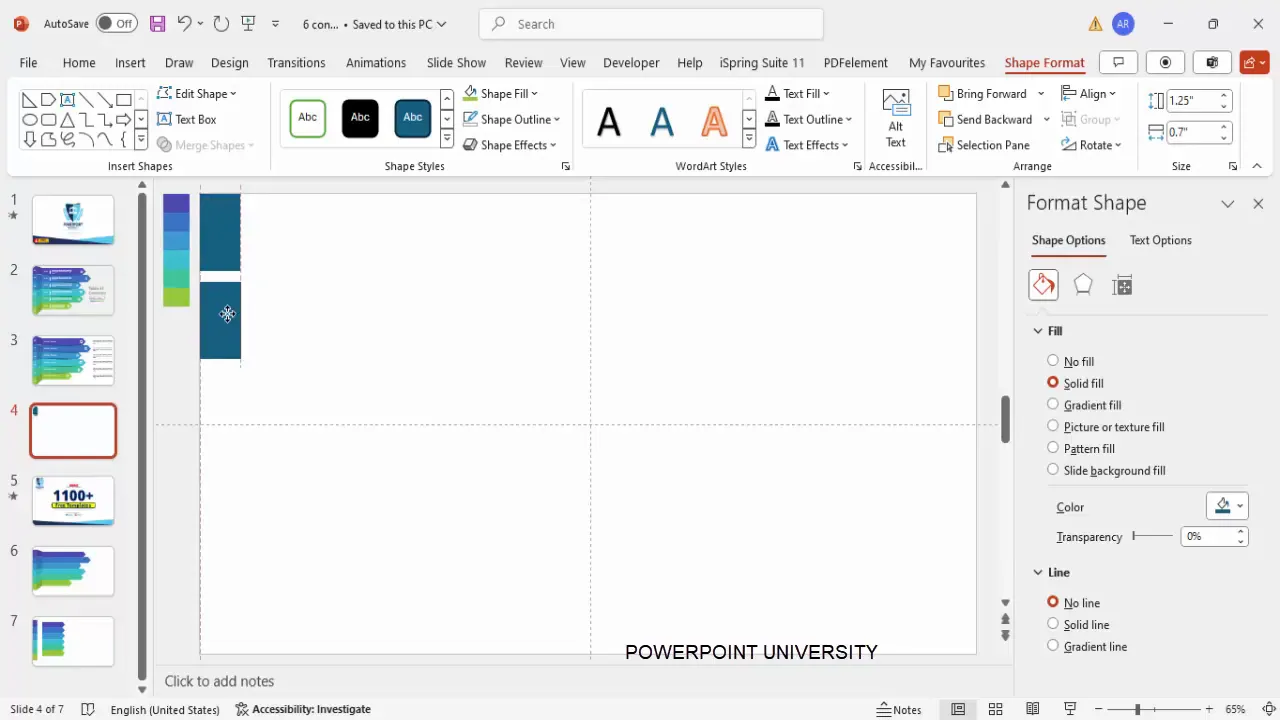
This setup forms the base structure of the table of contents. Each rectangle will correspond to a section in your presentation.
Color Coding Each Section Using Eyedropper Tool
To visually distinguish each section, apply different colors to the rectangles. Here’s how:
- Select the first rectangle.
- Go to Shape Fill and choose the Eyedropper tool.
- Pick a color from an existing color palette or any color you prefer on your slide.
- Repeat this process for each rectangle, selecting a unique color for each.
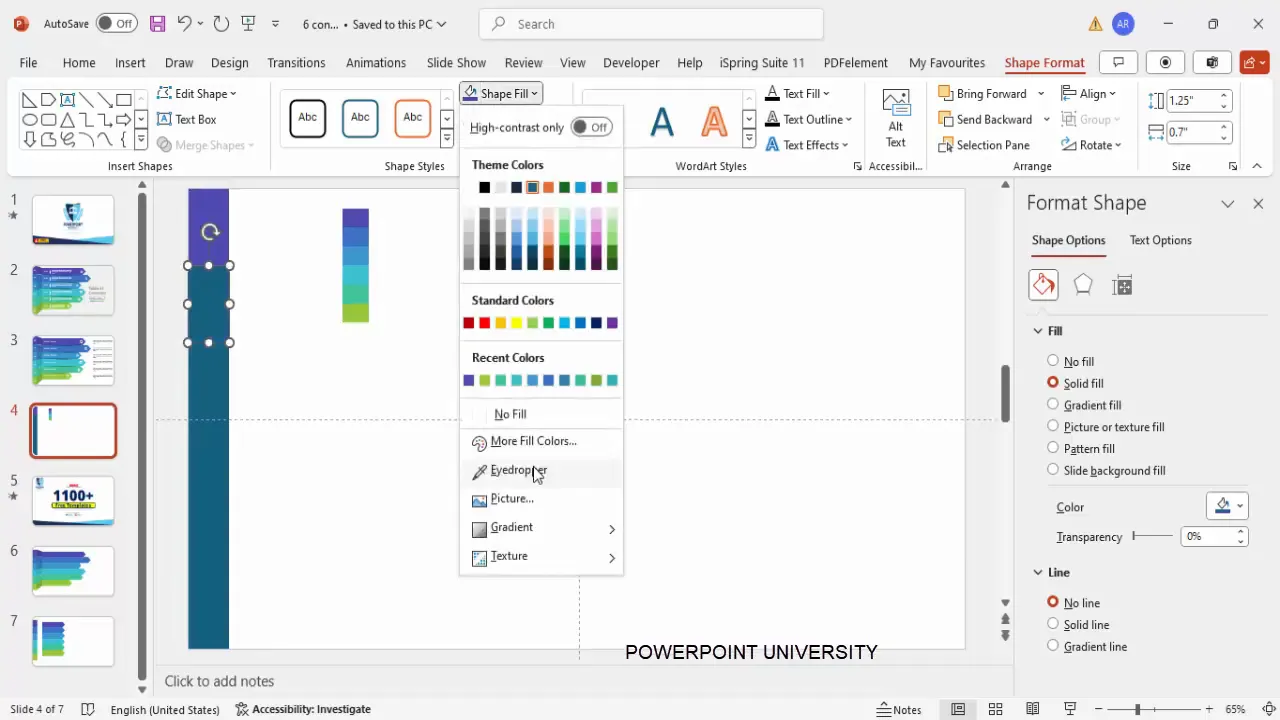
Using the eyedropper tool allows you to maintain a cohesive color scheme by selecting colors directly from your slide or template, ensuring consistency.
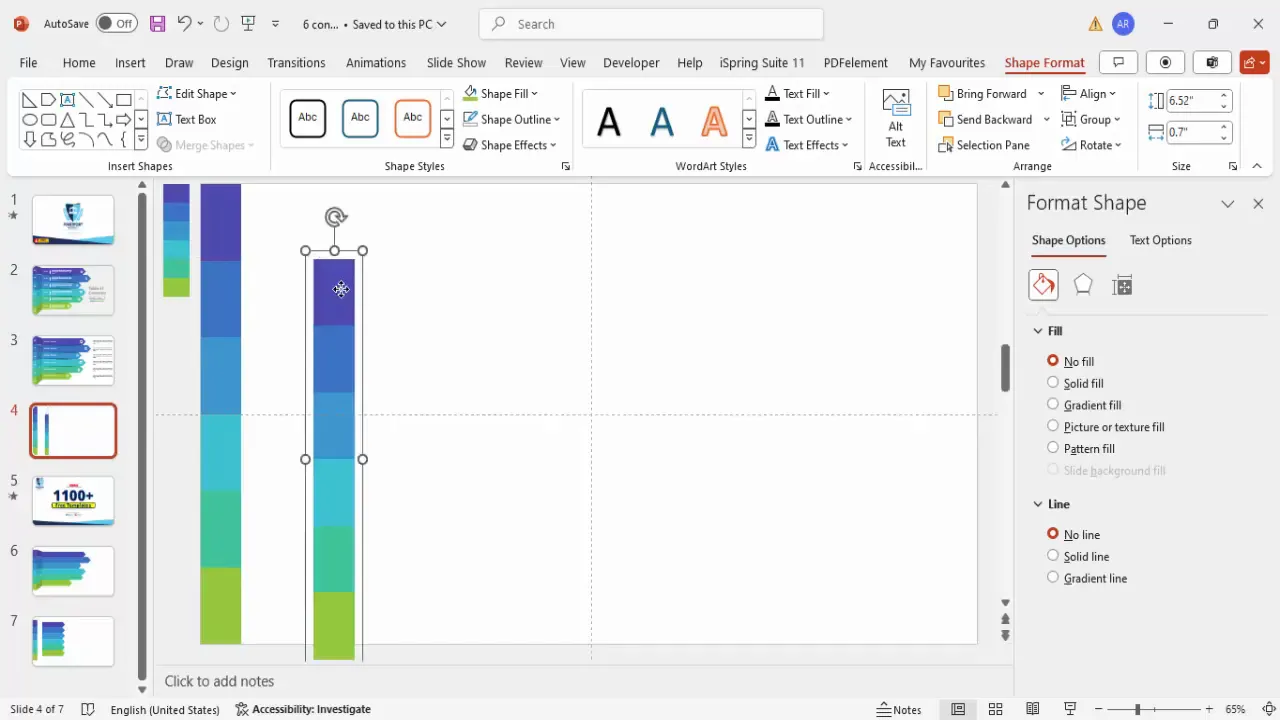
Duplicating and Grouping Elements for Consistency
Now that the basic rectangles are colored, select all six by holding the Shift key and clicking each. Then:
- Press Ctrl+D to duplicate the group.
- Press Ctrl+G to group the duplicated objects.
- Resize the group’s height (not its width) to fit your desired layout, typically centering it on the slide.
- Adjust the spacing between groups to create a visually balanced layout.
- Right-click and select Group > Ungroup to separate the objects again for further editing.
This step ensures that your rectangles are uniformly spaced and aligned for a clean, professional look.
Connecting Rectangles with Freeform Shapes
To add a sleek connecting effect between the rectangles, use the freeform shape tool:
- Go to Insert > Shapes > Lines > Freeform Shape.
- Click on the corner of the first rectangle, then draw lines connecting it to the next rectangle by clicking each point along the path you want to create.
- Close the shape by clicking the starting point again.
- Set the shape’s outline to No Outline.
- Fill the shape with the same color as the rectangle it connects to, but adjust the shade to be slightly darker via More Fill Colors.
- Repeat this process for all connections between rectangles.
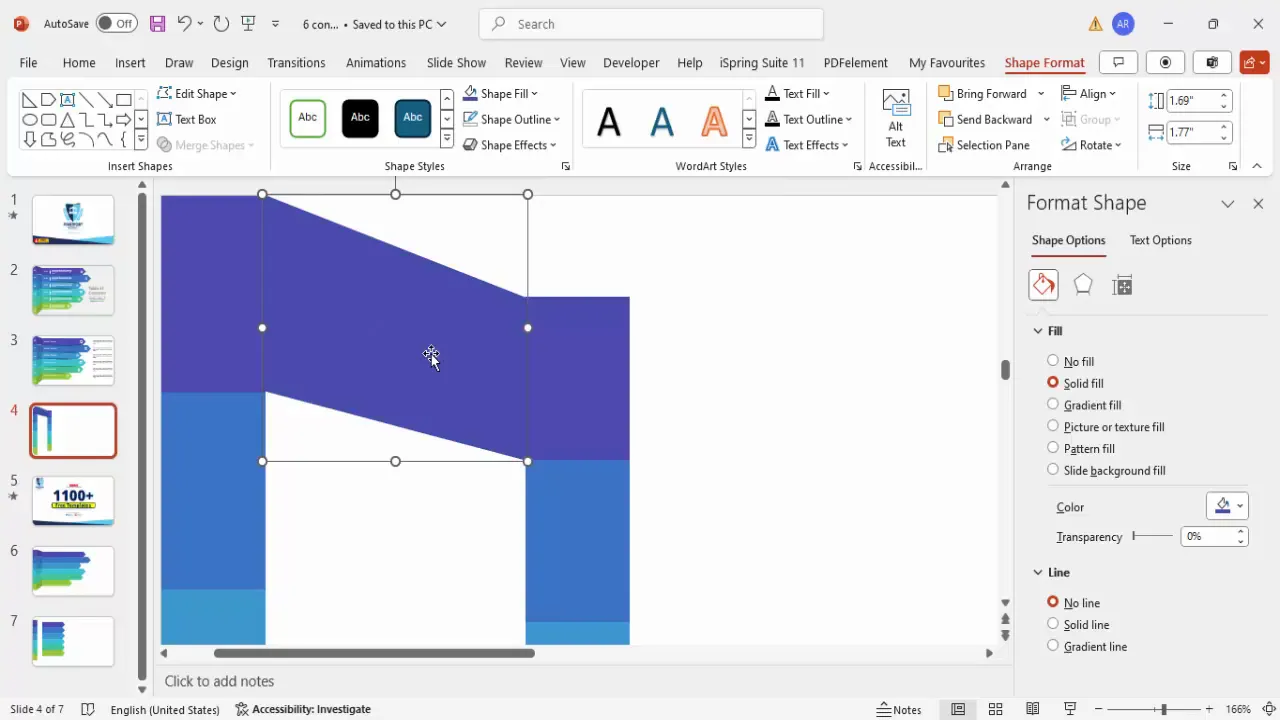
These connecting shapes create a visual flow that guides the viewer’s eye down the list, enhancing the slide’s cohesiveness.
Customizing Shapes: Arrow Pentagons
To add directional emphasis, change the shape of the rectangles into arrow pentagons:
- Select a rectangle.
- Navigate to Shape Format > Edit Shape > Change Shape.
- From the Block Arrows category, select Arrow Pentagon.
- Resize the arrow as needed to fit your design.
- Repeat for other rectangles, adjusting size to create a hierarchy (e.g., larger for main sections, smaller for subsections).
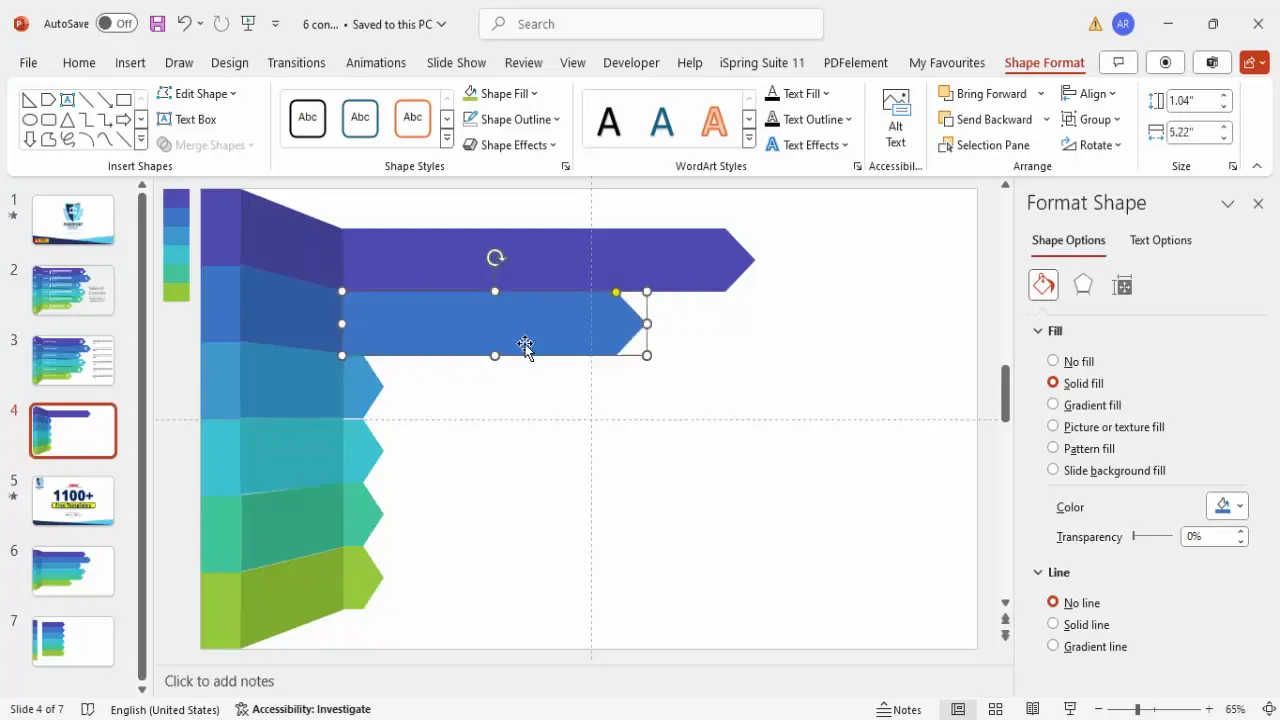
This customization adds a professional touch by visually indicating progression and importance within your table of contents.
Adding Shadow Effects with Gradient Filled Triangles
To add depth and dimension, create shadow effects using right triangles filled with gradient colors:
- Go to Insert > Shapes > Basic Shapes > Right Triangle.
- Draw a small right triangle near the arrow pentagon shape.
- Set the triangle’s outline to No Outline.
- Use the Rotate options to flip the triangle vertically and horizontally until it fits the desired shadow position.
- Apply a Gradient Fill with three stops:
- Stop 1: Black with 46% transparency
- Stop 2: Black with 71% transparency
- Stop 3: The color of the adjacent rectangle with 100% transparency
- Set the gradient direction to Linear Left for a natural shadow effect.
- Duplicate and resize the triangles for each arrow pentagon to keep consistency.
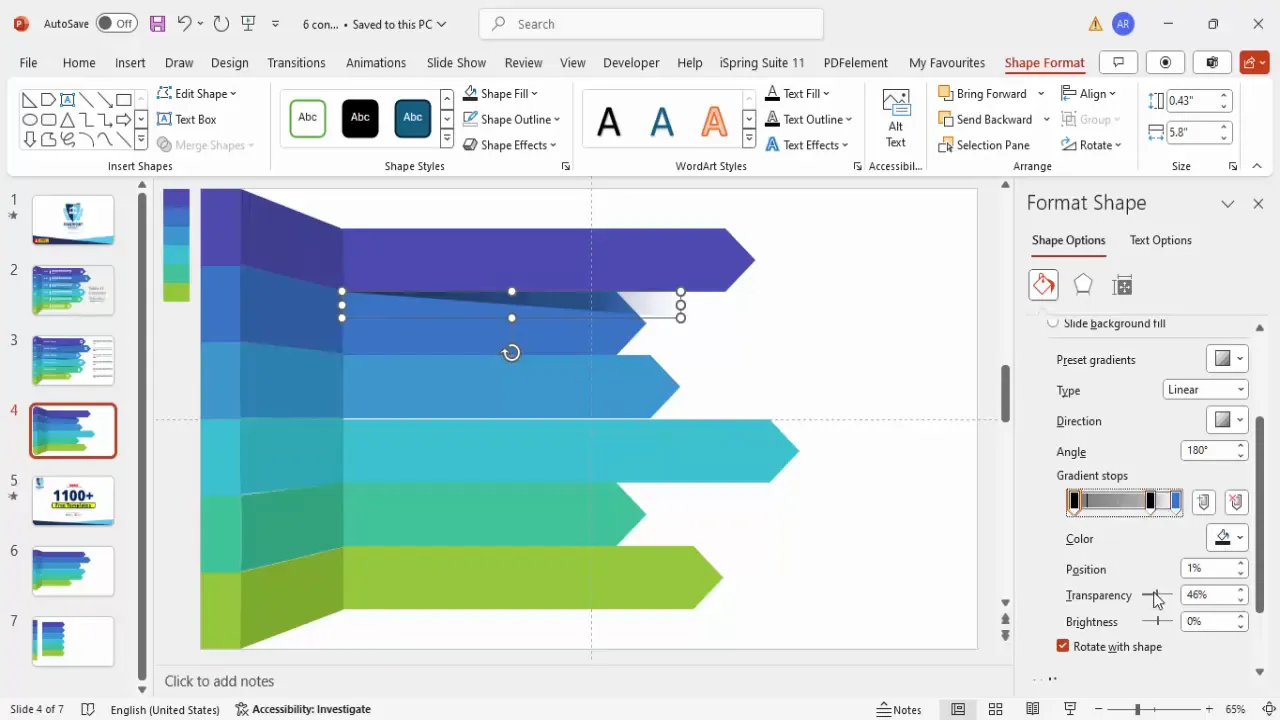
The gradient shadow effect adds a subtle yet impactful 3D look to your table of contents, making the slide visually engaging.
Inserting Text Boxes, Titles, Detail Text, and Icons
With the shapes in place, it’s time to add the content that your audience will interact with:

- Insert a Text Box for page or option numbers and place it at the top of each colored rectangle. Use a bold, readable font like Open Sans Extra Bold in white color for contrast.
- Duplicate the text box for all six options by holding Ctrl+Shift and dragging down.
- Add another text box for the section title next to each page number, again using the same font and color scheme.
- Insert a straight line under the title for visual separation:
- Go to Insert > Shapes > Line.
- Hold Shift while drawing to keep the line straight.
- Set the line color to white.
- Add a third text box for the detail description under the title, using a smaller font size and white color.
- Optionally, insert icons related to each section by going to Insert > Icons and choosing relevant visuals.
- Select the title, line, and detail text for each section and group them together with Ctrl+G for easier management.
- Duplicate the grouped content for all six sections and adjust the text accordingly.
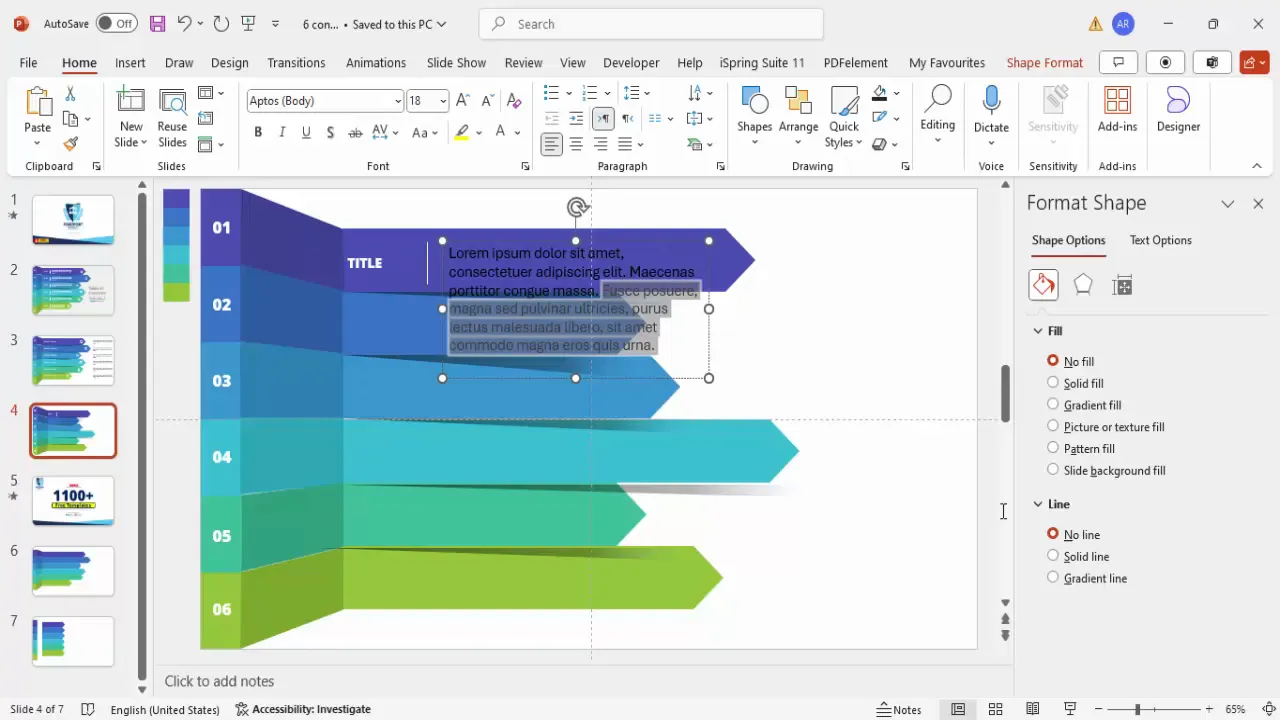
These textual and iconographic elements provide clarity and enhance the functionality of your table of contents slide.
Grouping Elements and Adding Basic Animations
To make your table of contents interactive and visually dynamic, group each section’s elements and add animations:
- Select the arrow pentagon, shadow effect, and text group of a section.
- Press Ctrl+G to group them into a single object.
- Repeat for all six sections, ensuring each group is properly layered (send background shapes to back).
- Go to the Animations tab and open the Animation Pane.
- Apply a Wipe animation effect from the left to each group.
- Use the Animation Painter tool to quickly copy the animation settings to all other groups.
- Adjust the timing and order to ensure a smooth, sequential reveal when presenting.
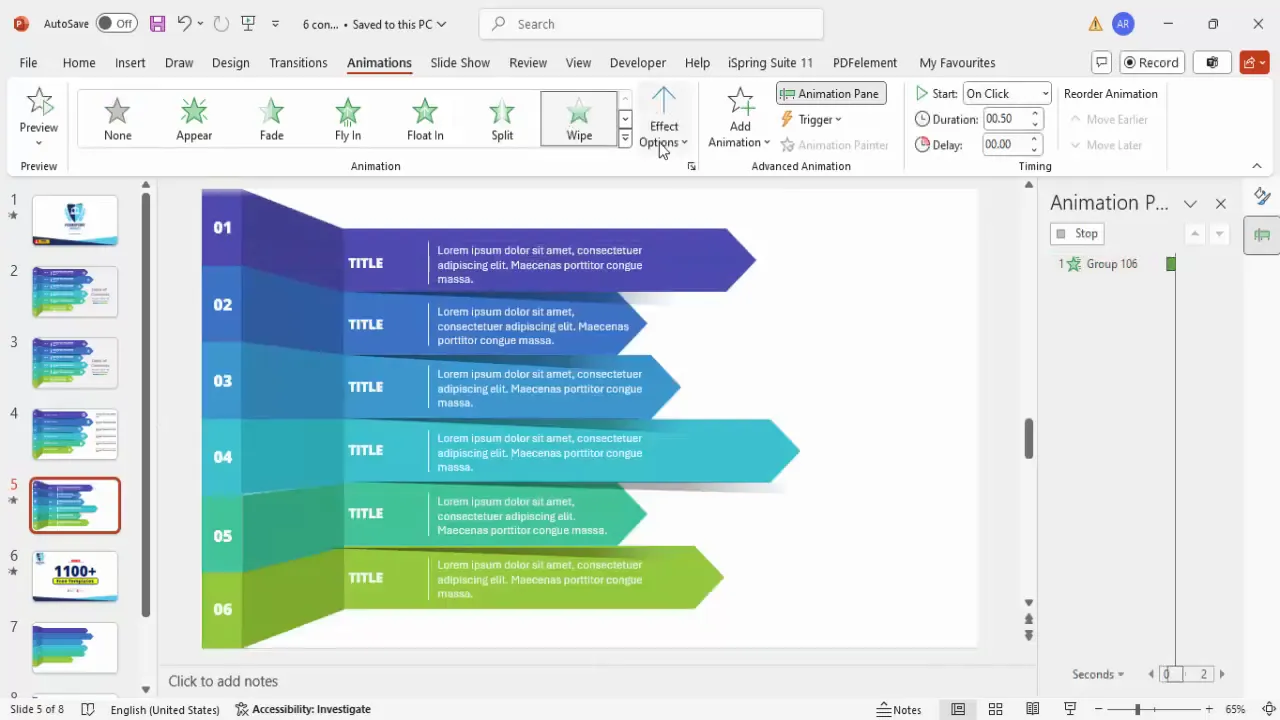
These animations add a professional polish to your presentation and help guide the audience’s focus as you introduce each topic.
Final Tips for a Polished Table of Contents Slide
- Alignment: Ensure all elements are perfectly aligned with no gaps or overlaps for a clean look.
- Color Consistency: Use a consistent color palette throughout your presentation for a cohesive visual experience.
- Font Choice: Choose legible fonts and maintain consistent font sizes across the table of contents.
- Icons and Visuals: Use icons sparingly to complement text without cluttering the slide.
- Interactivity: Link each section to the corresponding slide in your presentation for easy navigation (use Insert > Action).
- Practice: Preview your animations and transitions to ensure smooth playback during your presentation.
By integrating these tips, your PowerPoint table of contents design will not only look professional but also function seamlessly during your presentation.
Frequently Asked Questions
What is the best font to use for a PowerPoint table of contents design?
The best fonts are clean, readable, and professional. Fonts like Open Sans Extra Bold, Arial, or Calibri work well. Avoid decorative or overly stylized fonts to maintain clarity.
Can I make my table of contents interactive in PowerPoint?
Yes! You can add hyperlinks or action buttons to each section in your table of contents, allowing you or your audience to jump directly to specific slides during your presentation.
How do I ensure my table of contents matches the rest of my presentation?
Use a consistent color scheme, font choices, and design elements across your entire presentation. Applying a slide master template can help maintain uniformity.
Are animations necessary for a table of contents slide?
Animations are not mandatory but can enhance the viewer experience by guiding attention and making your presentation feel more dynamic. Use subtle effects like wipes or fades for professionalism.
Can I download ready-made PowerPoint table of contents templates?
Absolutely! Many websites, including POWERPOINT UNIVERSITY, offer free downloadable templates that you can customize to fit your needs.
How much text should I include in each section of the table of contents?
Keep it concise. Use short titles and brief descriptions (ideally under 30 words) to maintain readability and avoid clutter.
What is the ideal size for table of contents sections?
Size your sections to be large enough for clear visibility but balanced to fit all content on one slide without overcrowding. Rectangles with a height of about 1.25 inches and width around 7 inches work well as a starting point.
Conclusion
Mastering the creation of a professional PowerPoint table of contents design elevates your presentation’s clarity, interactivity, and visual appeal. Through simple yet effective steps—such as creating colored rectangular sections, connecting shapes with freeform lines, adding custom arrow shapes, incorporating shadows, and animating grouped elements—you can build a table of contents slide that impresses your audience and enhances your message delivery.
By following this guide, you not only learn how to build a functional TOC slide but also gain practical design skills that can be applied across all your PowerPoint presentations. Remember, a well-crafted table of contents is the roadmap to your story, guiding your audience smoothly from start to finish.
Explore free PowerPoint templates and additional tutorials to further refine your presentation skills and make your next deck truly stand out.
Check out the full video: How to Create a Professional Table of Contents in PowerPoint


