
PowerPoint is an incredibly powerful tool for creating engaging presentations, but many users—novices and experienced alike—often miss out on some simple yet game-changing tricks that can elevate their slide decks. Whether it’s perfecting image placement, creatively filling shapes with pictures, or even embedding videos inside text, mastering these techniques can save you time and produce stunning results.
In this comprehensive guide, I’ll walk you through three essential PowerPoint tricks that every presenter should know. These tricks have been carefully crafted to help you create professional, polished presentations with ease. I’m Ramgopal from Presentation Process, and over the years, I have curated thousands of premium animated PowerPoint templates and training resources to help you get the most out of this versatile software.
Let’s dive right in and explore these tricks that might not be known even to experienced PowerPoint users!
Table of Contents
- Trick #1: Extend Photos Seamlessly to Cover the Entire Slide
- Trick #2: Fill Shapes with Images the Right Way
- Trick #3: Fill Text with Images or Videos for Stunning Effects
- Conclusion: Elevate Your Presentations with These PowerPoint Tricks
- Frequently Asked Questions (FAQs)
Trick #1: Extend Photos Seamlessly to Cover the Entire Slide
Have you ever inserted a photo on a slide only to notice awkward empty spaces around it? This usually happens because the image’s dimensions don’t perfectly match the slide’s aspect ratio, which is commonly 16:9 in modern PowerPoint presentations. The result? Unsightly blank areas that detract from your overall design.
### The Common Approach: Cropping to Aspect Ratio
The usual method to fix this mismatch involves cropping the image to fit the slide’s aspect ratio. Here’s how you might do it:
- Insert your image onto the slide.
- Right-click the slide and duplicate it to preserve the original.
- Select the image, go to Picture Format → Crop → Aspect Ratio, and choose 16:9.
While this makes the image cover the entire slide, the downside is that part of your photo gets cropped out, potentially cutting off important content.
### The Better Way: Extending the Photo Without Cropping Important Parts
What if you want the image to cover the entire slide without losing any part of it? Here’s a clever workaround:
- Insert your original photo on the slide.
- Press Ctrl + D to duplicate the image and place the copy directly on top of the original.
- Stretch this copied image horizontally to extend beyond the left edge of the slide.
- Go to Picture Format → Crop and crop the extended image so just the extra portion remains visible on the left side.
- Click outside the image to apply cropping.
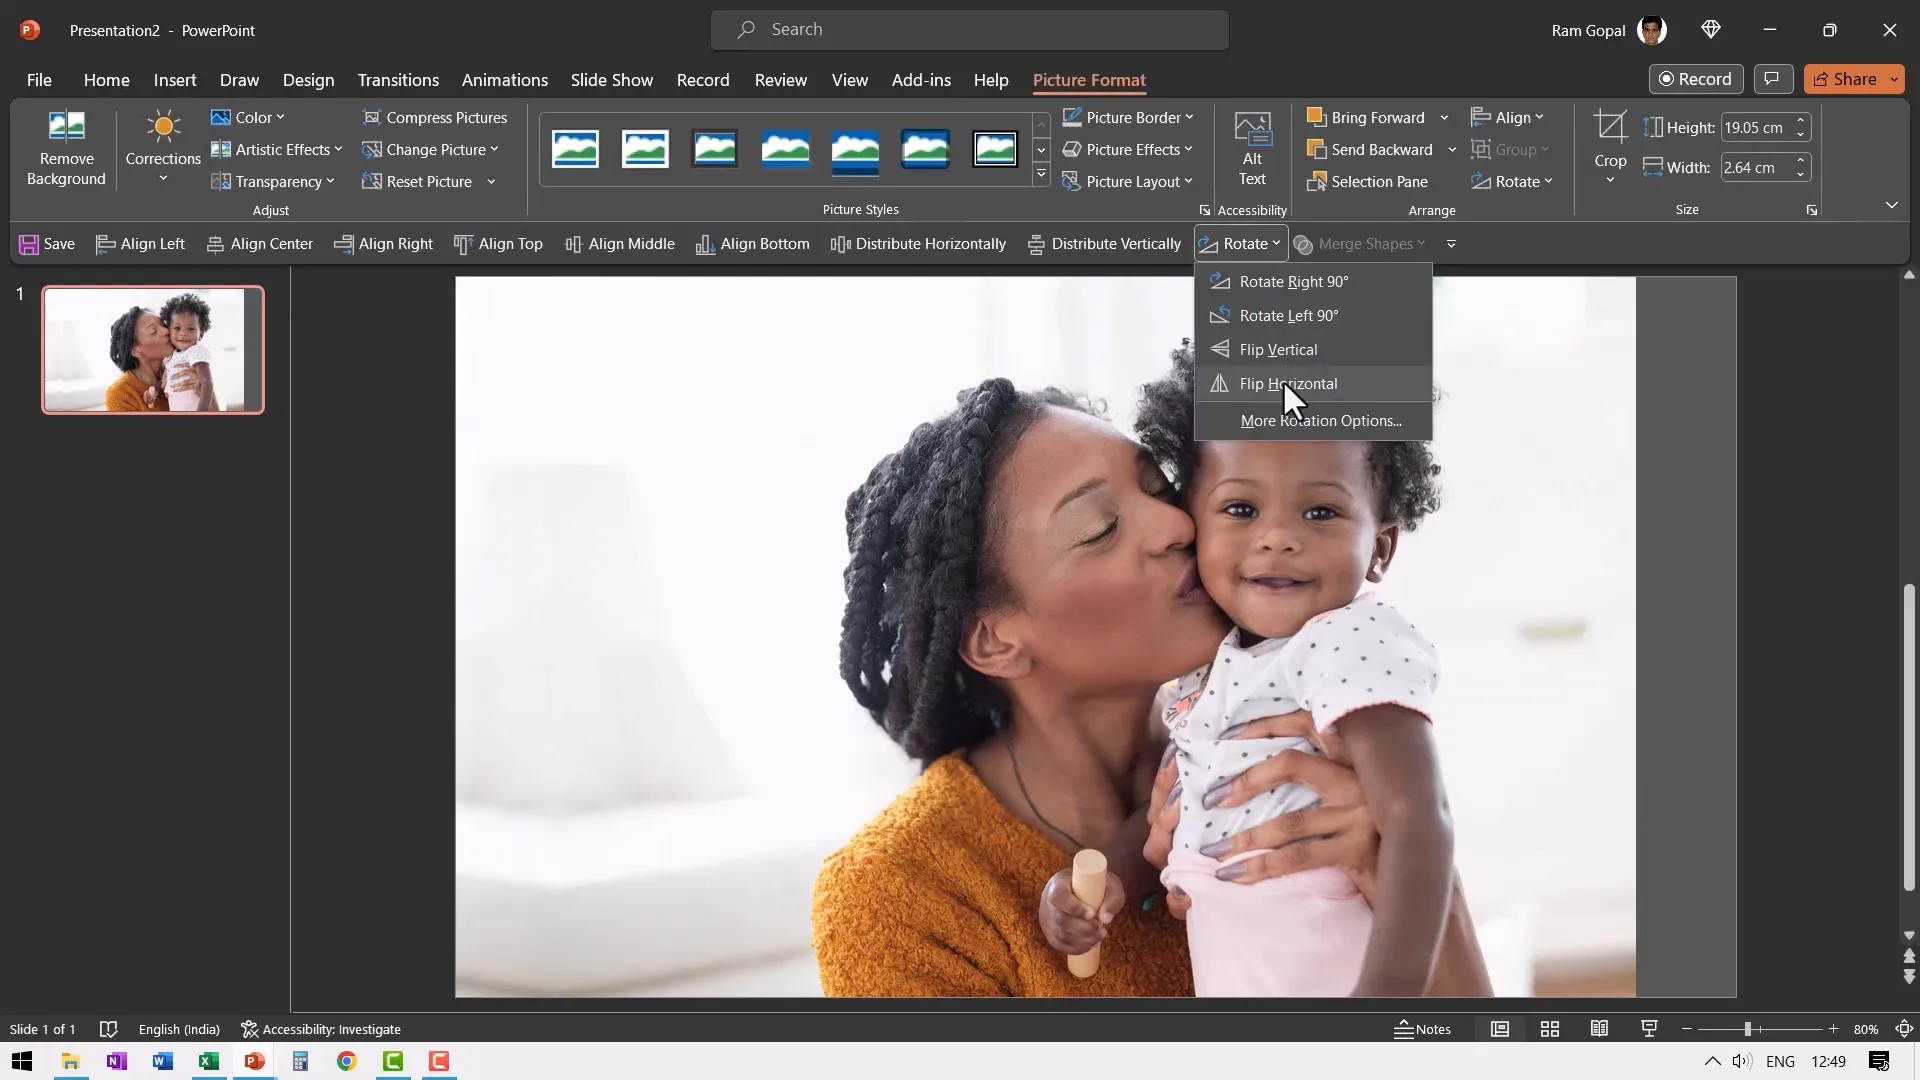
- If you notice a mismatch or visual break between the original and the extended part, select the extended image, go to Rotate, and choose Flip Horizontal to mirror it. This creates a seamless extension.
- Repeat these steps for the right side by duplicating the original image again, stretching it to the right, cropping, and flipping horizontally.
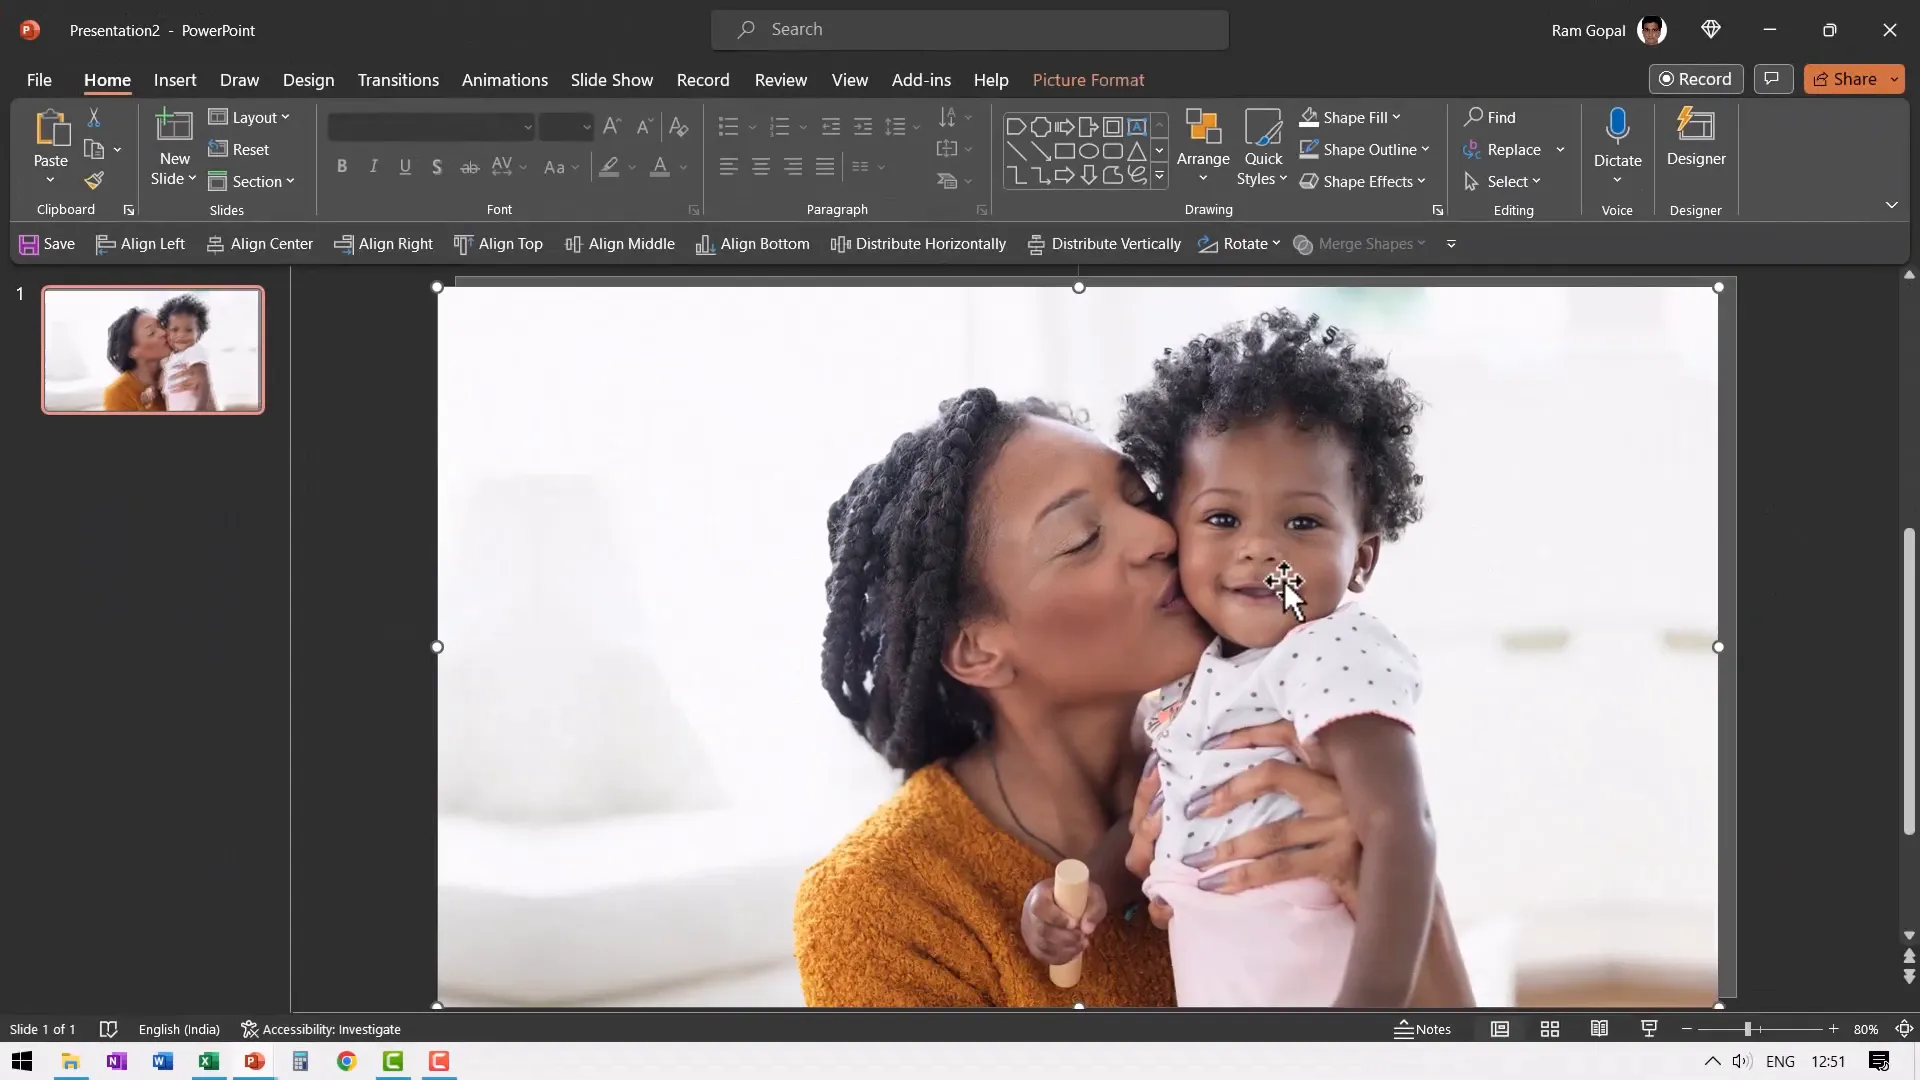
This process uses three images on one slide to create a perfect, edge-to-edge photo background without cropping out any part of your original photo. However, you might worry about increasing your PowerPoint file size with multiple images.
### Combining Images into One Picture to Reduce File Size
To keep your file size manageable, you can combine these three images into a single picture:
- Select all three images by pressing Ctrl + A.
- Cut them with Ctrl + X.
- Right-click on the slide and choose Paste as Picture.
Now, you have a single image that looks seamless and covers the entire slide without cropping.
Note: This technique works well for most photos but might not be perfect for every image depending on its content and layout. Still, it’s a powerful trick to have in your PowerPoint arsenal.
Trick #2: Fill Shapes with Images the Right Way
Shapes are a great way to add visual interest to your presentation. But filling shapes with images can sometimes be tricky. You might find that the image inside the shape doesn’t align properly, looks distorted, or rotates unexpectedly. Let’s explore how to avoid these common issues.
Filling a Shape with an Image and Adjusting Its Position
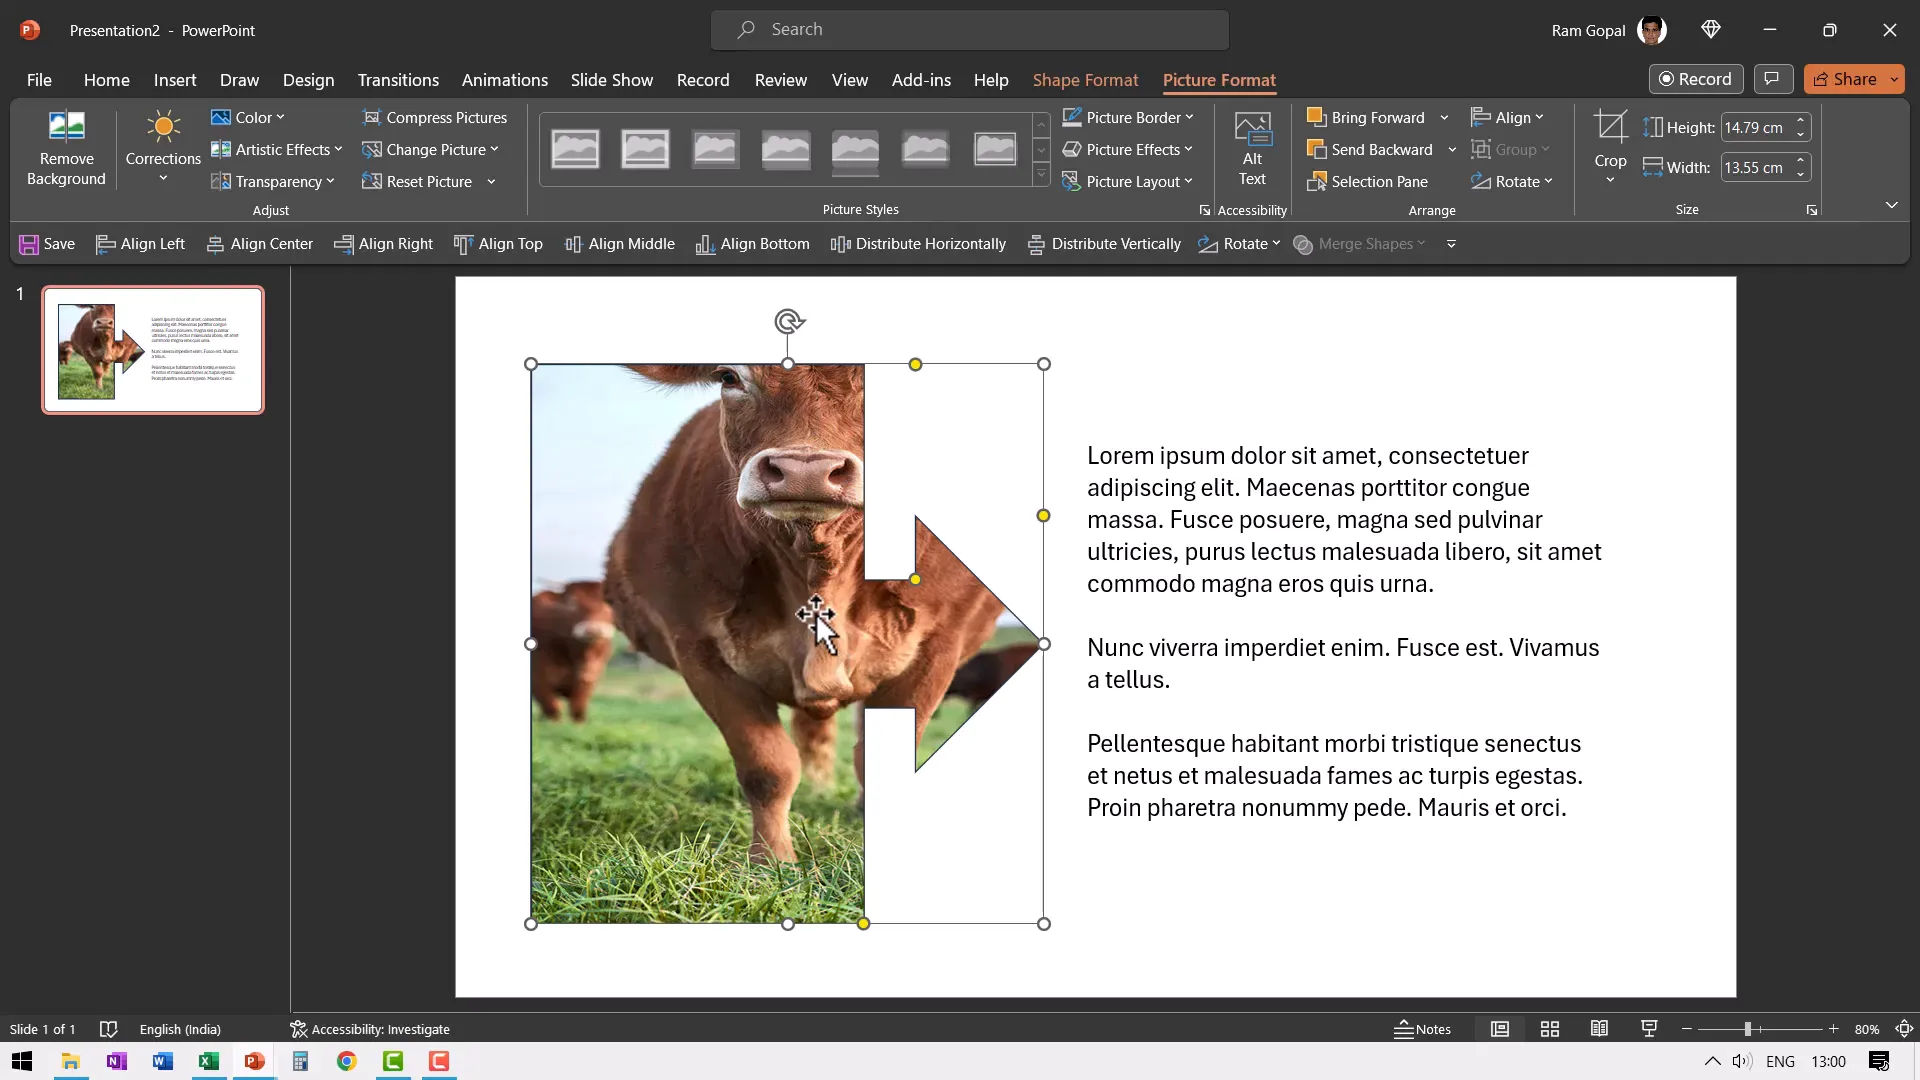
Suppose you want to fill a callout arrow shape with a picture of a penguin. The basic steps are:
- Insert the shape (e.g., a callout right arrow).
- Select the shape, right-click, and choose Format Shape.
- Under Fill, select Picture or Texture Fill and insert your desired image (e.g., a penguin).
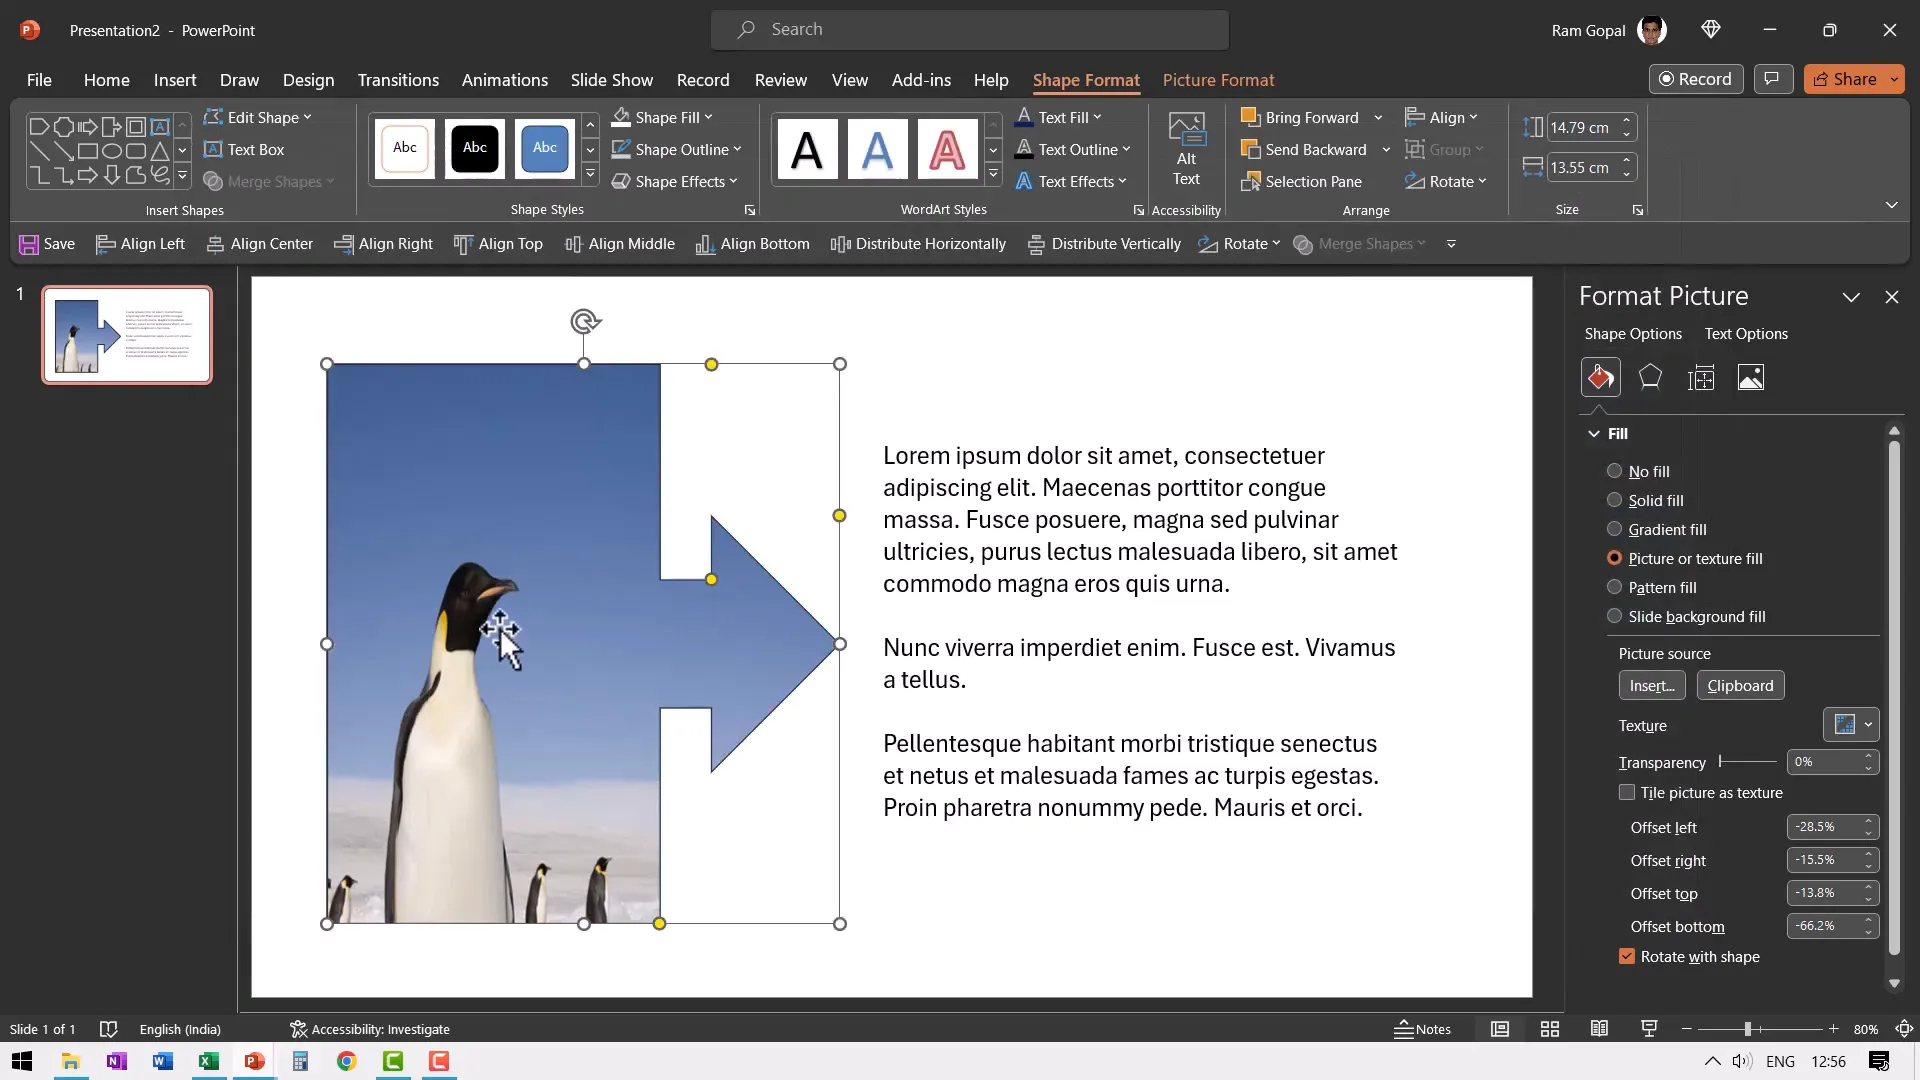
However, the image may not be positioned properly within the shape. You can fix this by:
- Selecting the shape.
- Going to Picture Format → Crop.
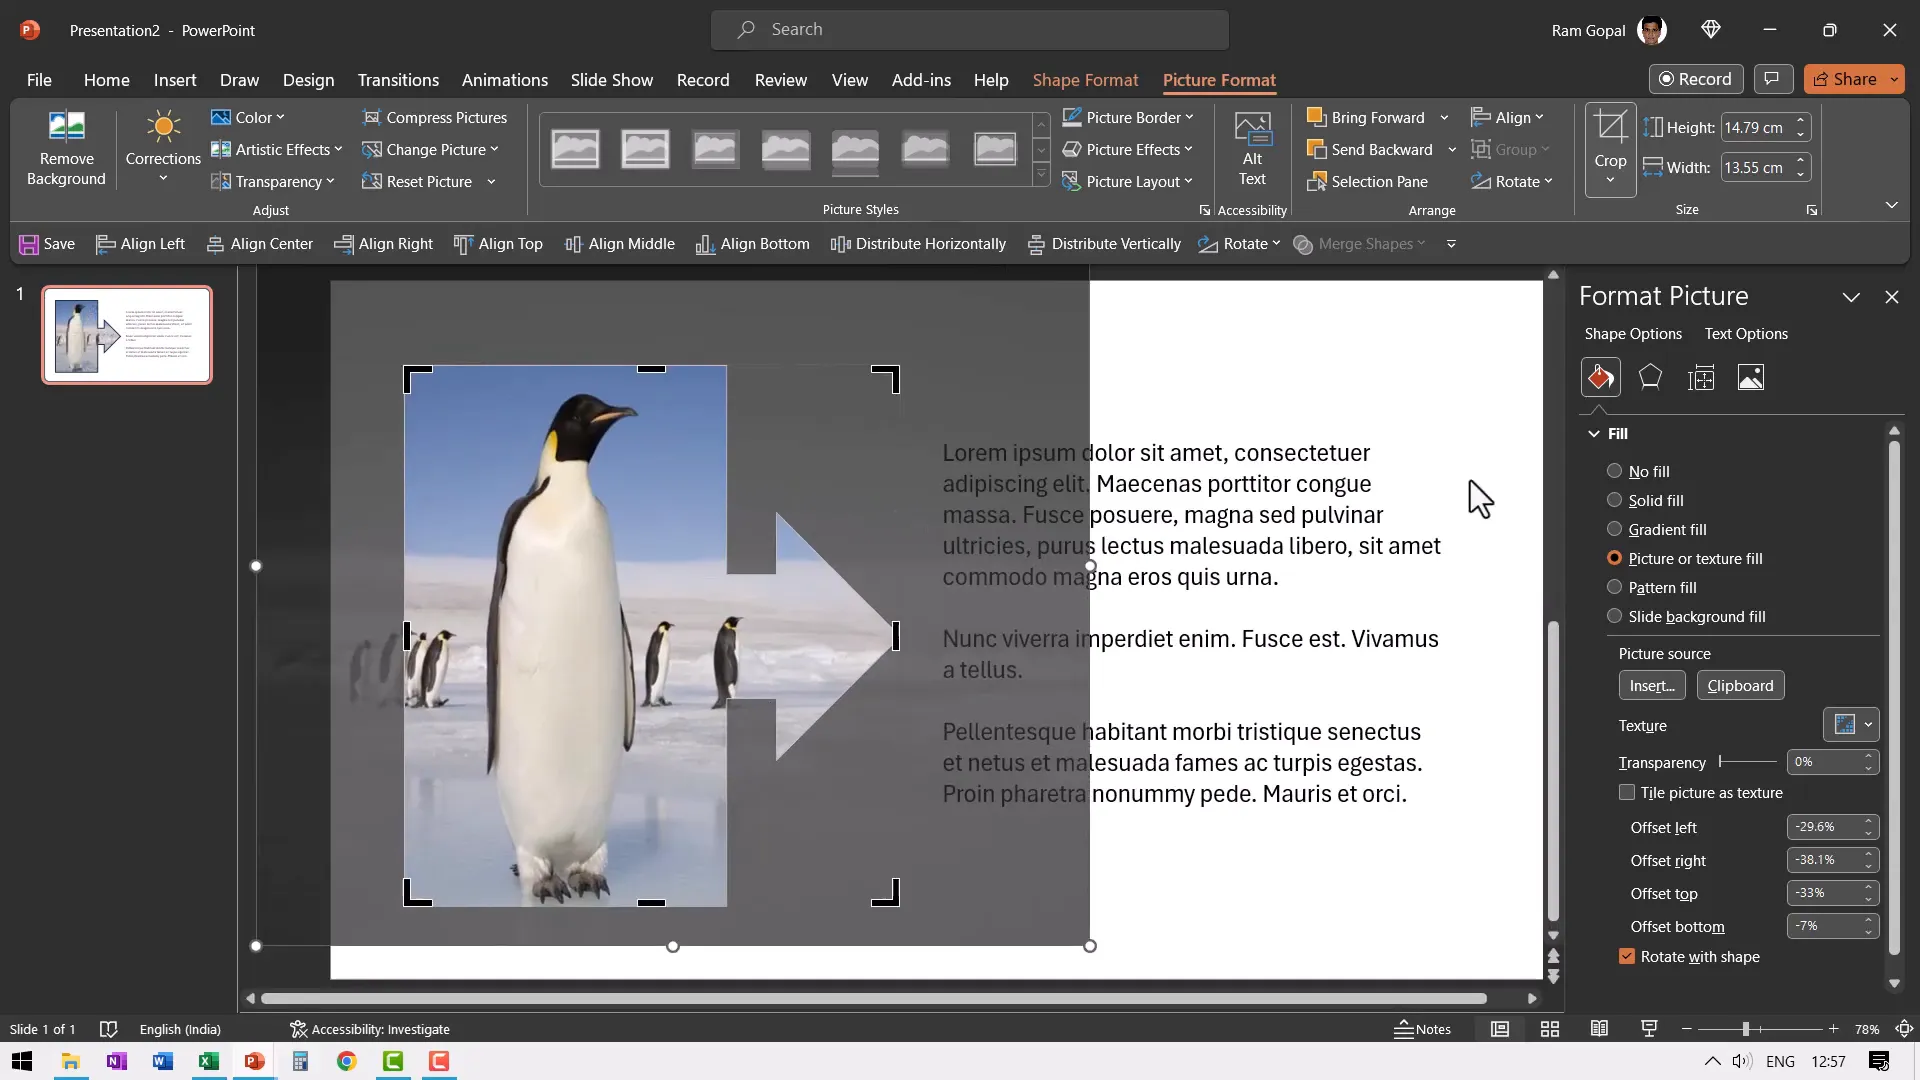
- Clicking and dragging the image inside the crop frame to reposition the focus area.
- Holding the Shift key while resizing to maintain the image’s aspect ratio.
This allows you to perfectly align the image inside the shape without distortion or unwanted cropping.
Fixing Image Distortion Due to Automatic Offsets
Another issue you might encounter is distortion caused by PowerPoint automatically applying offsets inside the fill. For example, when filling a shape with a cow image, the picture might appear squished or stretched.
To fix this distortion:
- Right-click the shape and select Format Shape.
- In the Fill section under Picture or Texture Fill, scroll down to find the offsets settings.
- Reset all offsets (Left, Right, Top, Bottom) to zero.
Once you zero out these offsets, the image fits perfectly inside the shape without distortion.
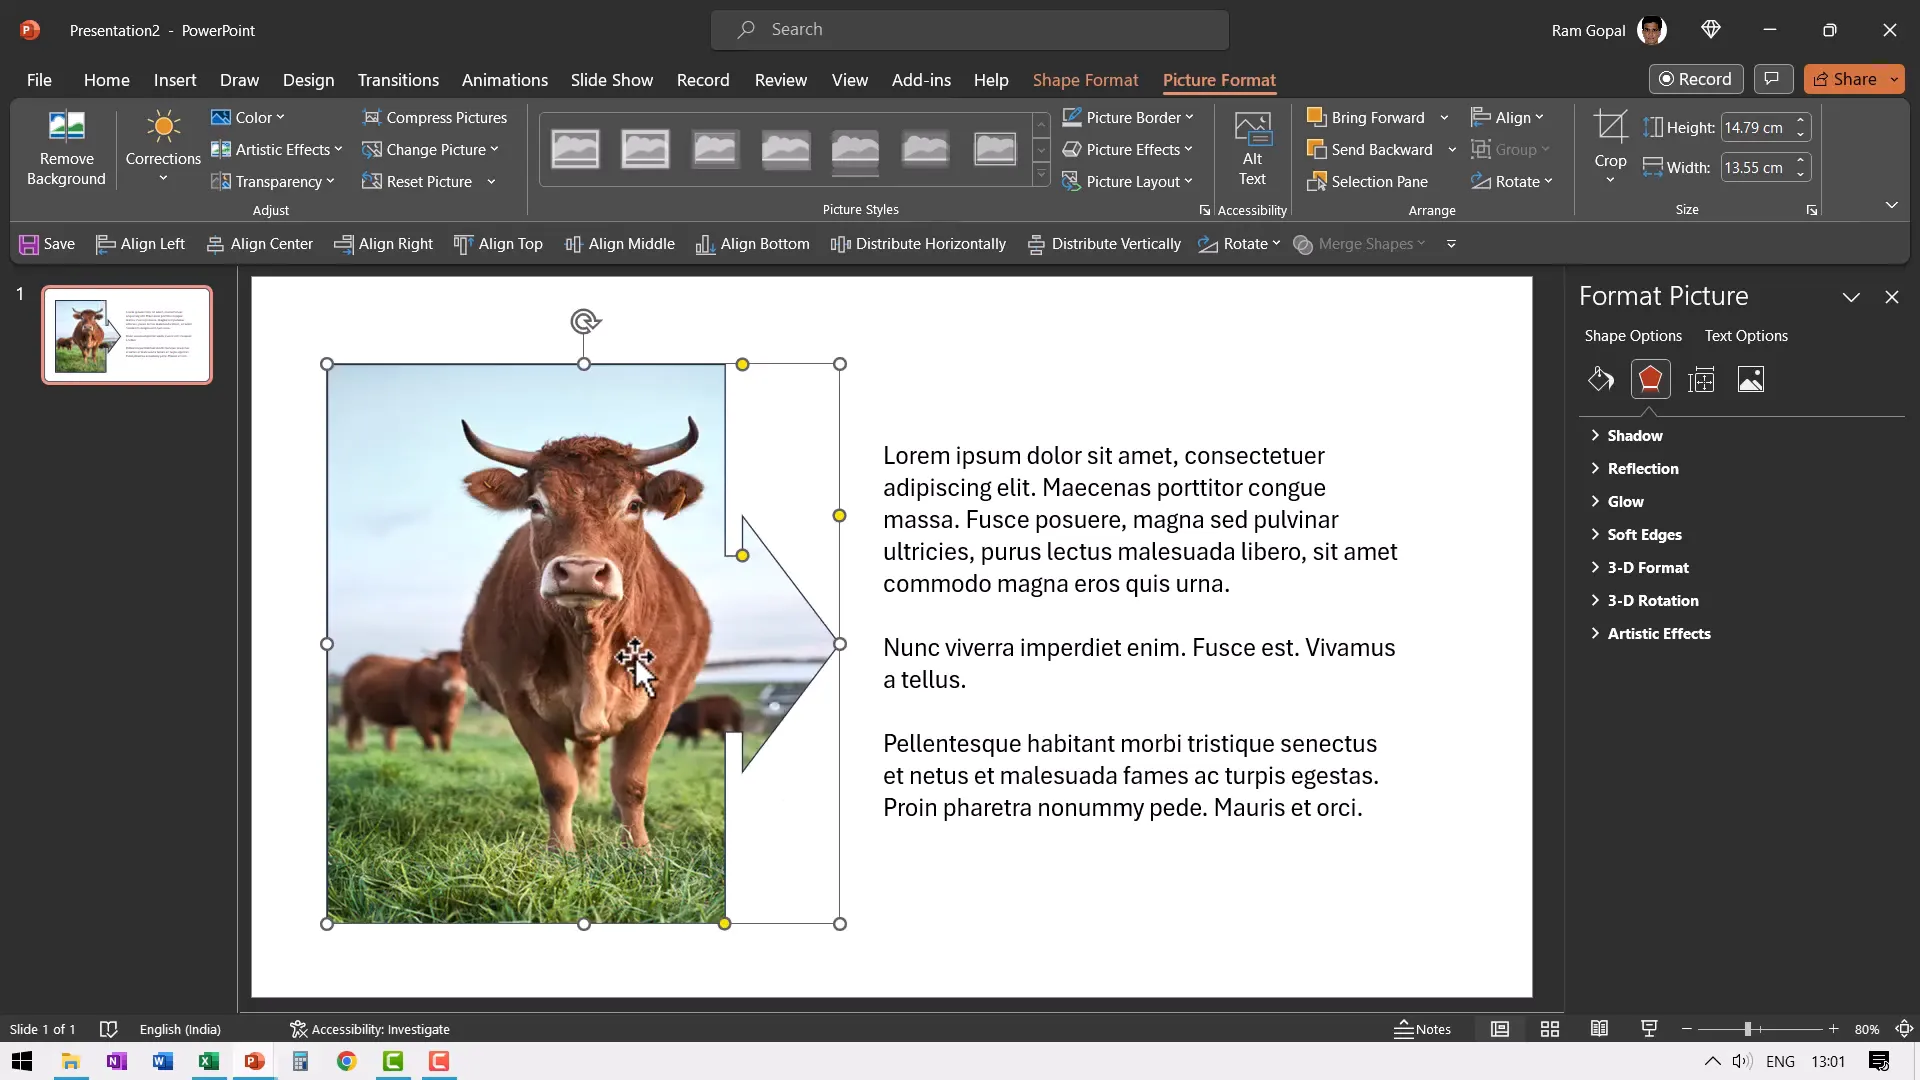
Now, feel free to adjust the shape’s size and position without worrying about the image inside getting distorted.
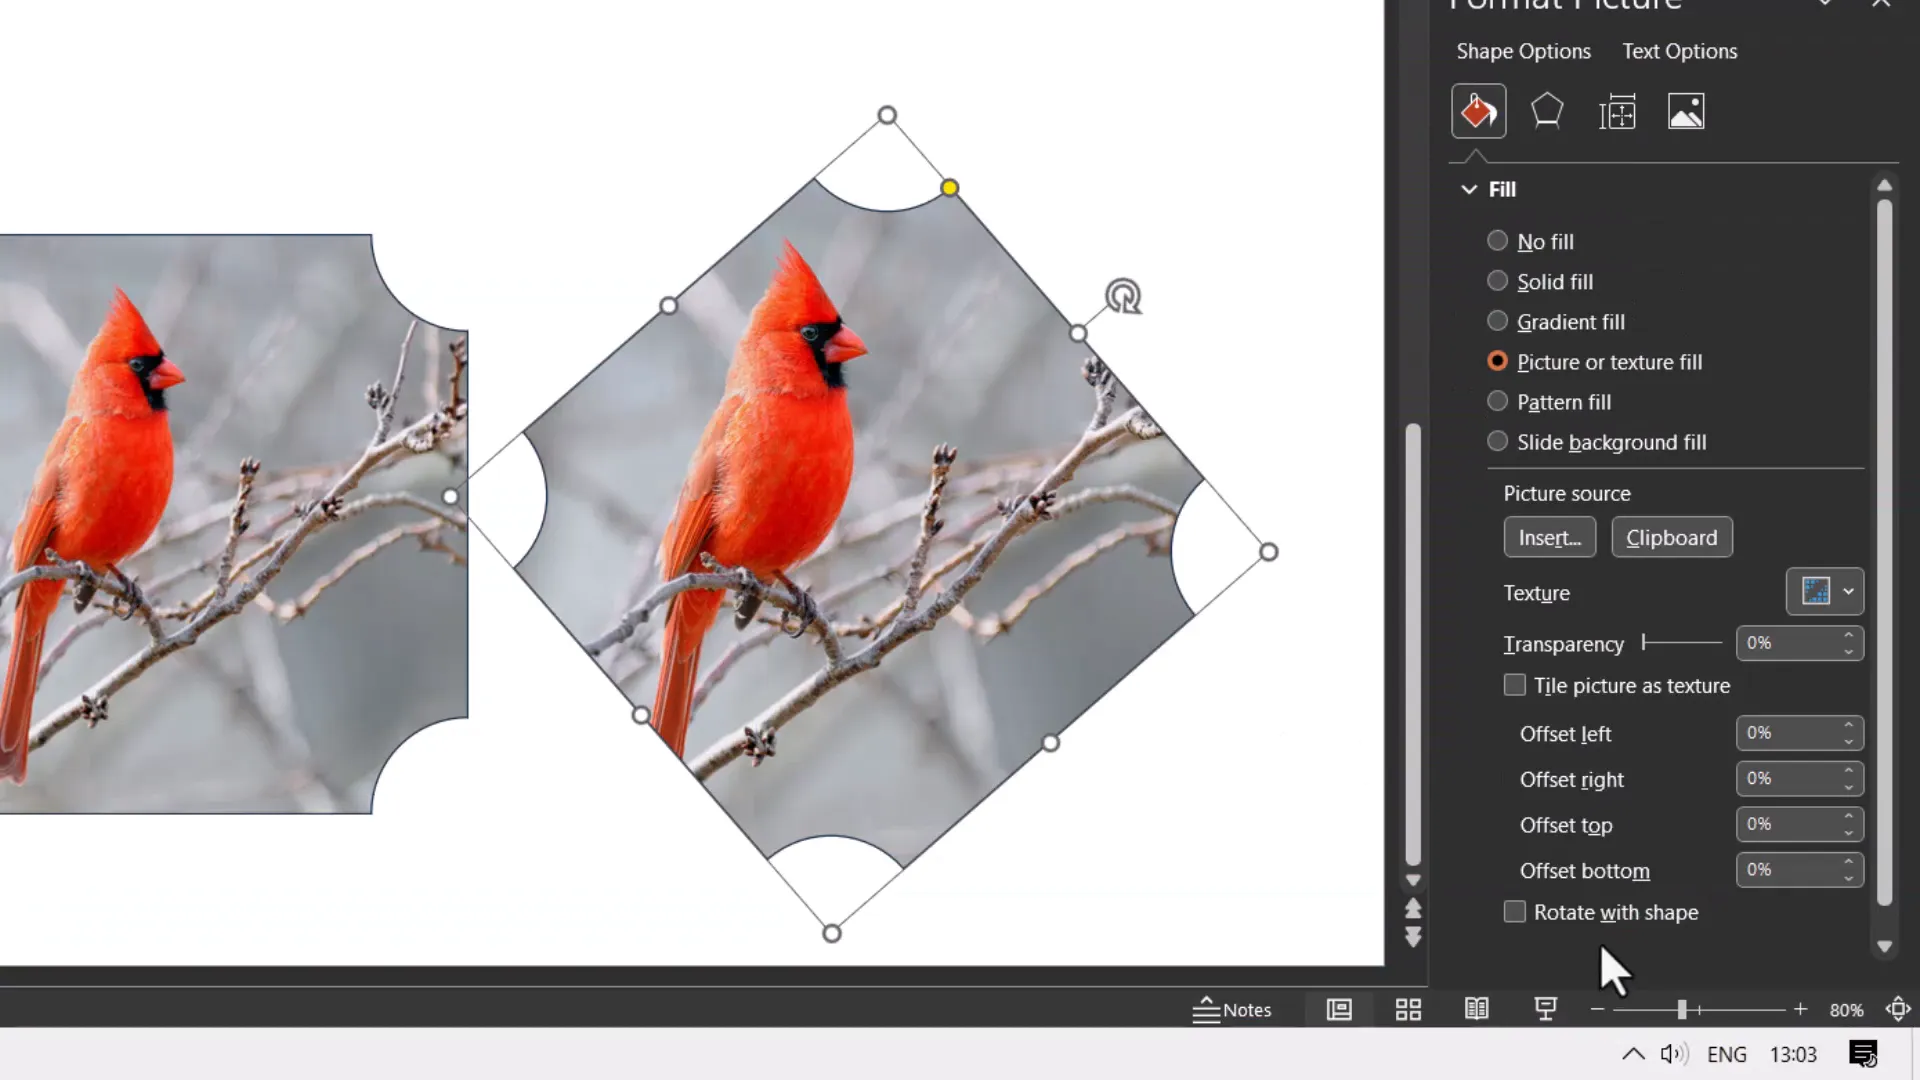
Preventing Image Rotation Inside Rotated Shapes
Finally, a subtle but important trick is how to handle image rotation inside shapes. When you rotate a shape, PowerPoint by default rotates the image inside the shape as well, which might not always be desirable.
For example, if you rotate a bird-filled shape by 45 degrees, the bird image inside also rotates:
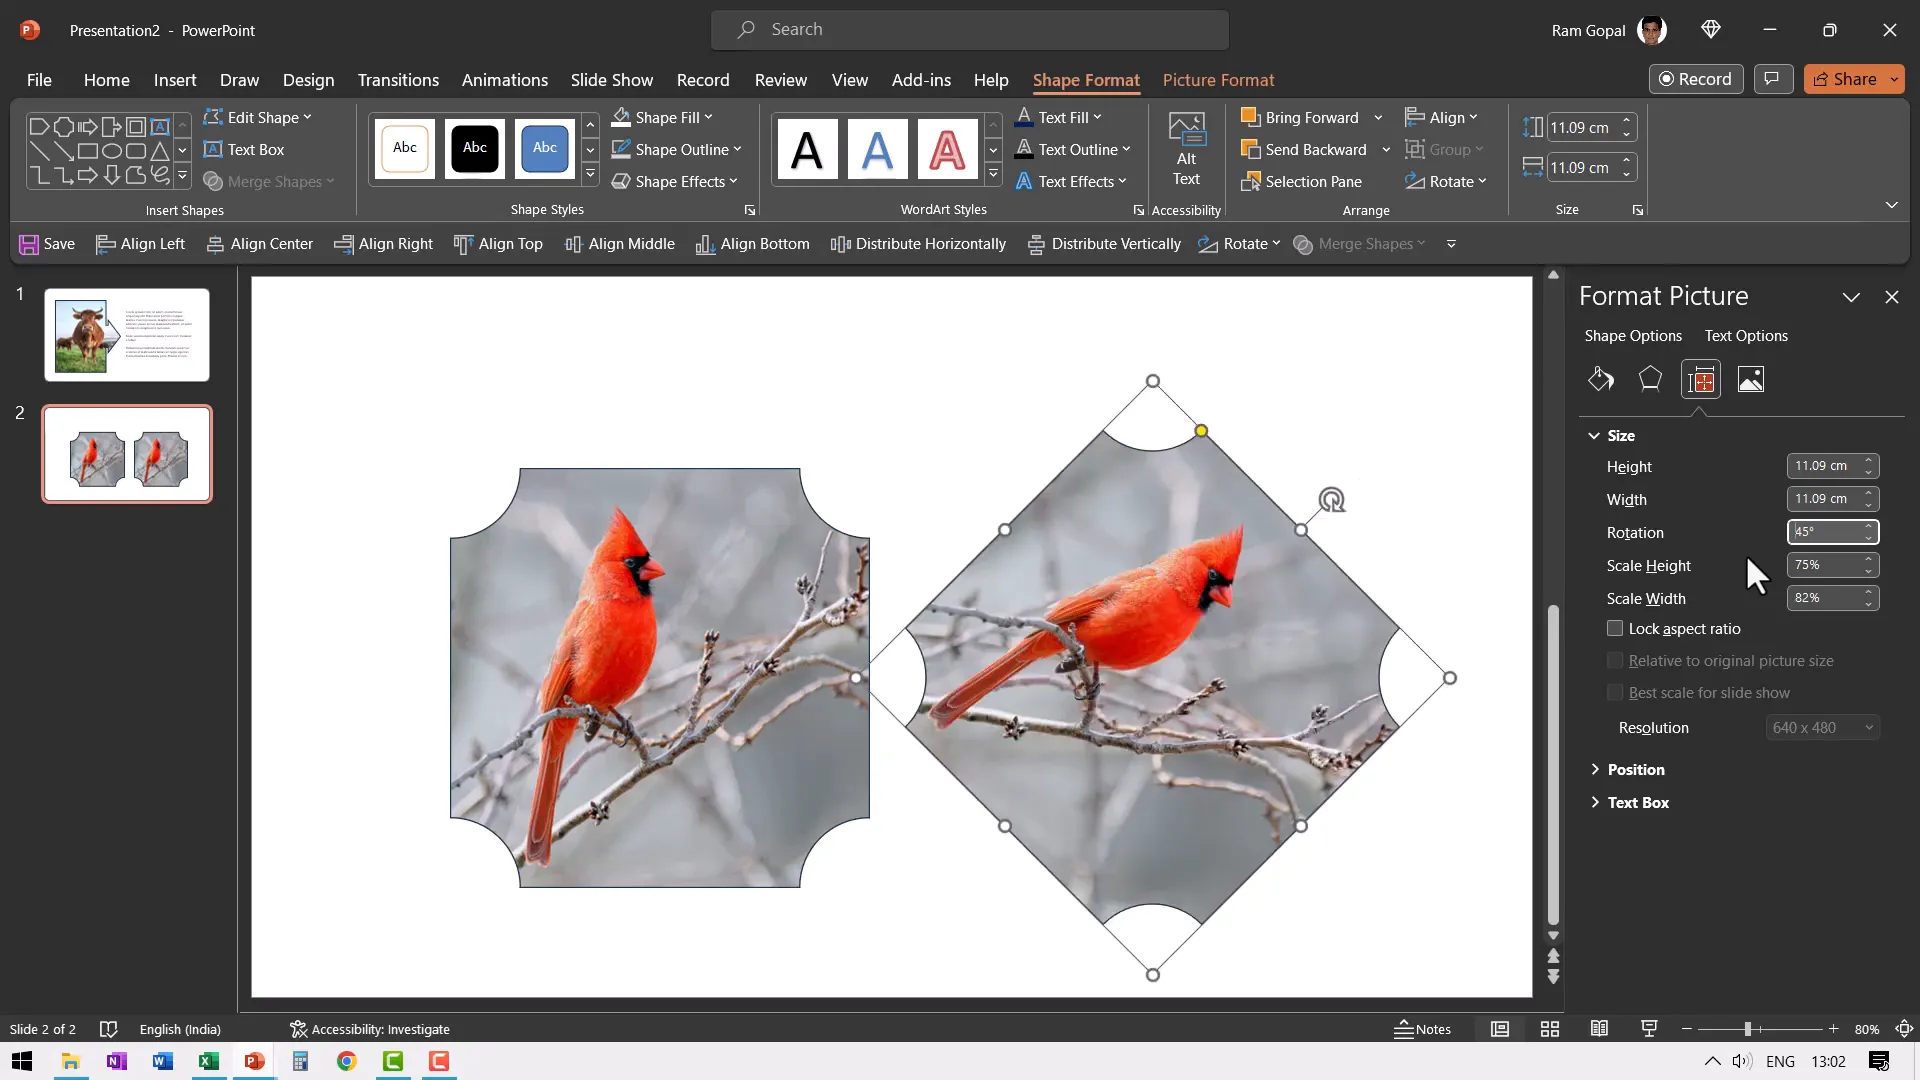
If you want the image inside the shape to maintain its original orientation while allowing the shape to rotate, do this:
- Right-click the shape and choose Format Shape.
- Under Fill, find the checkbox labeled Rotate with shape.
- Uncheck this box.
Now, when you rotate the shape, the image remains upright and visually consistent.

This small setting can save you a lot of frustration and help maintain a professional look in your presentations.
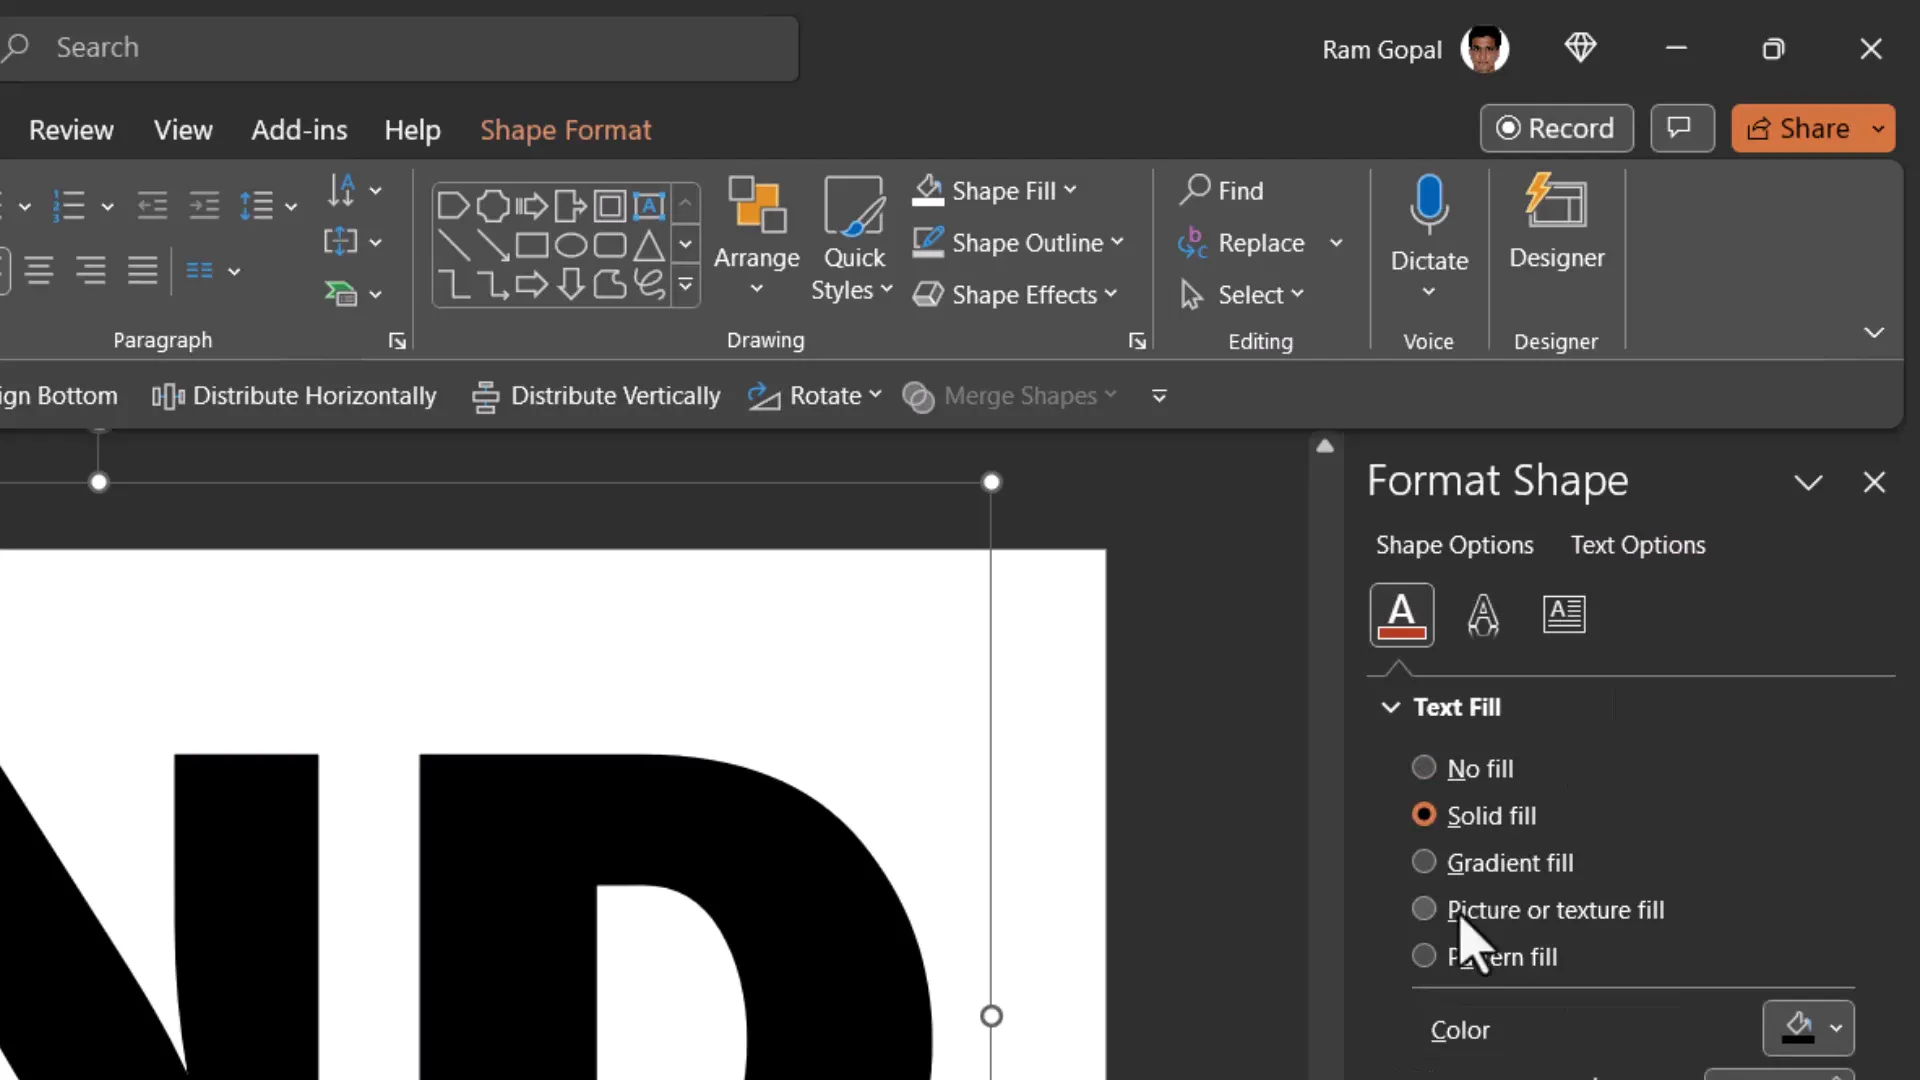
Trick #3: Fill Text with Images or Videos for Stunning Effects
Text is usually plain and simple in presentations, but imagine filling your text with images or even videos for a dramatic and eye-catching effect. PowerPoint allows you to do just that with a little know-how.
Filling Text with an Image
Let’s say you have a large text box on your slide, and you want to fill the text itself with an image instead of just filling the text box shape.
The common mistake is to right-click the text box, go to Format Shape, and fill the entire shape with an image. However, this fills the background of the text box, not the text characters themselves.
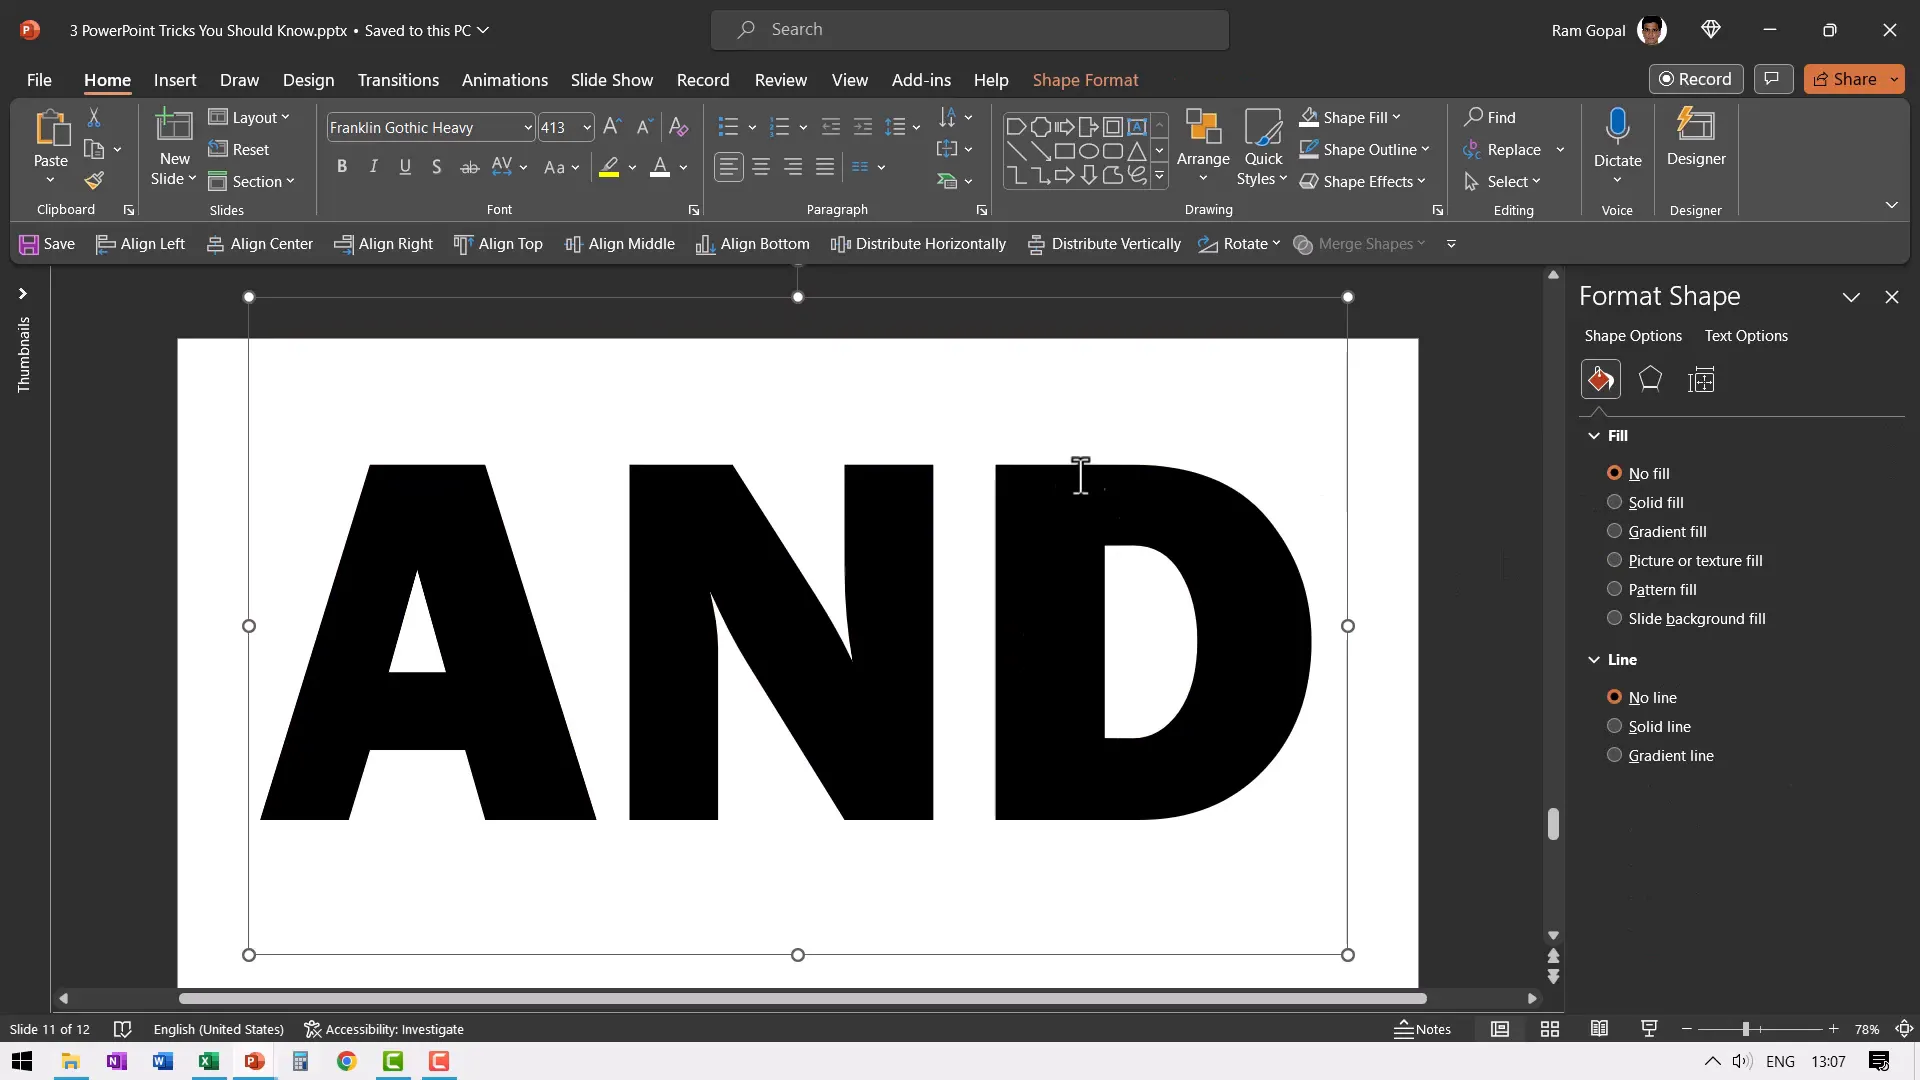
To fill the text characters with an image:
- Select the text box and set the fill of the shape to No Fill.
- Right-click the text box and choose Format Text Effects or go to the Text Options tab.
- Under Text Fill, select Picture or Texture Fill.
- Insert the image you want to fill the text with.
Now the image fills the text itself, creating a visually rich typography effect that is sure to impress.
Filling Text with a Video
What if you want to take this to the next level and fill text with a video? PowerPoint doesn’t allow inserting videos directly into text fills, but there’s a brilliant workaround.
Here’s how you can do it:
- Insert a video on the slide (for example, go to Insert → Video → Stock Videos and pick a suitable clip).
- Right-click the video and send it to the back (Send to Back).
- Select the text box (can be filled with any text or even a picture fill).
- Hold the Shift key and select the video as well, so both are selected.
- Go to the Merge Shapes tool and choose Intersect.
Now the video plays inside the shape of your text, creating a dynamic and engaging visual effect.

To make the video play automatically during your presentation, select the video, go to the Playback tab, and set it to play automatically.
Setting Up the Merge Shapes Tool for Easy Access
The Merge Shapes tool is essential for this video-in-text trick, but it’s not always visible in the ribbon by default. To add it to your Quick Access Toolbar (QAT) for quick use:
- Right-click the Quick Access Toolbar and select Customize Quick Access Toolbar.
- In the Choose commands from dropdown, select All Commands.
- Scroll down to find Merge Shapes.
- Select it and click Add to include it in your QAT.
- Click OK to save changes.

Having this tool readily available makes it easy to create complex shape interactions like intersecting text and video.
Conclusion: Elevate Your Presentations with These PowerPoint Tricks
Mastering these three PowerPoint tricks can dramatically improve the visual impact of your presentations:
- Photo Extension Trick: Seamlessly extend photos to cover your entire slide without cropping.
- Image Fill in Shapes: Properly fill shapes with images, fix distortions, and control rotation behavior.
- Image and Video Fill in Text: Create striking text filled with images or videos that captivate your audience.
These are just a few of the many creative techniques that can make your slides stand out. If you want to learn more about PowerPoint and boost your presentation skills, consider exploring comprehensive training courses and template bundles that provide ready-to-use designs and in-depth tutorials.
Remember, the key to great presentations is not just the content but also how you visually engage your audience. With these tricks in your toolkit, you’re well on your way to creating slides that impress bosses, colleagues, and clients alike.
Frequently Asked Questions (FAQs)
Q1: Will extending photos using the photo extension trick increase my PowerPoint file size significantly?
Yes, using multiple copies of the same photo can increase file size. However, you can combine the extended images into a single picture by selecting all, cutting, and pasting as a picture. This reduces the file size while maintaining the seamless look.
Q2: Can I use any image for filling shapes and text, or are there restrictions?
You can use most images, including stock photos, personal pictures, and textures. However, very complex images may not always extend or fill perfectly, so testing is recommended. For best results, use high-resolution images with clear focal points.
Q3: Does the video inside text trick work with all video formats?
Most common video formats supported by PowerPoint (like MP4) will work. Just ensure the video is inserted properly and the Merge Shapes tool is used correctly. Also, adding the tool to your Quick Access Toolbar makes the process smoother.
Q4: How do I fix image distortion when filling shapes?
Distortion often occurs due to automatic offsets applied by PowerPoint. You can fix this by resetting all offset values to zero in the Format Shape → Fill options.
Q5: Can I animate the images or videos inside shapes and text?
Yes, PowerPoint allows you to apply animations to shapes and videos, including those filled inside text or shapes. Just select the object and use the Animations tab to add entrance, exit, or emphasis effects.
Q6: What if I rotate a shape with an image fill and want the image to rotate with it?
By default, images rotate with the shape. If you want to keep the image orientation fixed when rotating the shape, uncheck the Rotate with shape option in Format Shape → Fill. Check it to enable rotation.
Q7: Are these tricks compatible with all versions of PowerPoint?
These tricks are best supported in PowerPoint 2016 and later, including Office 365 versions. Some older versions might have limited functionality, especially for the Merge Shapes tool and video embedding.
Q8: Where can I find more creative PowerPoint ideas and templates?
I recommend exploring comprehensive template bundles and foundation courses that teach PowerPoint from basics to advanced techniques. These resources save time and help you create professional presentations effortlessly.
Check out the full video: 3 PowerPoint Tricks Every Presenter MUST Know


