
PowerPoint is one of the most powerful tools for creating impactful presentations, but mastering it goes beyond simply adding slides and text. To truly stand out, you need to know the right tips and tricks that streamline your workflow, enhance your design, and make your presentations memorable. Whether you’re a beginner or an experienced user, learning these PowerPoint shortcuts and techniques will boost your productivity and creativity.
In this comprehensive guide, we’ll explore the top 20 PowerPoint tips and tricks that will take your presentations to the next level. From creating stunning glassmorphic effects to advanced animation workflows, you’ll discover how to maximize PowerPoint’s potential. Plus, we’ll dive deep into useful PowerPoint shortcuts that save you time and effort.
Let’s dive in and unlock the full potential of PowerPoint together!
Table of Contents
- 1. Glassmorphic Effect: Adding Frosty Transparency to Shapes
- 2. Insert Photos and Videos into Any Custom Shape
- 3. Use Slide Grids for Perfect Alignment
- 4. Create Stunning Duotone Effects for Photos
- 5. Master Text and Line Spacing for Better Readability
- 6. Convert Text into Vector Shapes for Creative Designs
- 7. Spice Up Slides with Colorful Shadows
- 8. Harness the Power of Slide Master for Global Changes
- 9. Add Gradient Fill to Text for Extra Pop
- 10. Design Modern Gradient-Filled Charts
- 11. Animate Elements Globally Using Slide Master
- 12. Extend Animation Duration Beyond Limits
- 13. Customize Rotation Centers for Precise Animations
- 14. Combine GIFs and PowerPoint Animations
- 15. Loop Complex Animations with Bookmark Triggers
- 16. Perfect Your Morph Transitions with Naming Conventions
- 17. Animate Photos by Combining Morph and Crop
- 18. Create Auto-Updating Donut Charts
- 19. Divide Pie or Donut Charts into Equal Parts
- 20. Essential PowerPoint Shortcuts to Boost Your Workflow
- Frequently Asked Questions
1. Glassmorphic Effect: Adding Frosty Transparency to Shapes
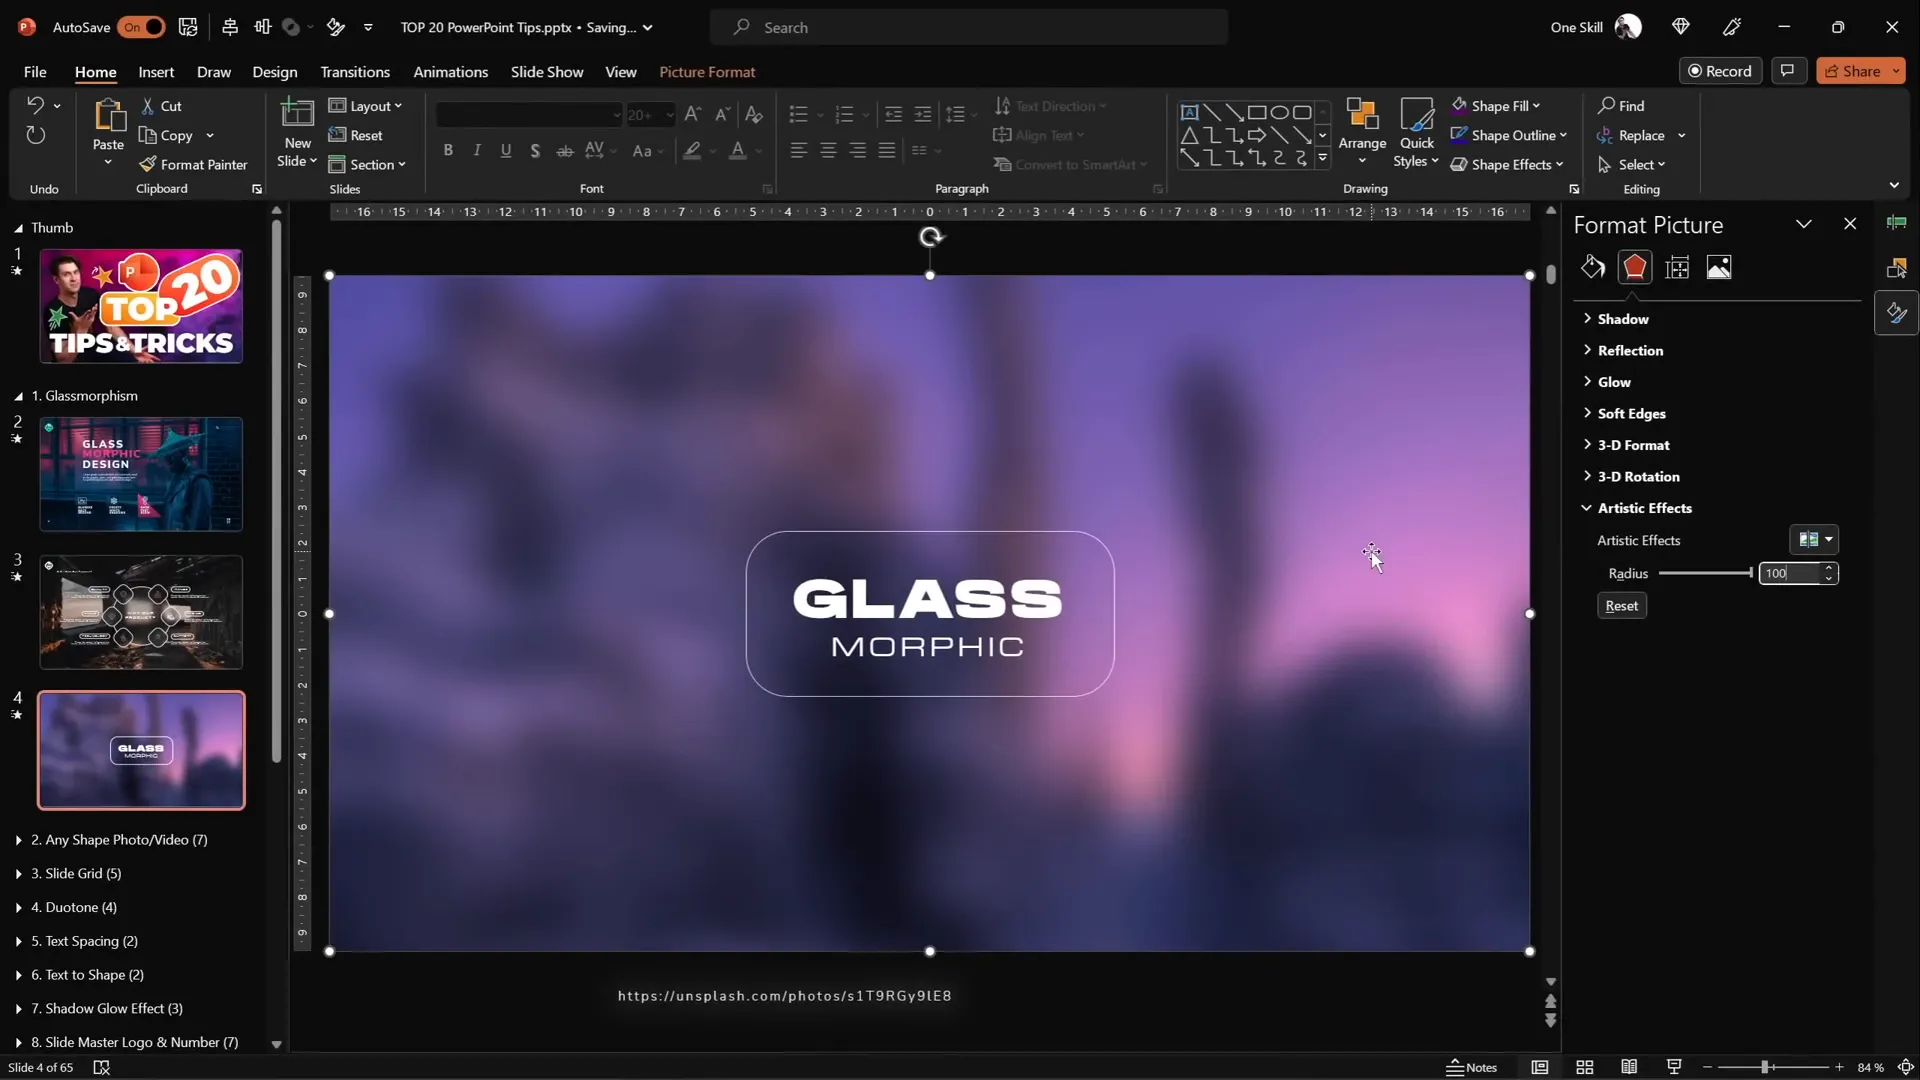
The glassmorphic effect is a modern design trend that mimics frosted glass with transparency and blur, creating a sleek and stylish look. You can easily create this effect in PowerPoint for any shape on your slide.
Here’s how to do it:
- Start with a background photo and place a shape (like a rounded rectangle) where you want the effect.
- Select the photo and go to Format Picture > Artistic Effects, then choose the Blur effect.
- Set the blur radius to the maximum (100) to heavily blur the photo.
- Right-click on the blurred photo and Copy it.
- Reset the original photo to its unblurred state.
- Change the slide background fill from solid color to picture fill, then paste the copied blurred photo from the clipboard.
- Position the blurred photo precisely behind your shape.
- Select your shape and set its fill to Slide Background Fill. The shape will now take on the blurred background, creating the glassmorphic effect.
- For more realism, add a white inside shadow to your shape to mimic frosty edges.
This effect works beautifully for overlay panels, text boxes, or any UI elements on your slides.
2. Insert Photos and Videos into Any Custom Shape
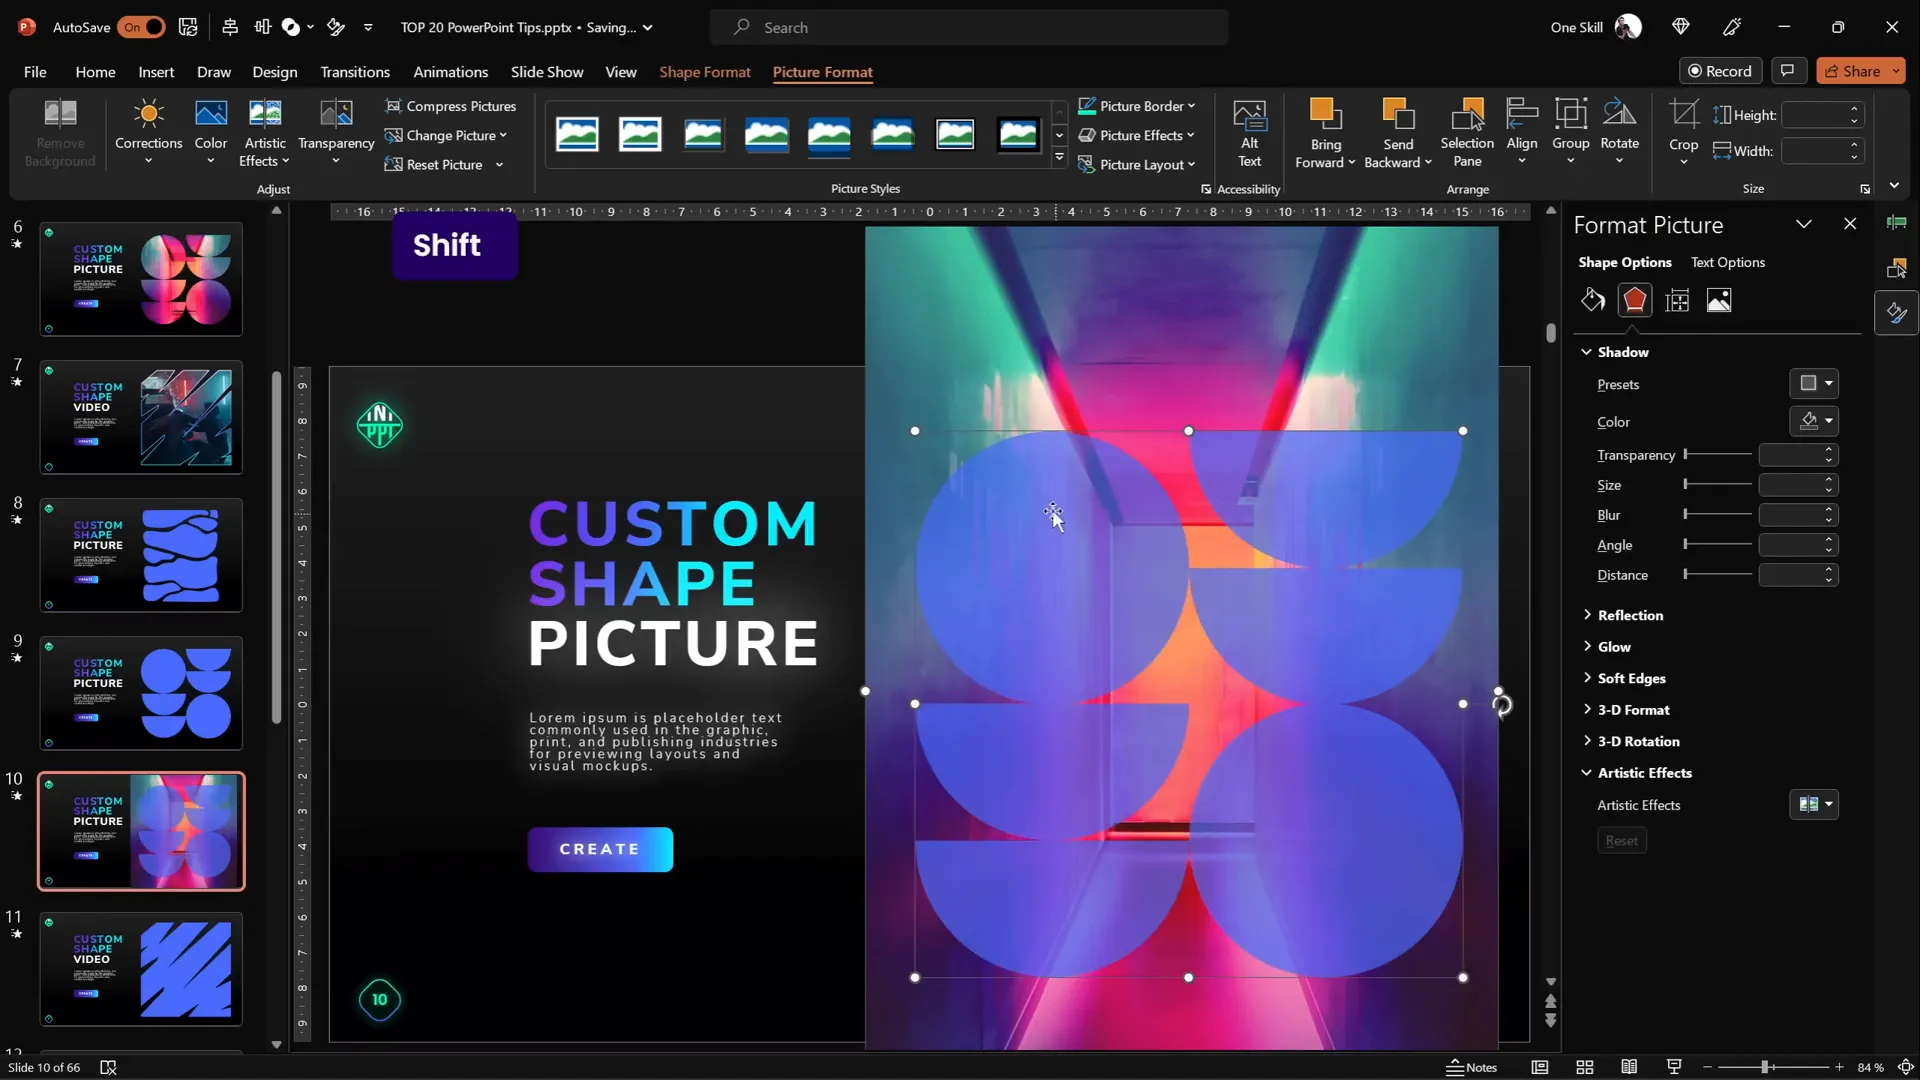
While adding images into simple shapes like circles or rectangles is straightforward, PowerPoint allows you to place photos and videos into any custom vector shape you create.
Steps to insert an image or video into a custom shape:
- Create your custom shape using PowerPoint’s Curve or Freeform tools. For example, draw a blob shape by clicking points and closing the path.
- For semicircles or complex shapes, use Insert > Shapes and then combine shapes using Merge Shapes > Subtract or Union to get your desired form.
- Insert your photo or video and resize it to cover the custom shape fully.
- Send the photo/video to the back (Right-click > Send to Back).
- Select the photo/video, then hold Shift and select the custom shape.
- Go to Shape Format > Merge Shapes > Intersect. This clips the image or video to the custom shape.
- Use the crop handles to adjust how the image fits inside the shape.
For template creators, consider making custom picture placeholders in the slide master with this technique for easy image replacement by users.
3. Use Slide Grids for Perfect Alignment
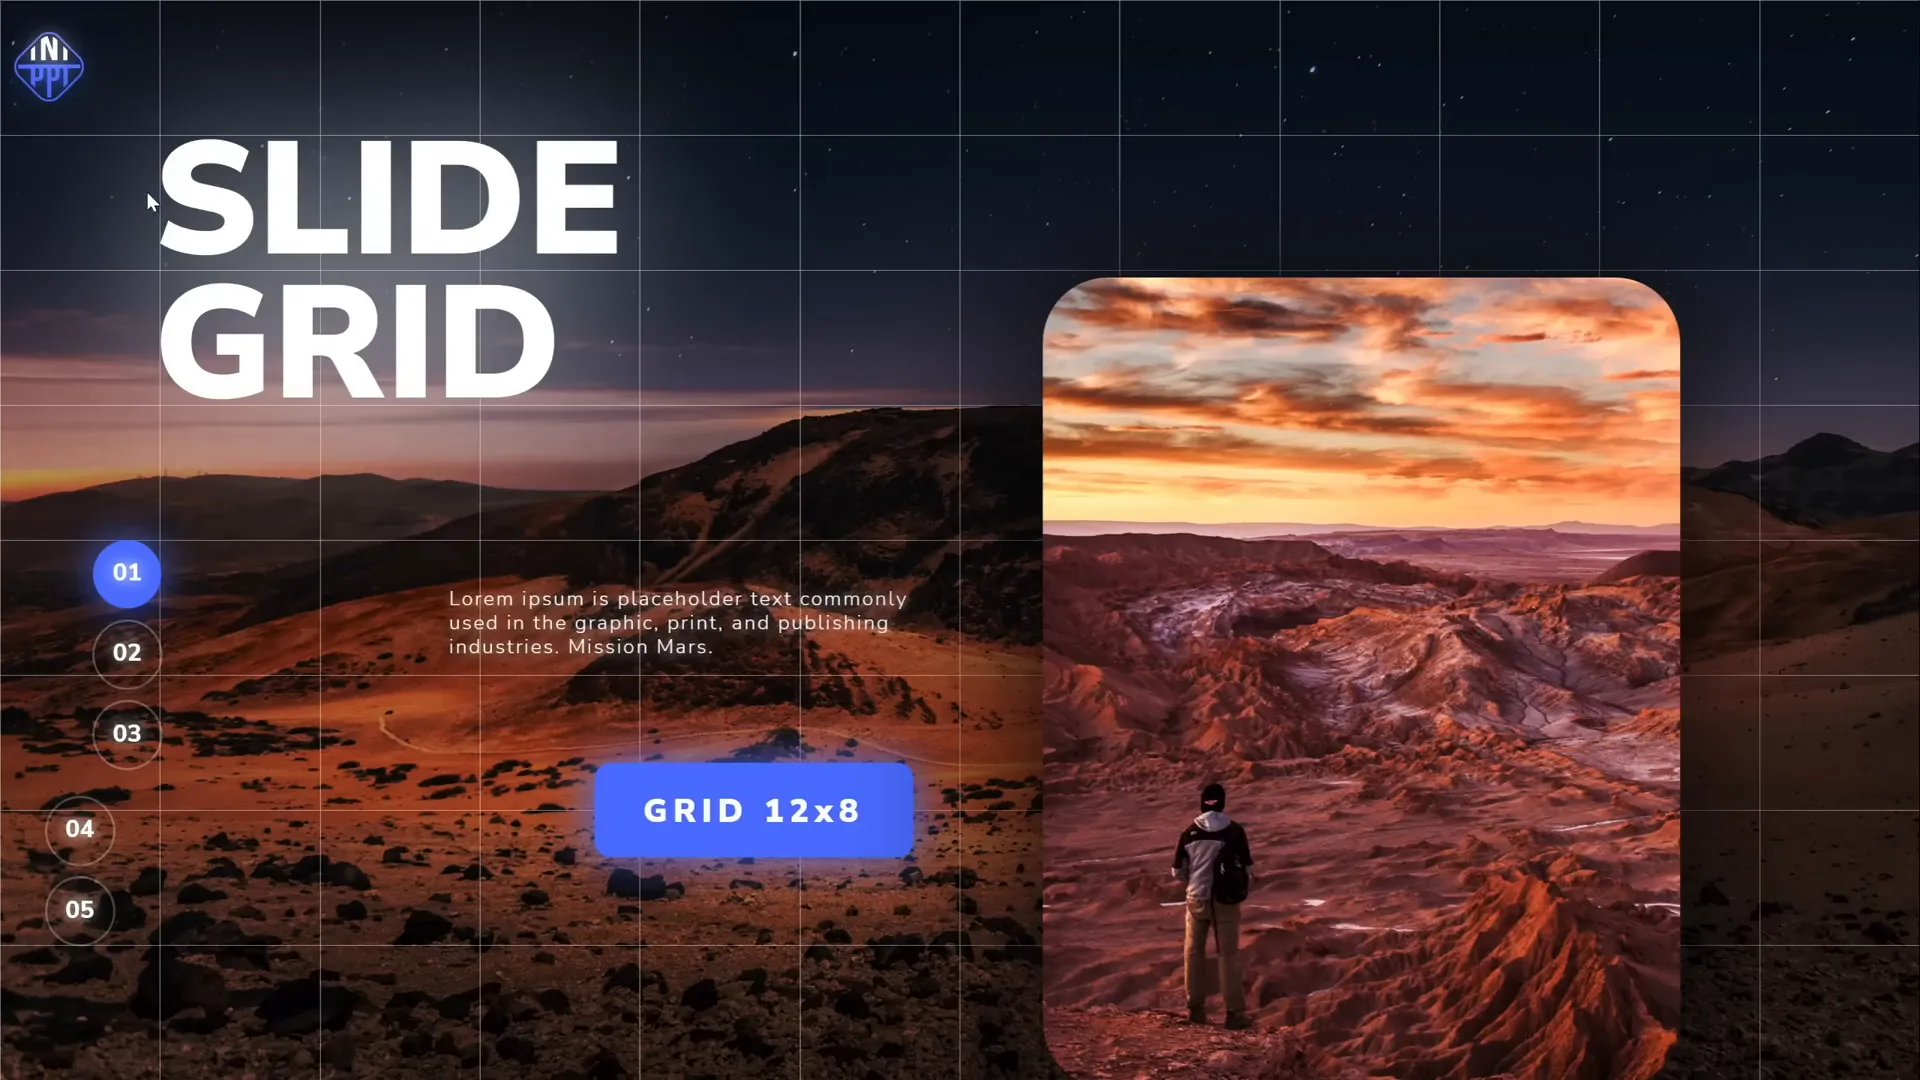
Alignment is crucial for professional-looking slides. Slide grids help you position elements consistently and avoid the “floating” look.
Difference between unaligned and aligned slides is clear when you toggle grids:
- Use Insert > Shapes to create columns and rows as rectangles covering the slide.
- Group all columns, then stretch them to cover the slide evenly.
- Repeat for rows, then group columns and rows into a single grid group.
- Adjust grid line transparency and remove fill so slide content remains visible.
- Toggle grid visibility by hiding/showing the group from the selection pane.
Typical grids include 12×8 or 18×12 layouts, but you can customize based on your design needs.
4. Create Stunning Duotone Effects for Photos
Duotone images use two colors to recolor photos, creating dramatic and stylized visuals perfect for presentations.
PowerPoint doesn’t have built-in duotone filters yet, but you can use free online tools like duotone.shapefactory.co to create them easily.
Here’s how:
- Pick two colors: one bright and one dark for contrast.
- Upload your photo to the duotone website and apply the colors.
- Download the duotone image and insert it into PowerPoint.
Bonus Tip: Use the free Chrome extension Scribe to create step-by-step guides for your colleagues to replicate this process. It records your actions and generates a shareable tutorial in under a minute.
5. Master Text and Line Spacing for Better Readability
Proper text and line spacing dramatically affect slide readability and aesthetics.
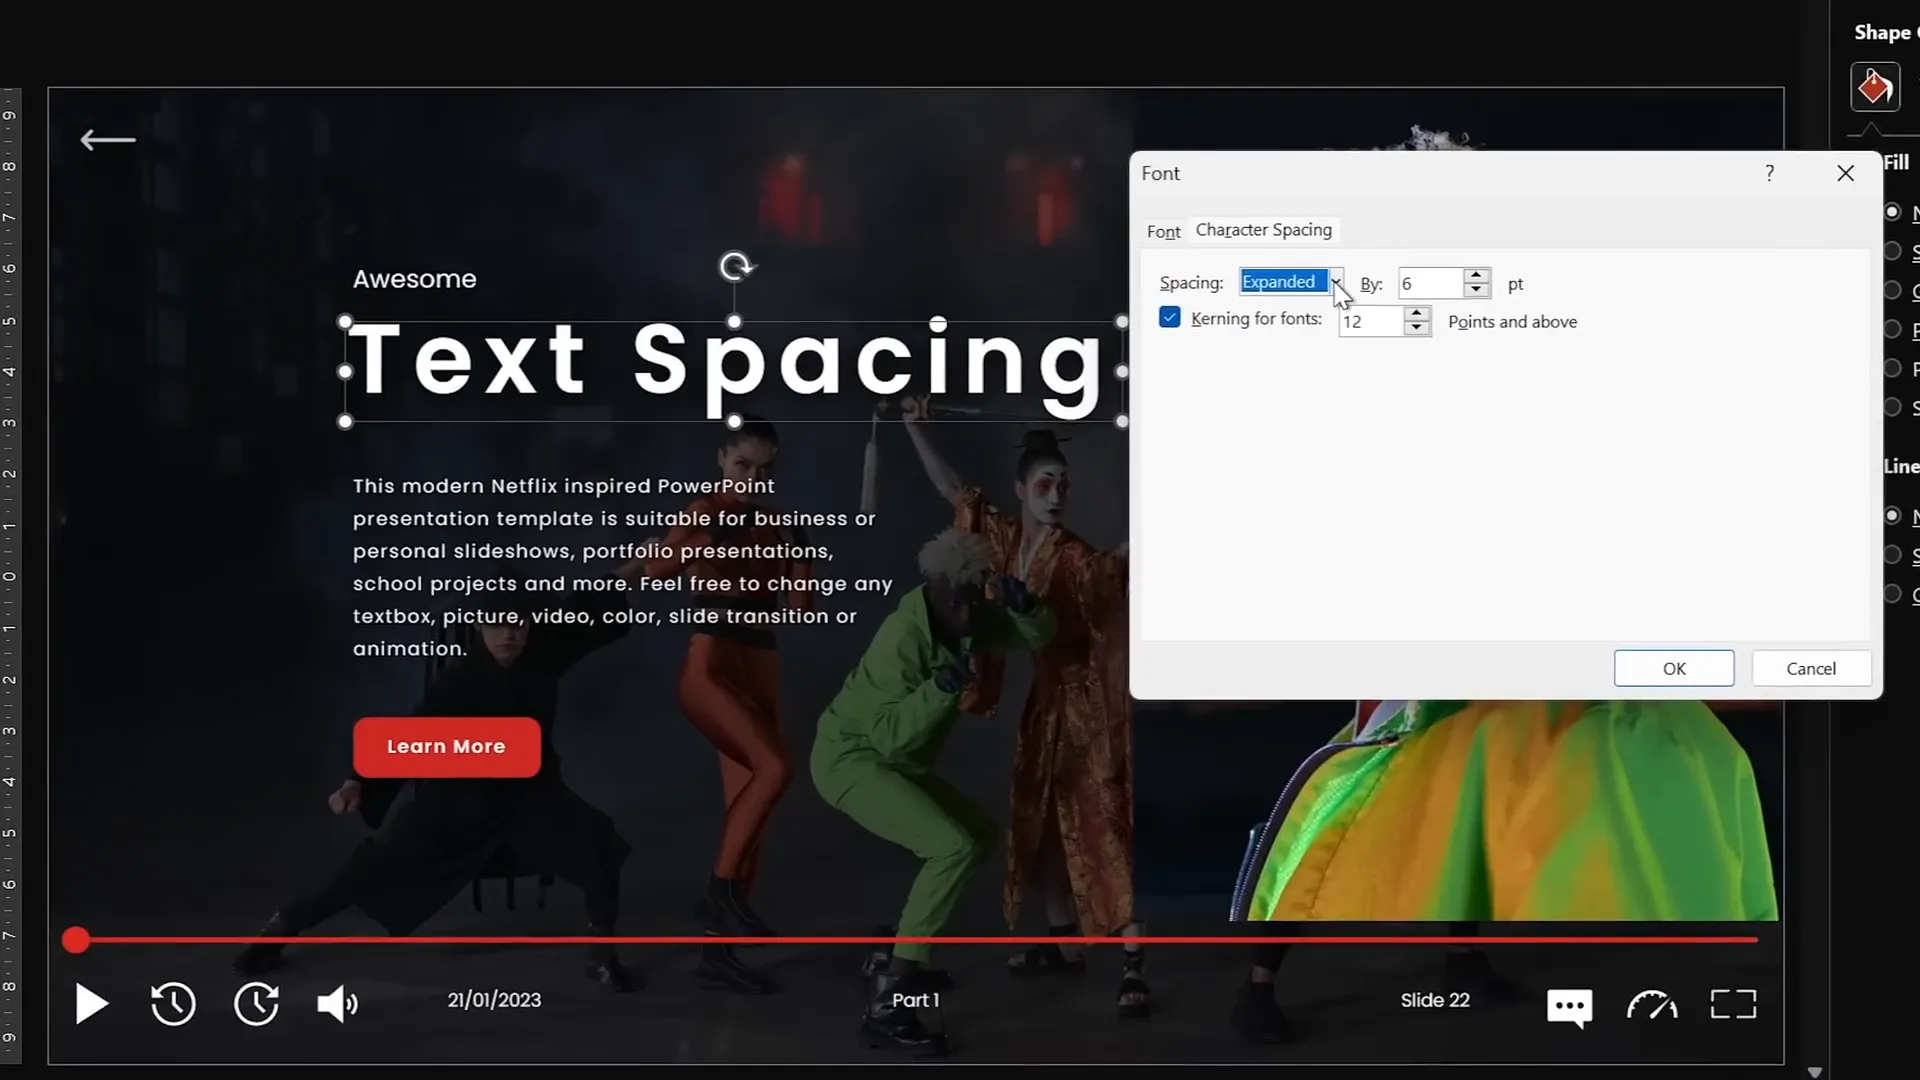
Text Spacing
- Access spacing presets via the character spacing dropdown.
- If presets are insufficient, use More Spacing to expand letter spacing by precise points (e.g., 15pt for very loose spacing).
- Subtle spacing tweaks (like 1pt expanded) can improve readability without overdoing it.
Line Spacing
- Adjust using paragraph settings.
- Options include single, 1.5 lines, or multiple with custom values.
- For tighter spacing, set multiple line spacing to values below 1 (e.g., 0.8) for a compact but readable look.
These fine-tuned controls help you create polished text layouts that fit your slide design perfectly.
6. Convert Text into Vector Shapes for Creative Designs
Converting text into vector shapes unlocks powerful design possibilities like cutting text with shapes or creating unique effects.
How to convert and cut text:
- Type your text using any font (e.g., the beautiful Orbit font).
- Create a shape with the freeform tool to use as a cutter.
- Select the text box, hold Shift, then select the shape.
- Use Merge Shapes > Subtract to cut the shape out of the text, converting the text to a vector shape.
If you want to convert text to a vector shape without cutting:
- Duplicate the text box and align both perfectly.
- Select both and use Merge Shapes > Union to convert the text box to a vector shape.
You can then create split text effects by using intersect and subtract commands on duplicates of the text and shapes.

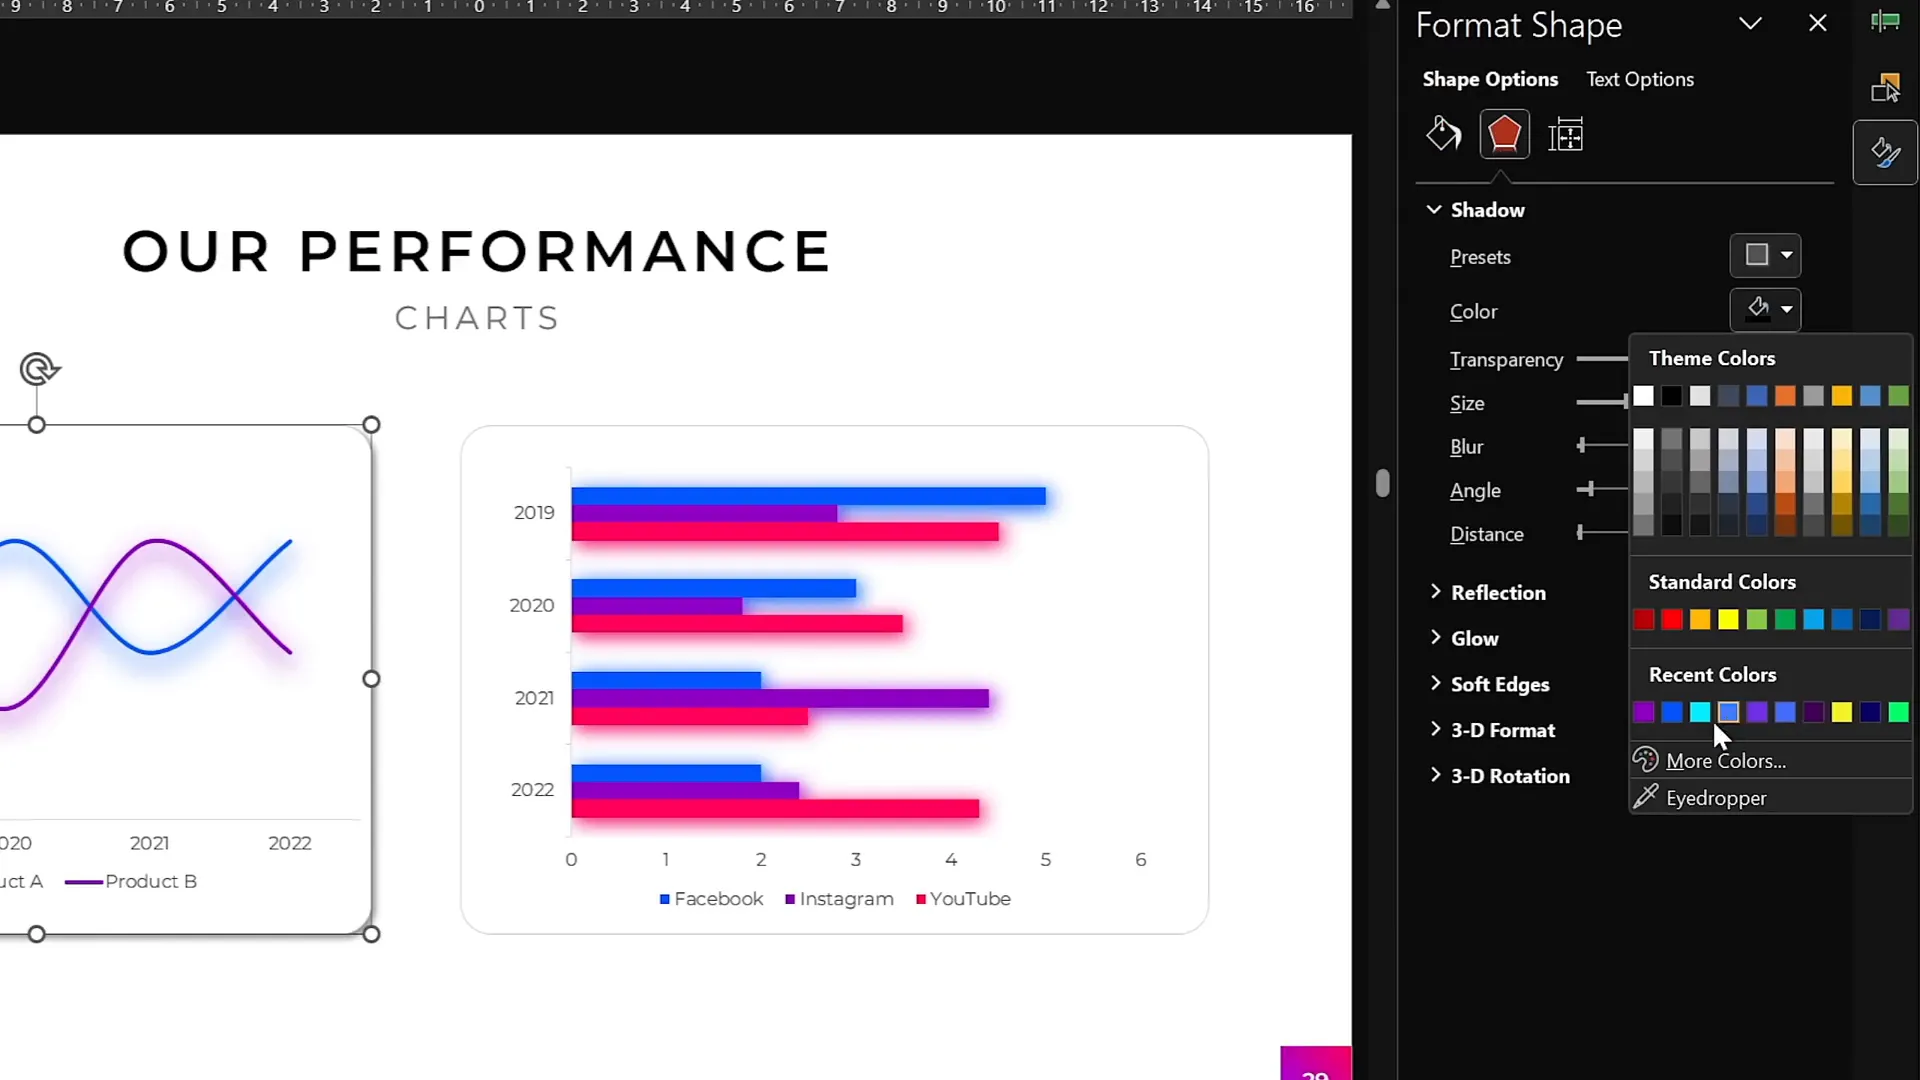
7. Spice Up Slides with Colorful Shadows
By default, PowerPoint applies black shadows to objects. But changing shadow colors can add subtle highlights and dimension to your slide elements.
Steps to add colorful shadows:
- Select the shape or object you want to highlight.
- Go to Format Shape > Shadow options.
- Choose an outer shadow preset, then change the shadow color to something soft and colorful.
- Increase blur (e.g., 75 points) for a soft, glowing effect.
- Adjust shadow distance and transparency for the perfect look.
This technique is especially effective on charts and UI elements to make them pop.
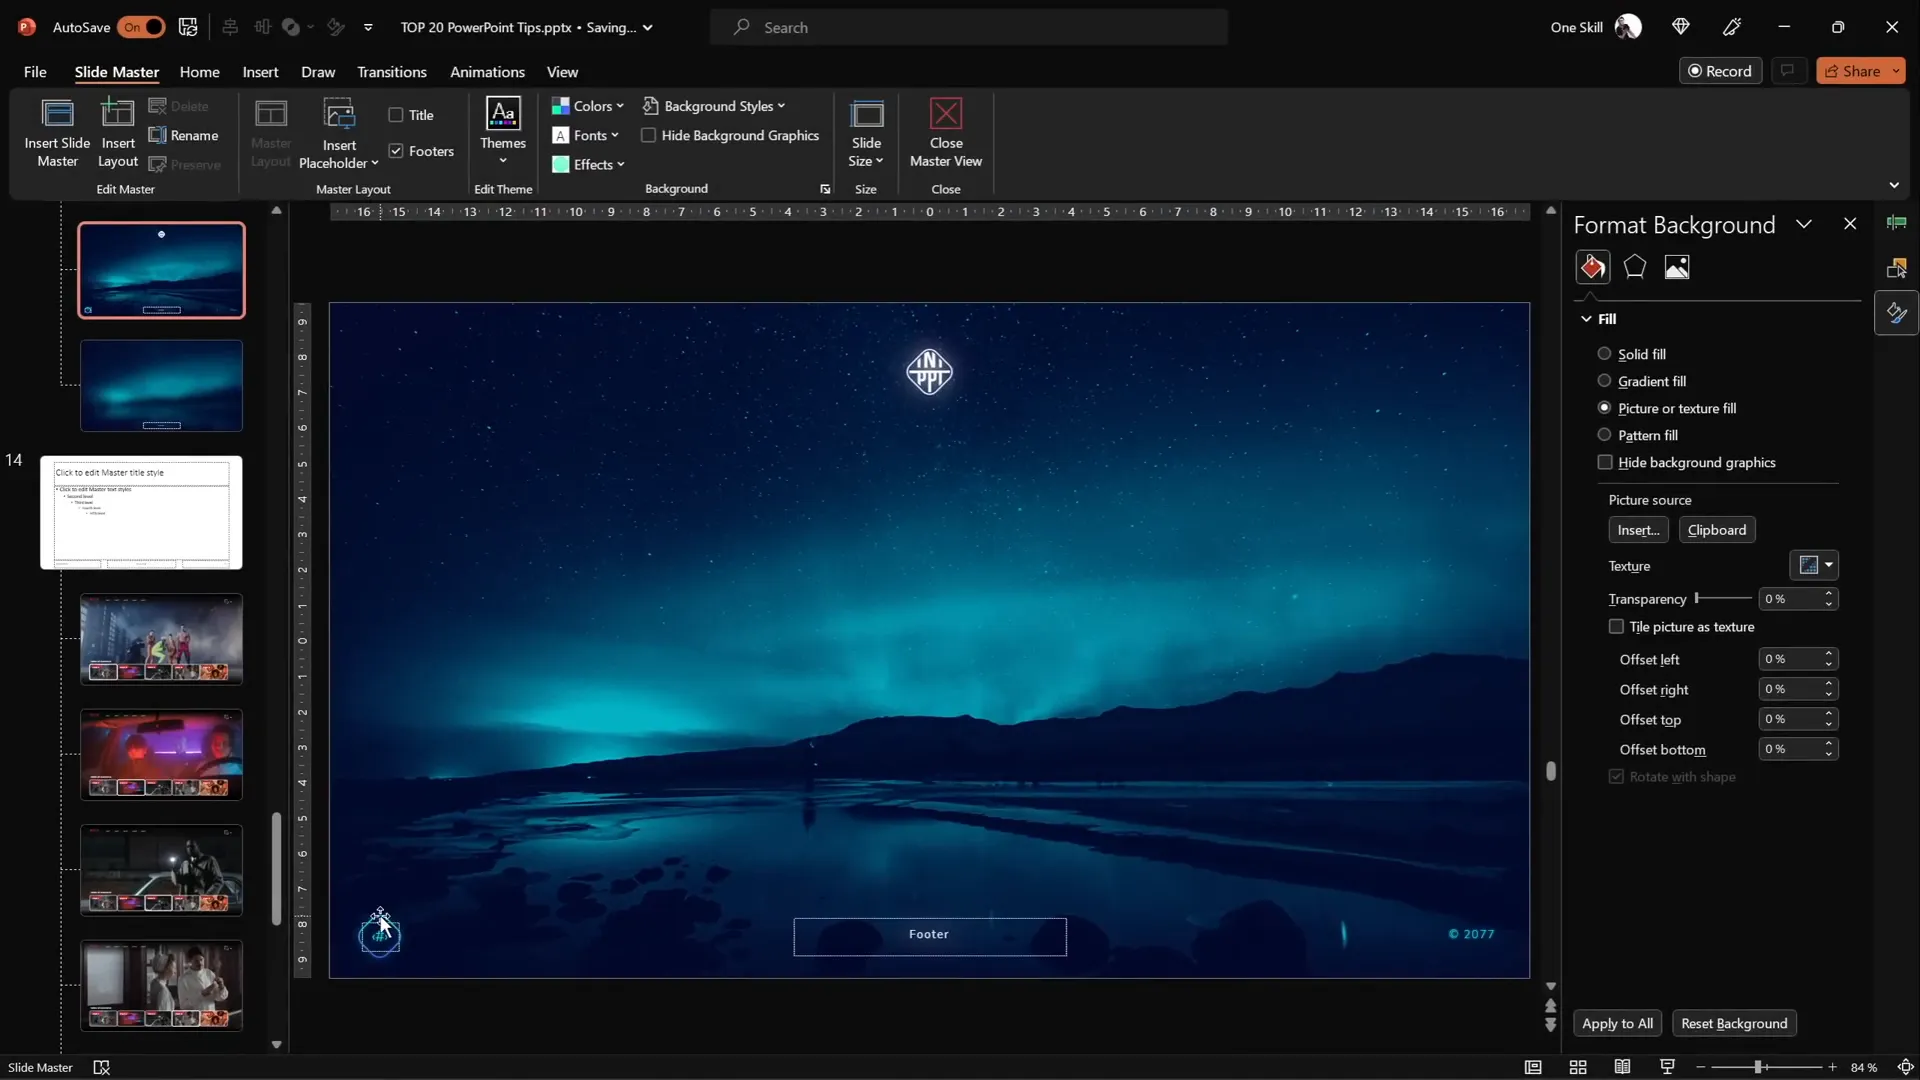
8. Harness the Power of Slide Master for Global Changes
The Slide Master is a powerhouse for making global changes across your entire presentation, saving you time and ensuring consistency.
Key uses of Slide Master include:
- Insert logos or watermarks that appear on all slides.
- Customize slide numbers’ appearance and position.
- Change background styles or placeholders globally.
To access Slide Master:
- Go to View > Slide Master.
- Make your changes (e.g., insert a logo, reposition slide numbers).
- Close Slide Master to apply changes to all slides.
You can even change slide number shapes, for example, from a rounded rectangle to a circle, and reposition them as needed.
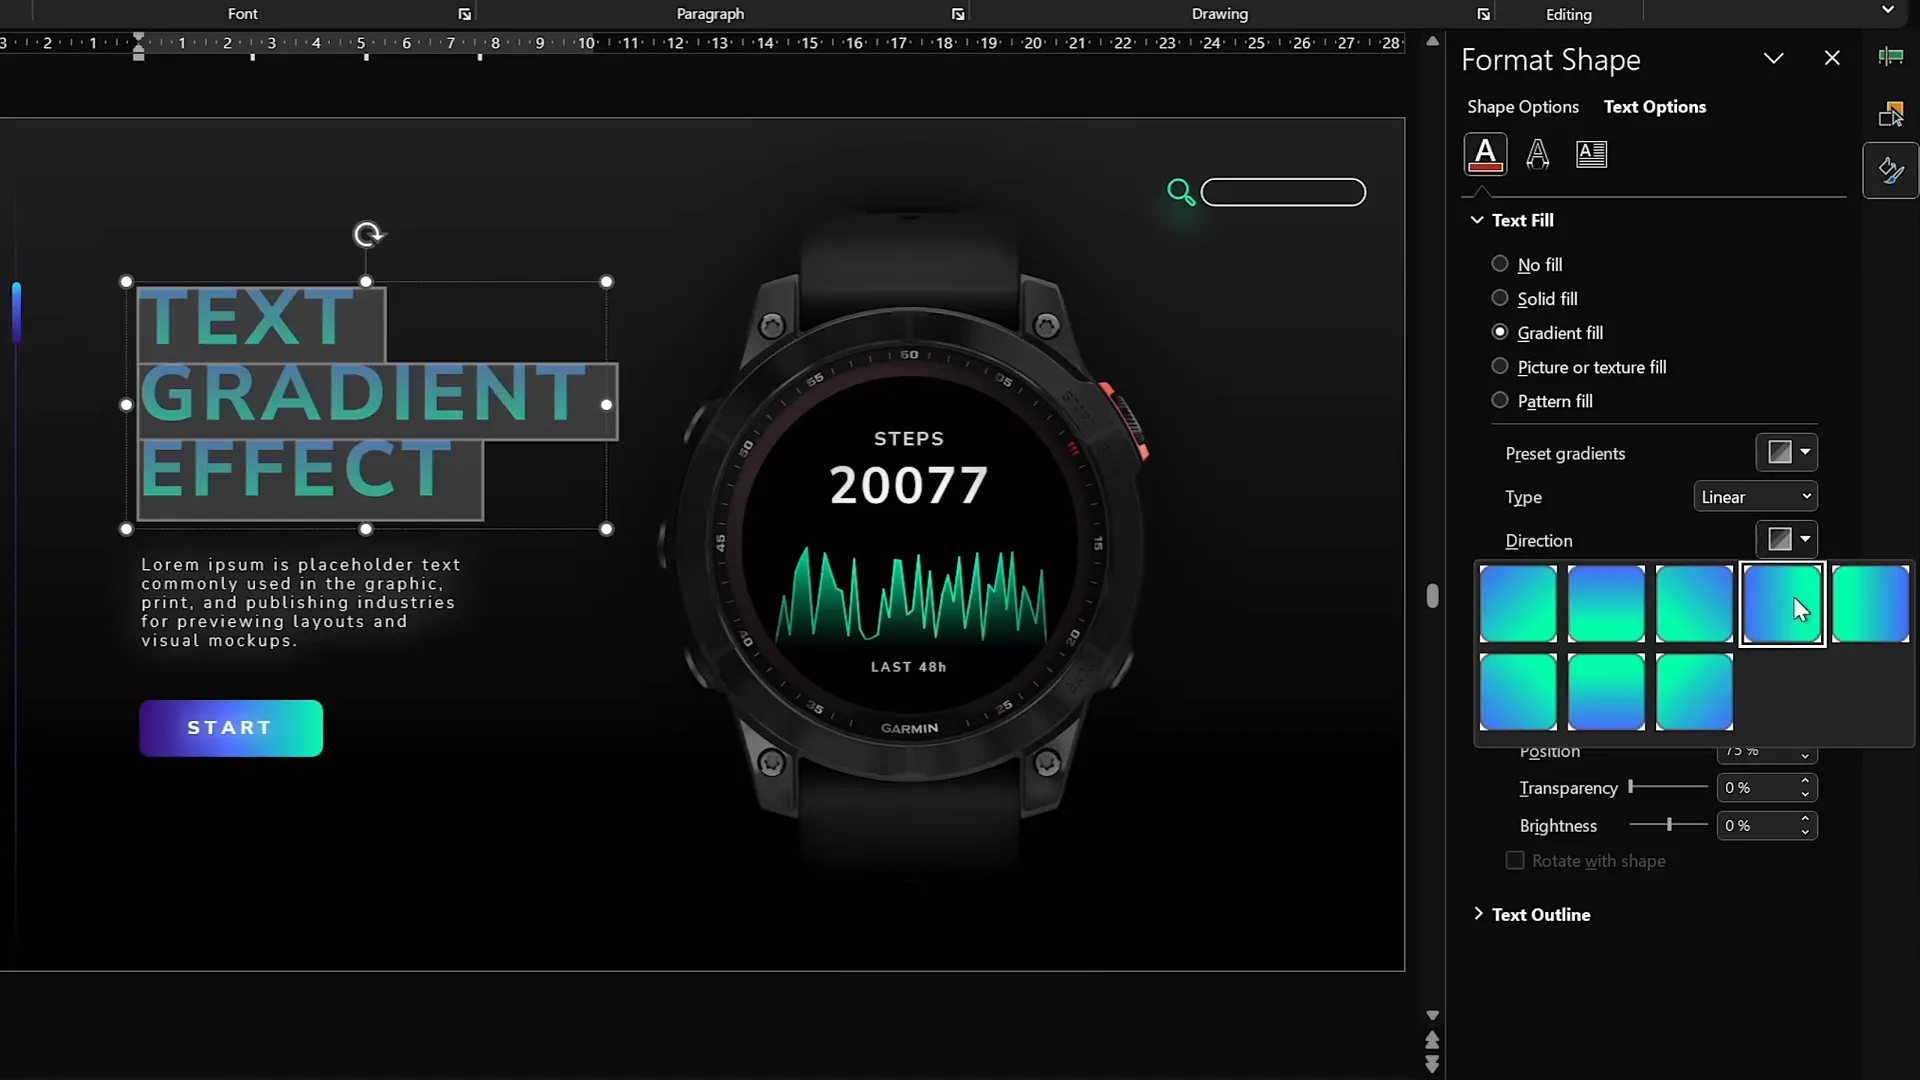
9. Add Gradient Fill to Text for Extra Pop
Gradient text adds visual interest and dimension to your slide titles and headers.
How to apply gradient text:
- Select the text box and highlight the text.
- Go to Text Fill > Gradient Fill.
- Add as many color stops as you want and adjust their positions.
- For emphasis, fill one word with white and add a white shadow glow.
- Play with transparency stops to create fades or transparent gradients.
This technique creates eye-catching titles that draw audience attention.
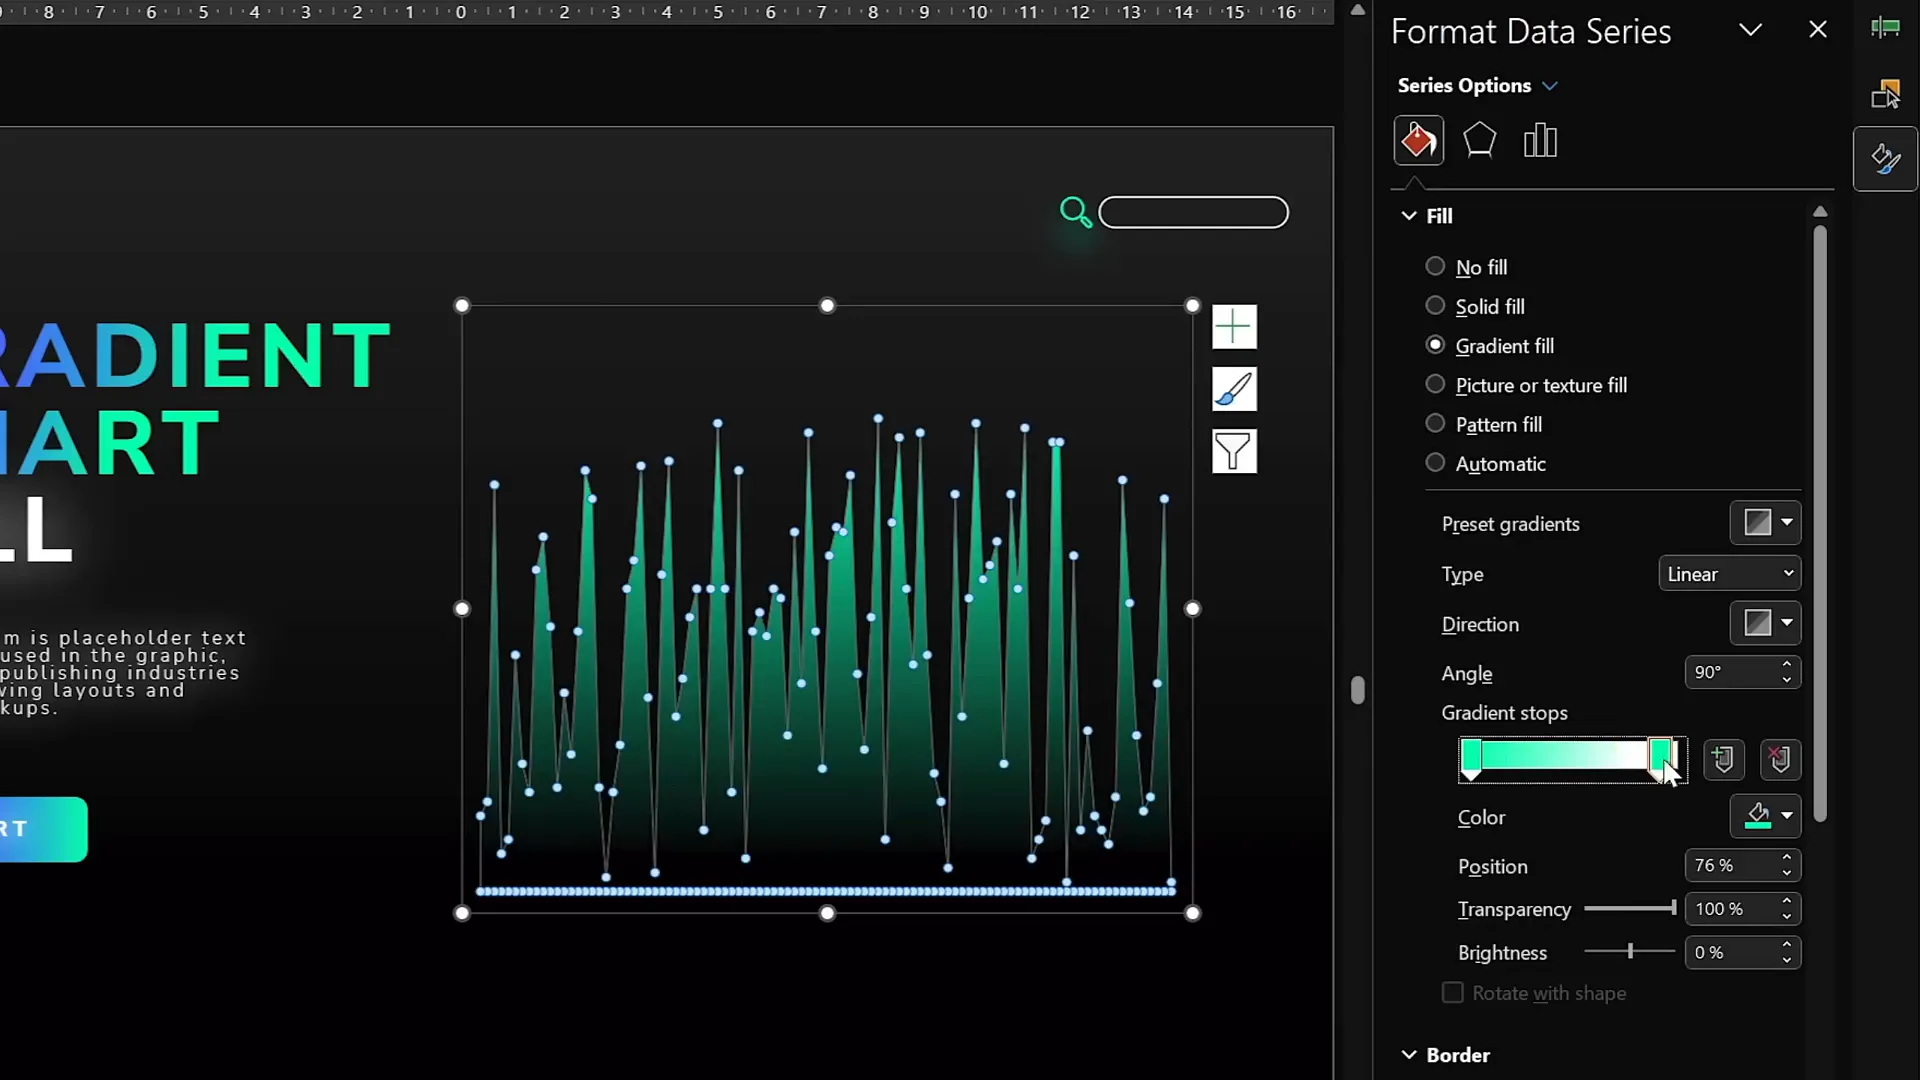
10. Design Modern Gradient-Filled Charts
Make your charts stand out by filling them with gradients instead of solid colors.
Steps to create gradient area charts:
- Insert an Area Chart (Insert > Chart > Area).
- Resize and clean up the chart by removing unnecessary elements like titles and axes.
- Edit the data to include only one series and generate random values using
=RANDBETWEEN(1,100)if desired. - Apply a gradient fill to the chart area with one fully opaque color and one fully transparent color.
- Add a gradient line to the chart’s outline using the same principle.
These steps create smooth, modern charts that visually appeal and clearly communicate data.
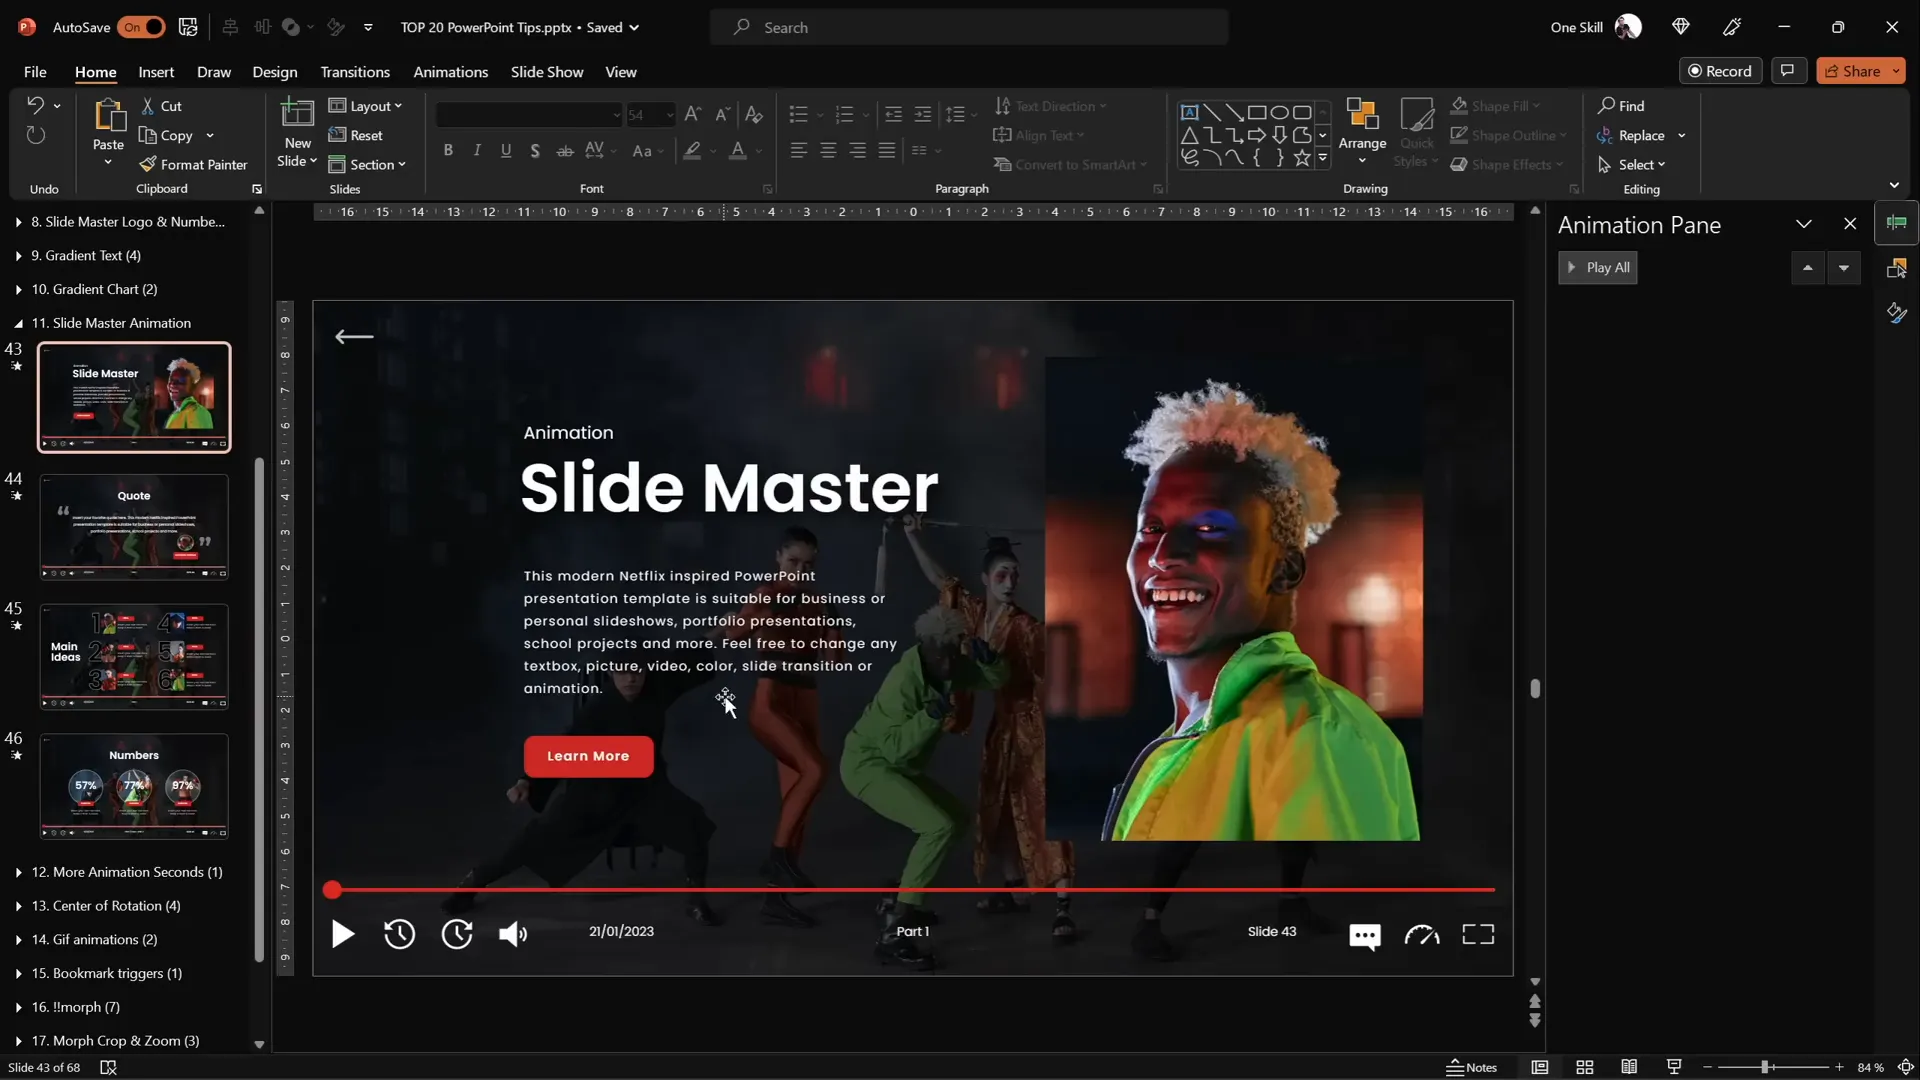
11. Animate Elements Globally Using Slide Master
Did you know you can add animations on the Slide Master, which then appear on all slides using that layout? This creates a secondary animation timeline for global effects.
Benefits include:
- Repeatable animations like logos or subtle movement across multiple slides.
- Consistent branding animations without reapplying on each slide.
Example workflow:
- Go to View > Slide Master.
- Add animated elements, such as a playback icon or moving object.
- Set animations to loop or repeat as desired.
- Close Slide Master and apply the layout to slides.
This technique saves time and enhances presentation polish.
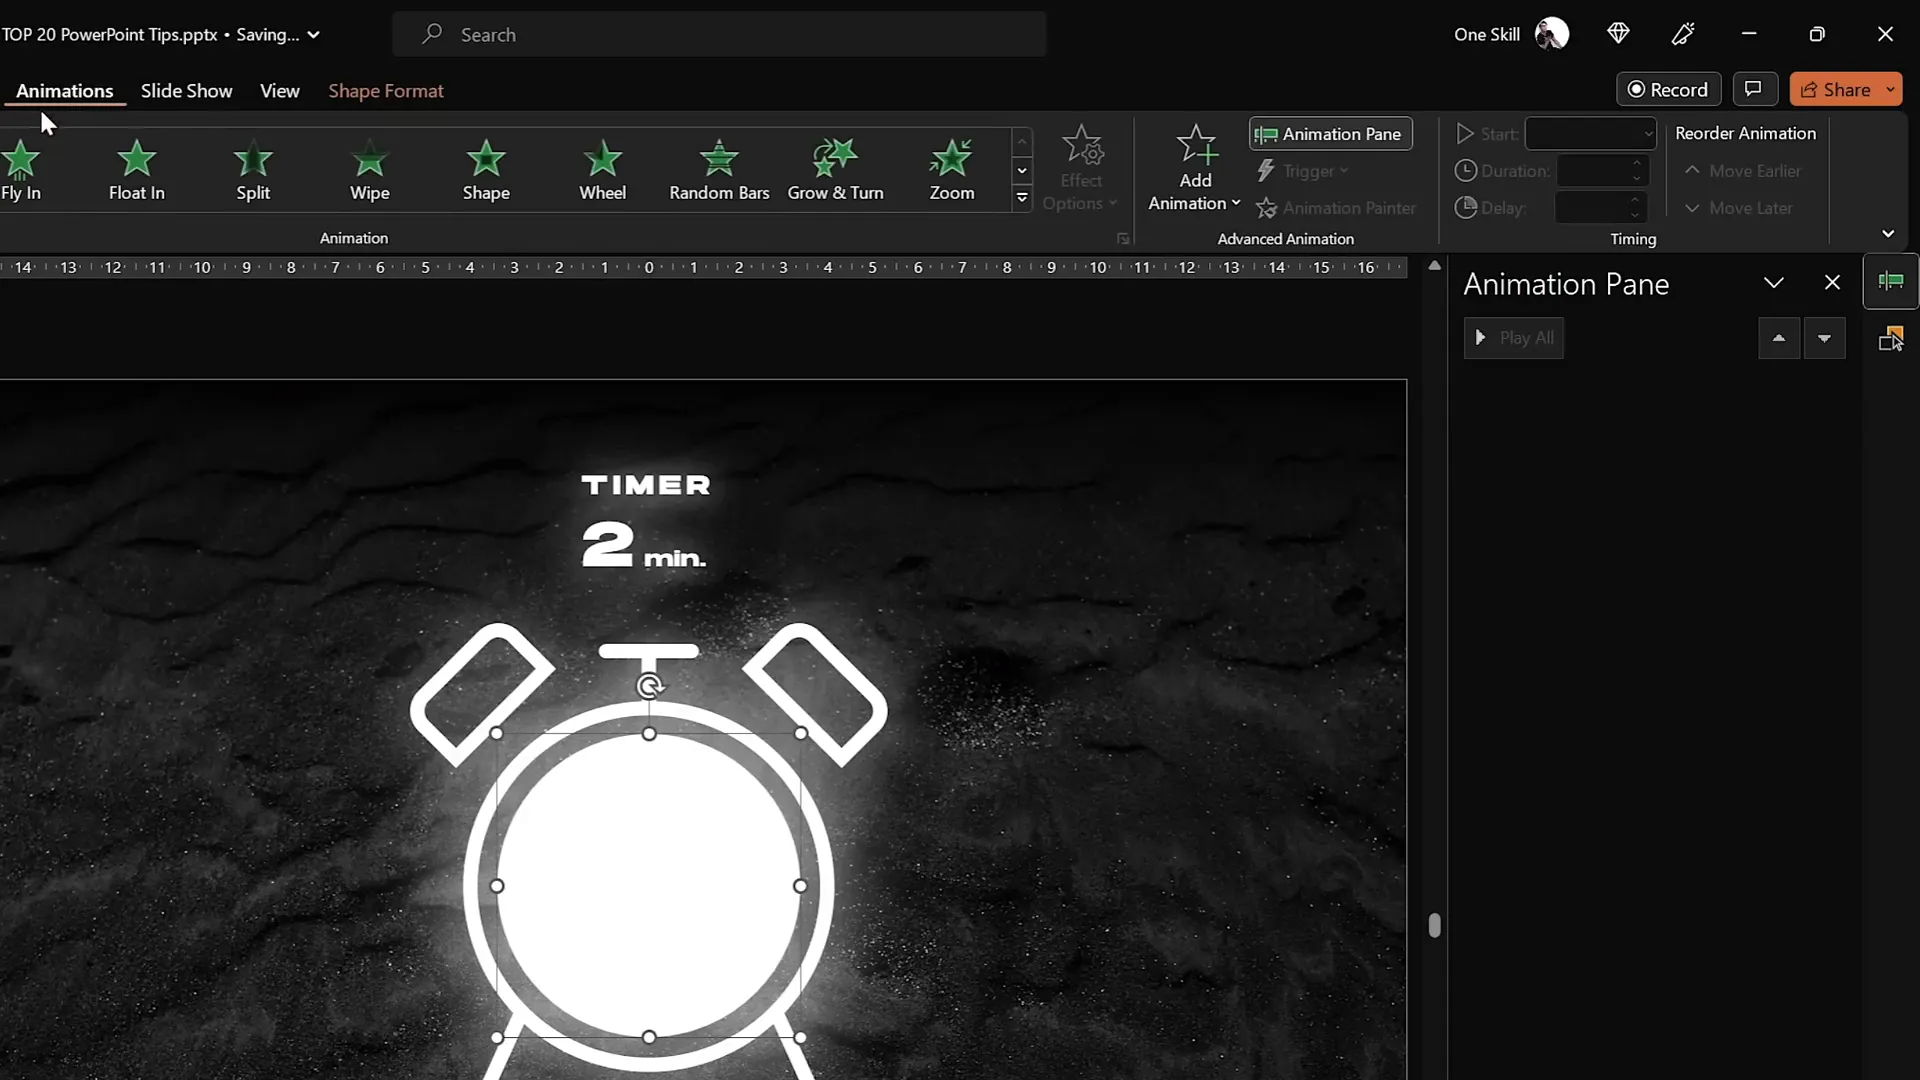
12. Extend Animation Duration Beyond Limits
PowerPoint’s animation duration fields max out at 59 seconds, but you can extend animations well beyond that manually.
How to create long animations (e.g., 2-minute timer):

- Apply your animation (e.g., Wheel effect on a circle).
- Double-click the animation to open settings, then go to the Timing tab.
- Manually enter the desired duration in seconds (e.g., 120 seconds for 2 minutes).
- Click OK. The duration field will display “Auto,” but the animation will run for the full time.
This makes it possible to create timers, progress bars, or other long-running animations.
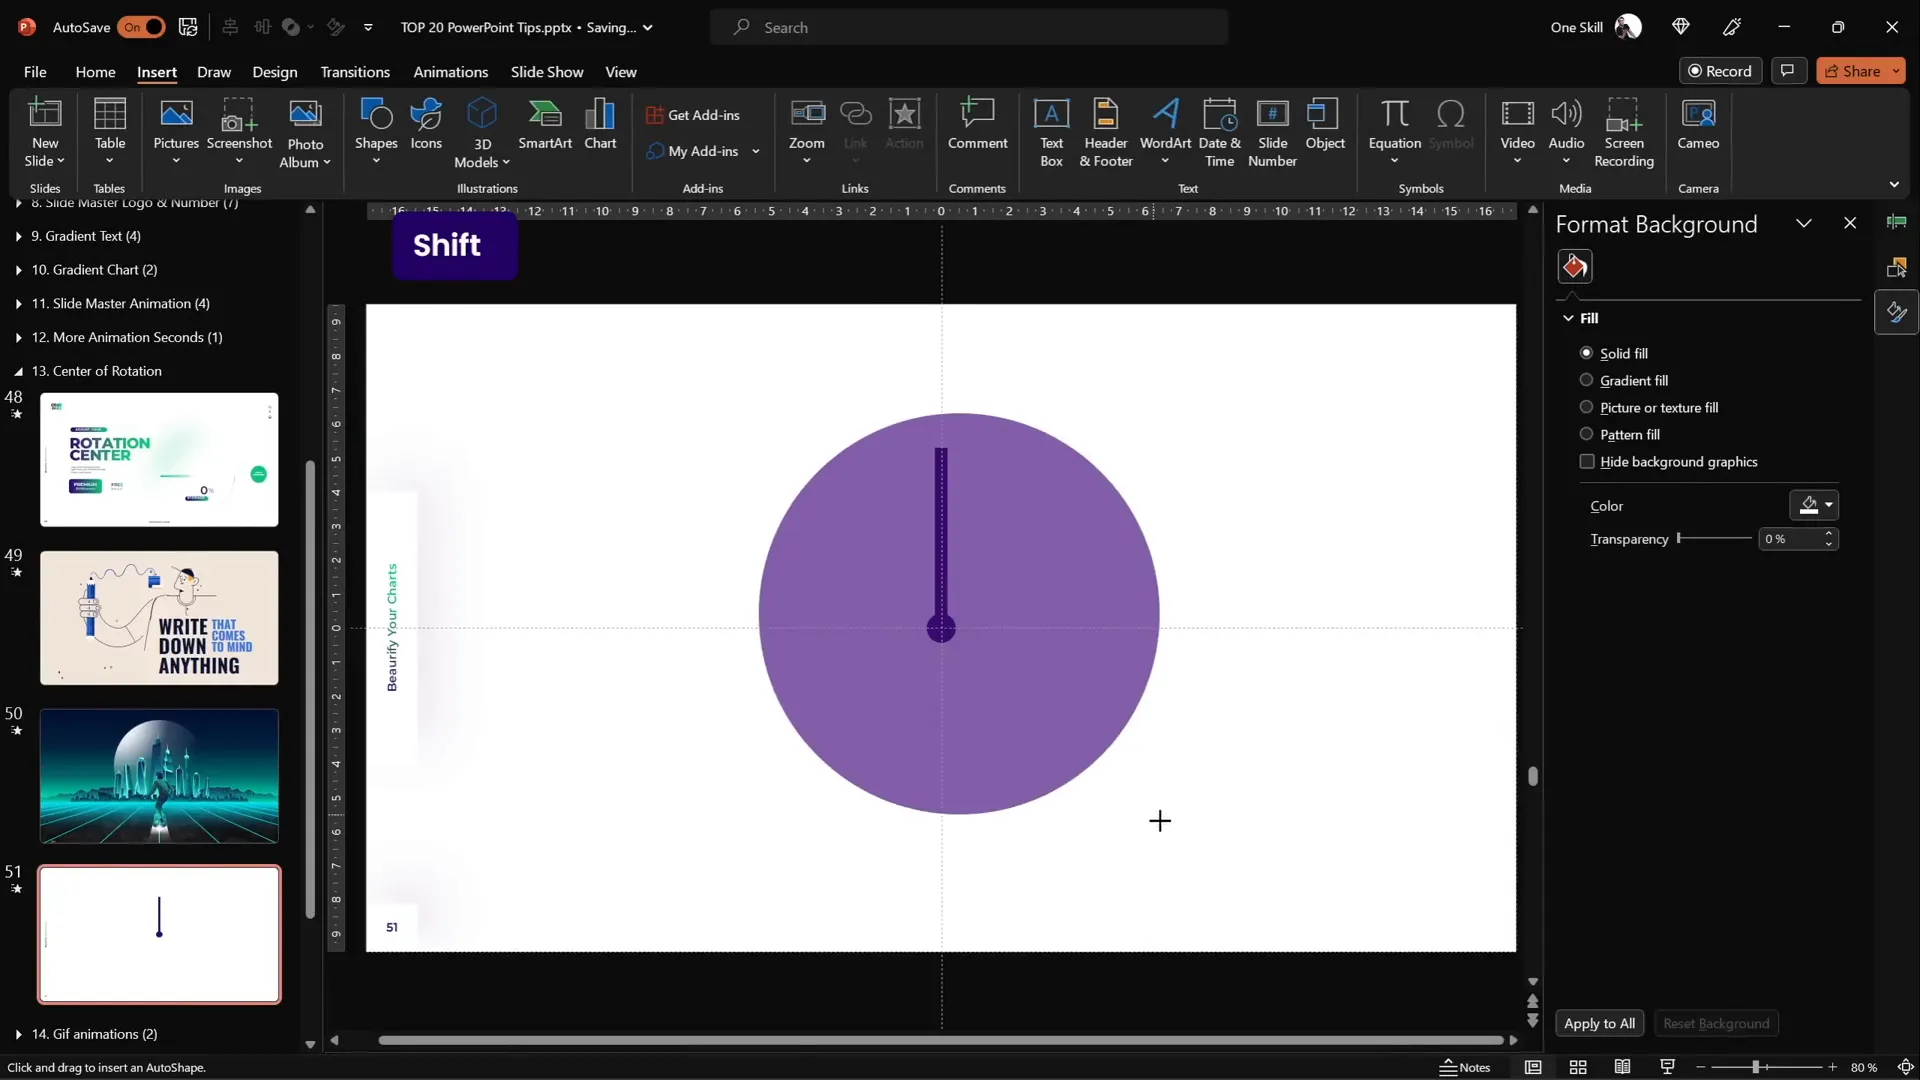
13. Customize Rotation Centers for Precise Animations
By default, grouped objects rotate around their center, but you can customize the rotation center for more natural animation effects.
Example: Rotate an arm around the shoulder instead of the middle
- Turn on slide guides to see the slide center.
- Insert a large shape (e.g., a big circle) aligned to the center, covering your group.
- Select all objects including the large shape and group them.
- Rotate the group—the rotation center is now the large shape’s center.
- Remove the fill from the large shape to keep it invisible.
This method is useful for complex rotations like character limbs or arrows.
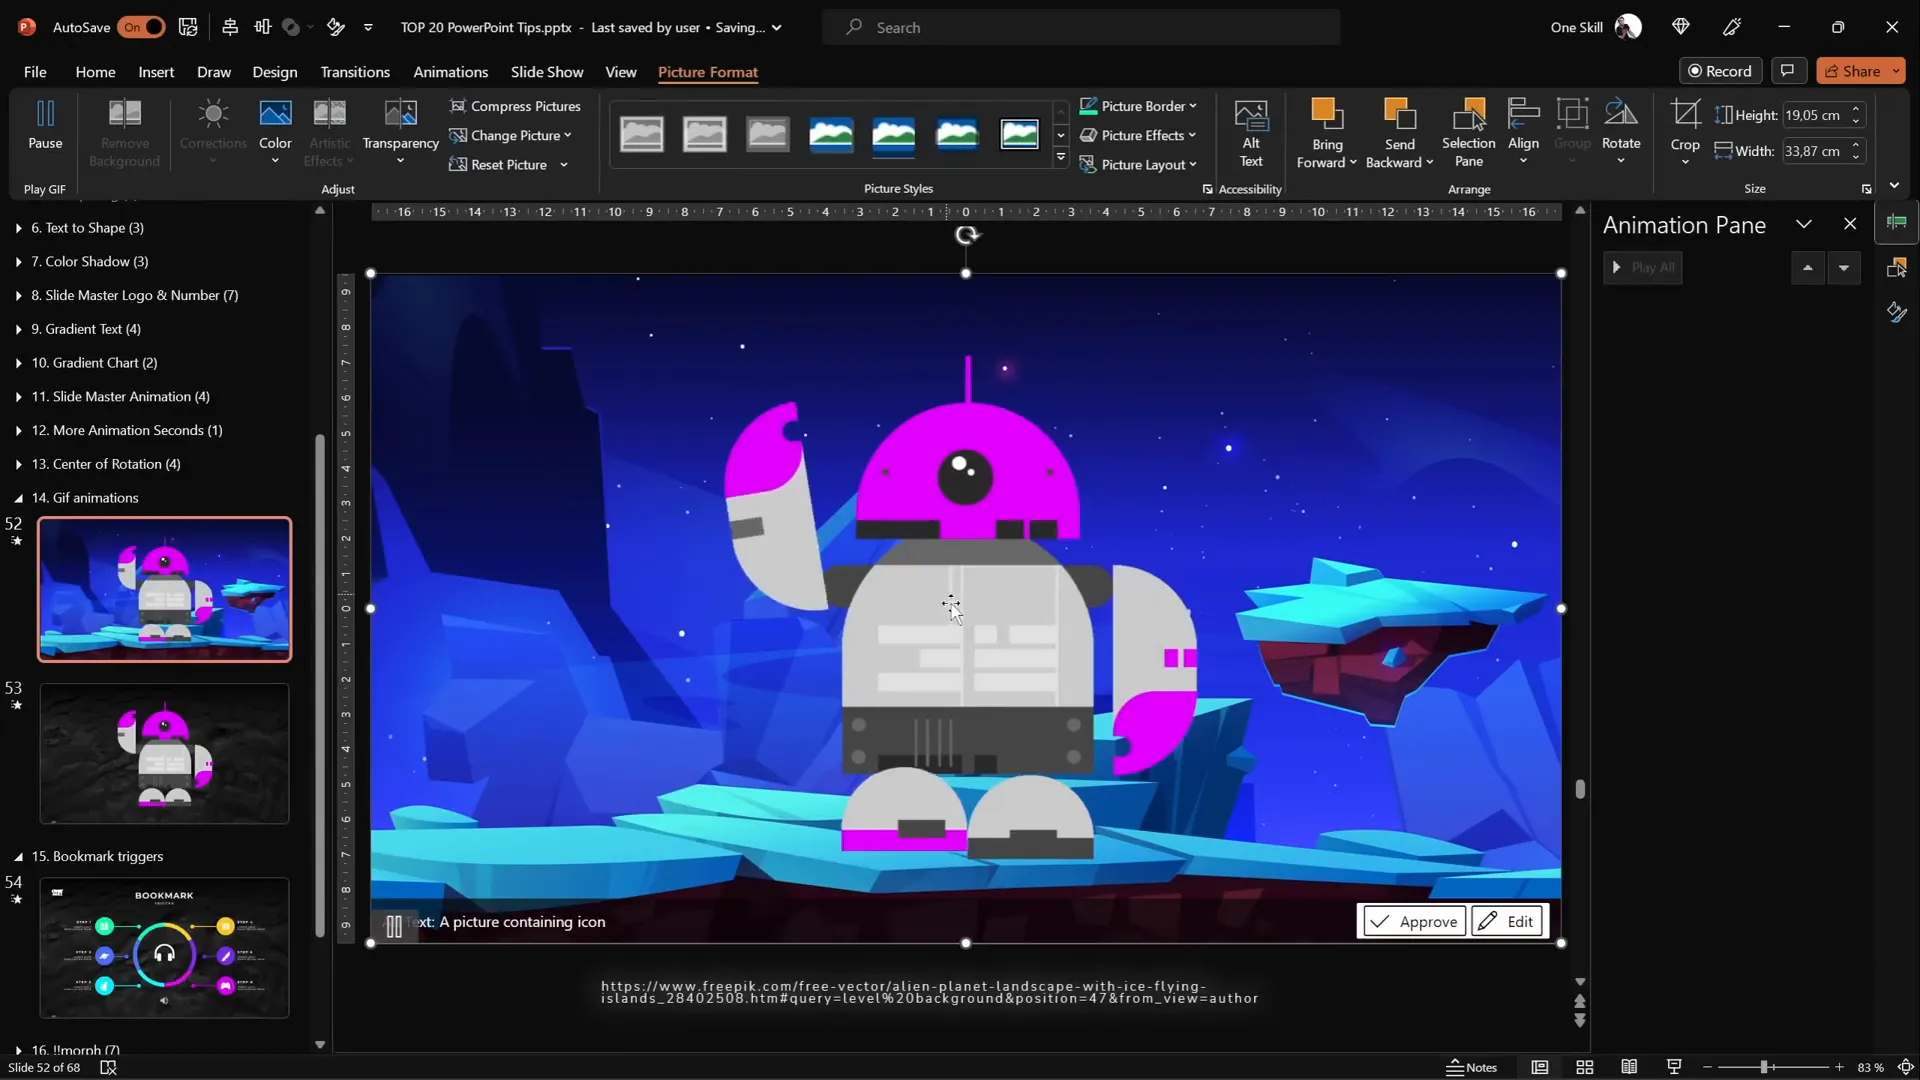
14. Combine GIFs and PowerPoint Animations
Complex animations like a robot waving its arms and moving legs can be challenging in PowerPoint alone. Combining GIFs with PowerPoint animations is an effective workaround.
Steps:
- Use Office 365 stock illustrations or import your GIF.
- Convert illustrations to shapes to animate parts separately if needed.
- Create custom rotation centers for limbs to animate naturally.
- Add motion path animations for subtle movements (e.g., leg up and down).
- Export the slide as an animated GIF (File > Export > Create Animated GIF).
- Reinsert the GIF into your presentation and add further animations like motion paths for movement.
This hybrid approach provides smooth, reusable animations that are hard to replicate with PowerPoint alone.
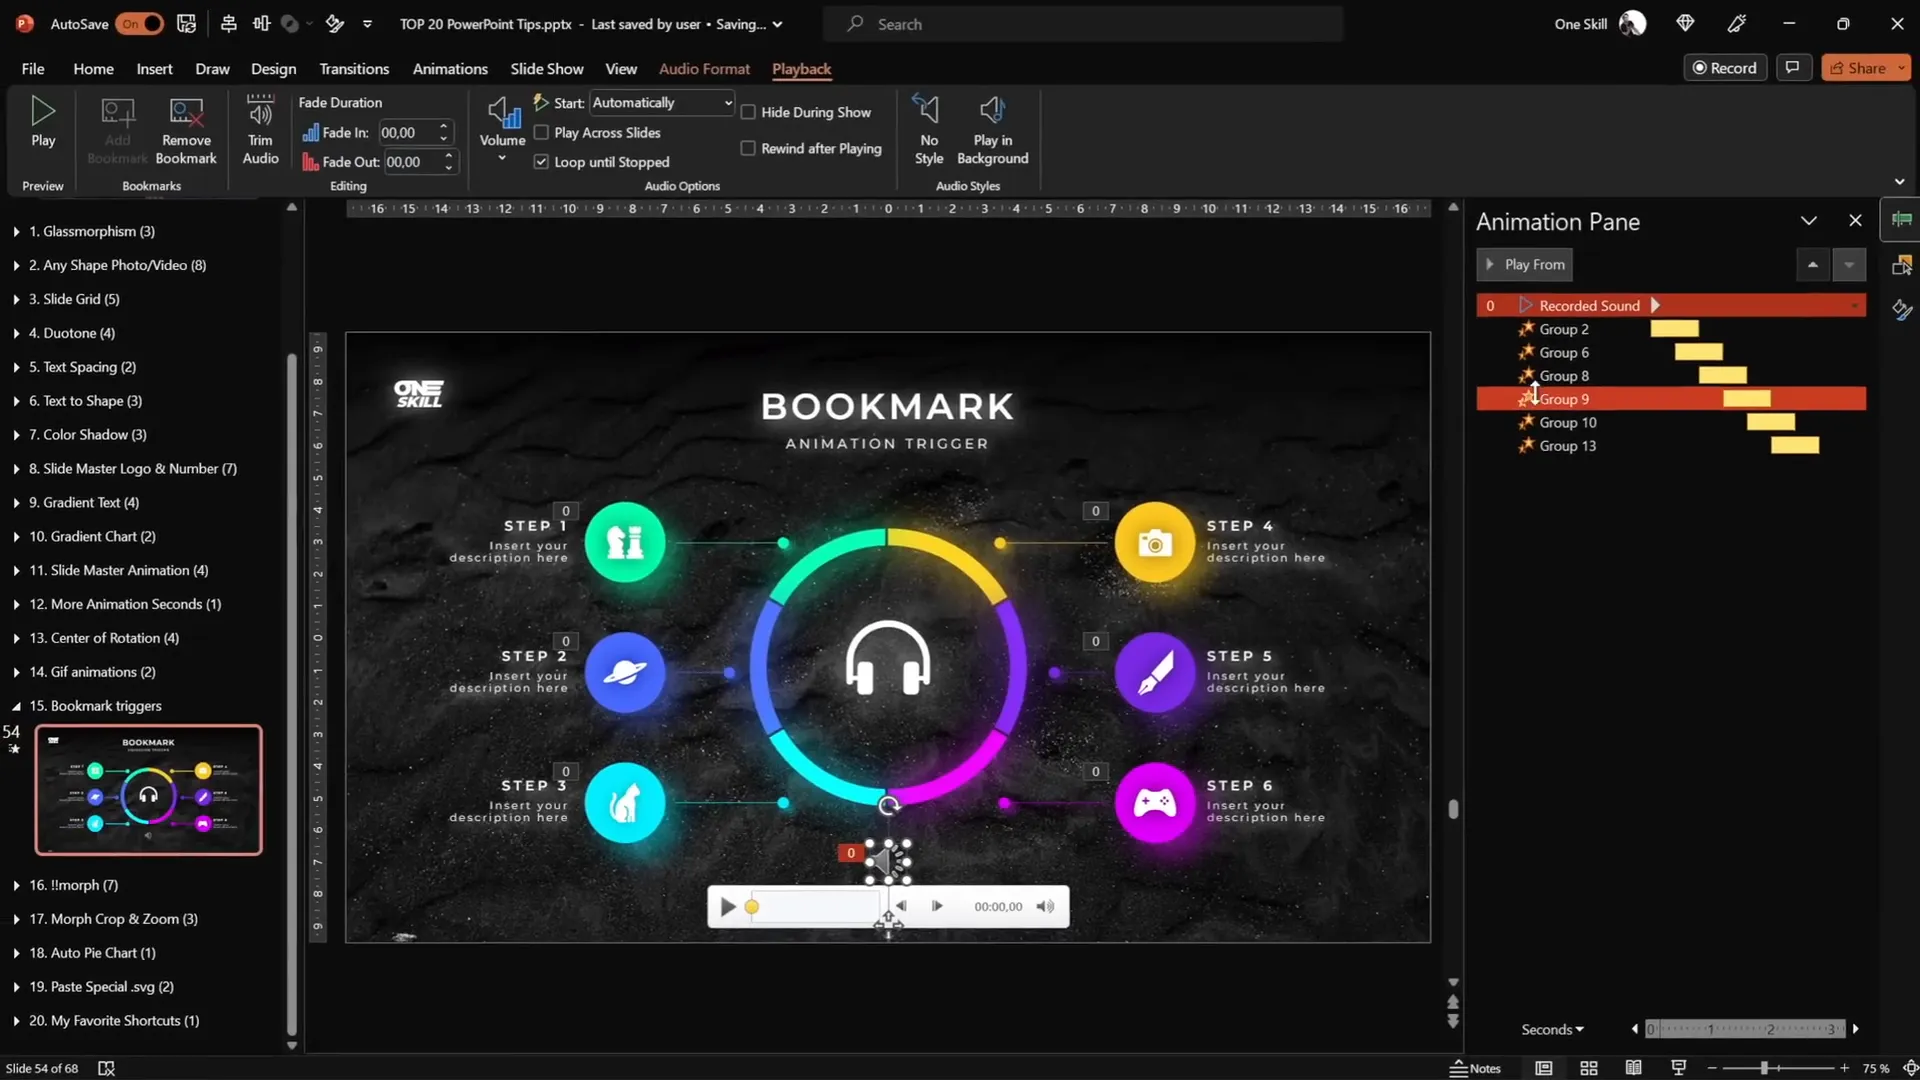
15. Loop Complex Animations with Bookmark Triggers
Bookmark triggers are a powerful, lesser-known tool to loop sequences of animations, even when they have delays.
How to use bookmark triggers:
- Record a silent audio clip just longer than your animation sequence.
- Insert the audio clip (Insert > Audio > Record Audio or import a file).
- Set audio playback to Automatically and loop until stopped.
- Add a bookmark at the desired time in the audio playback timeline.
- Select the animations you want to loop and set their trigger to On Bookmark with the bookmark you created.
This approach creates perfectly timed, looped animations that play in sequence indefinitely until you move to the next slide.
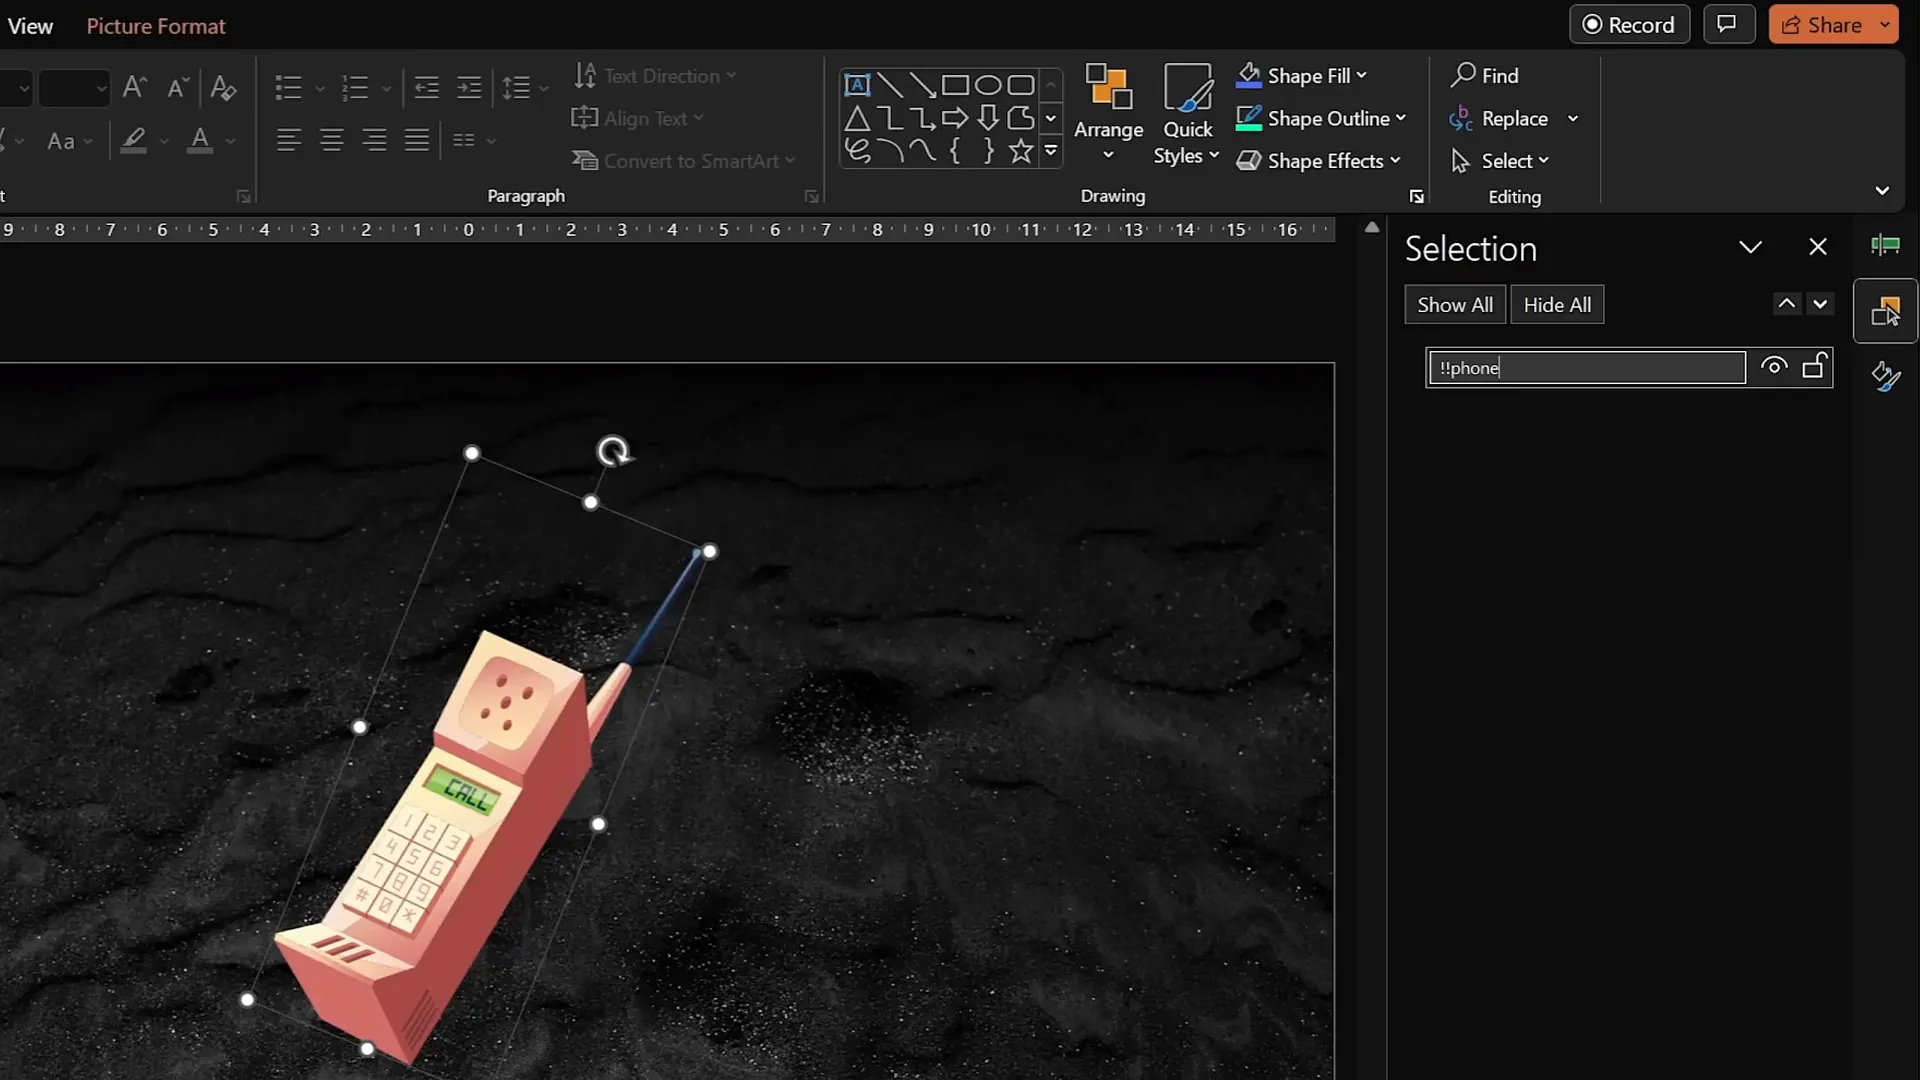
16. Perfect Your Morph Transitions with Naming Conventions
The Morph transition is great for smooth animations between slides, but sometimes it doesn’t work as expected, causing abrupt fades instead of morphs.
Tip to fix this:
- Open the Selection Pane (Home > Arrange > Selection Pane).
- Rename the objects you want to morph on both slides with the exact same name, starting with double exclamation marks (e.g.,
!!phone). - PowerPoint will recognize these as the same object and morph smoothly.
Consistent naming is key to unlock smooth morph transitions.
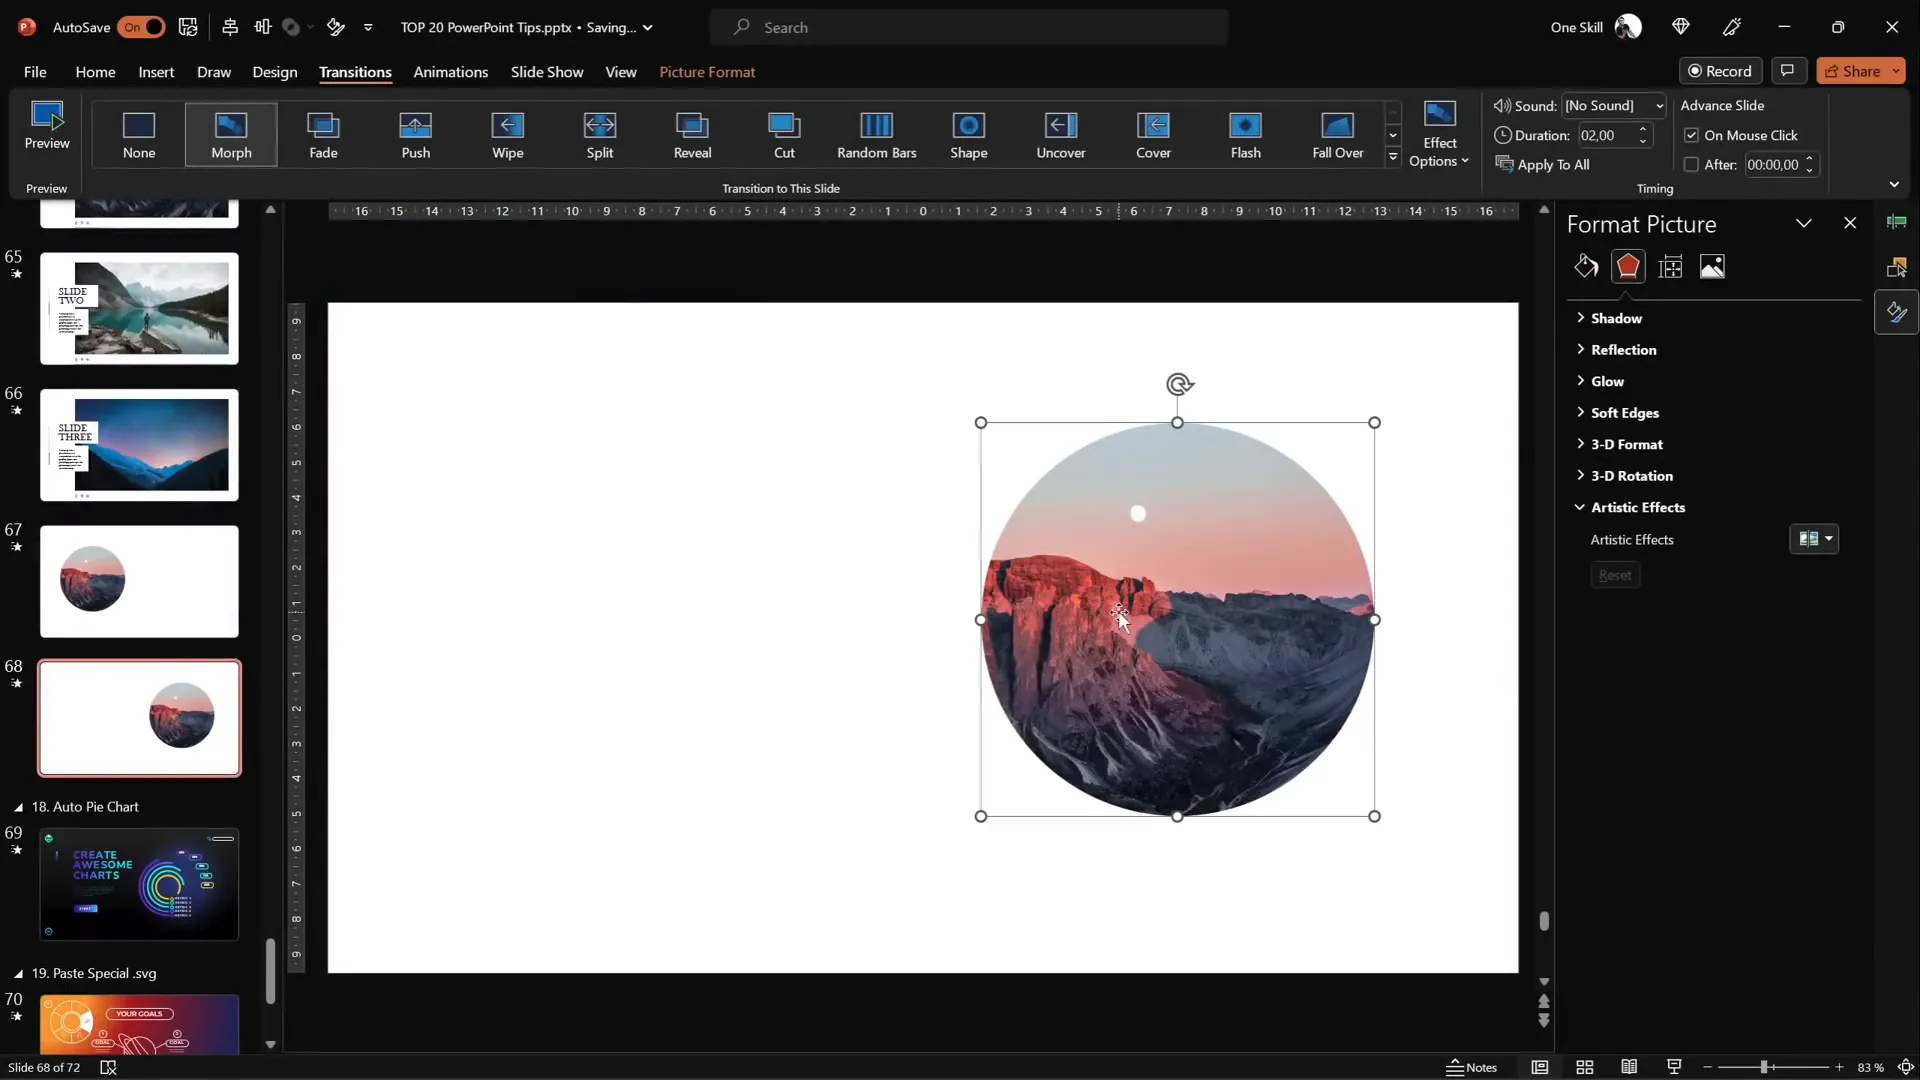
17. Animate Photos by Combining Morph and Crop
PowerPoint can animate photos not just by moving them but also by cropping them between slides.
How to create zoom and pan effects with Morph and Crop:
- Insert a photo and crop it into a shape (e.g., circle).
- Duplicate the slide and move the photo to a new position.
- On the duplicate slide, adjust the crop size to zoom in or out.
- Apply the Morph transition between slides.
This creates dynamic movement and zoom effects on images without complex animations.
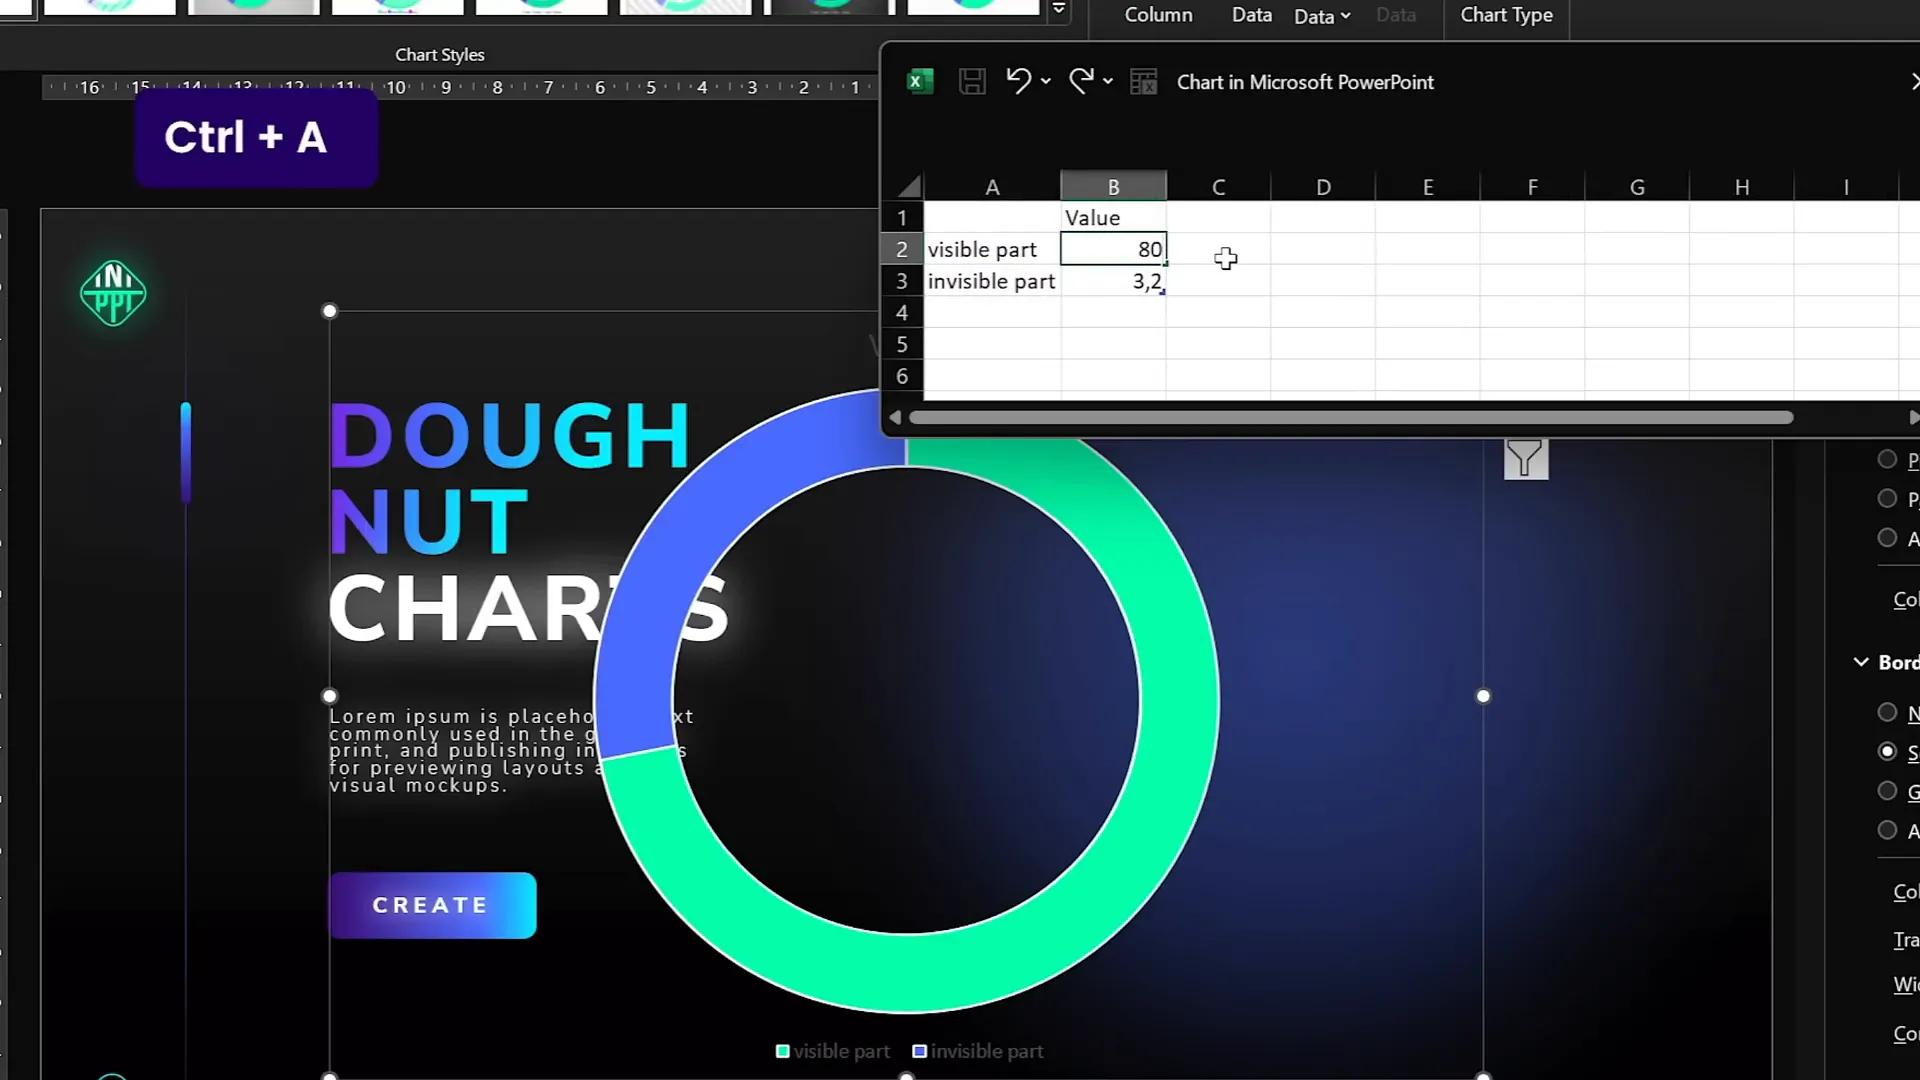
18. Create Auto-Updating Donut Charts
Donut charts are popular for showing progress or parts of a whole. You can make them auto-update using formulas.
Steps:
- Insert a donut chart (Insert > Chart > Donut).
- Keep only two rows of data: Visible part and Invisible part.
- Enter the visible part value (e.g., 80).
- For the invisible part, use the formula
=100 - [visible part cell]. - When you update the visible part, the invisible part adjusts automatically.
- Style your chart with shadows and colors for better visuals.
This technique makes updating charts quick and error-free.
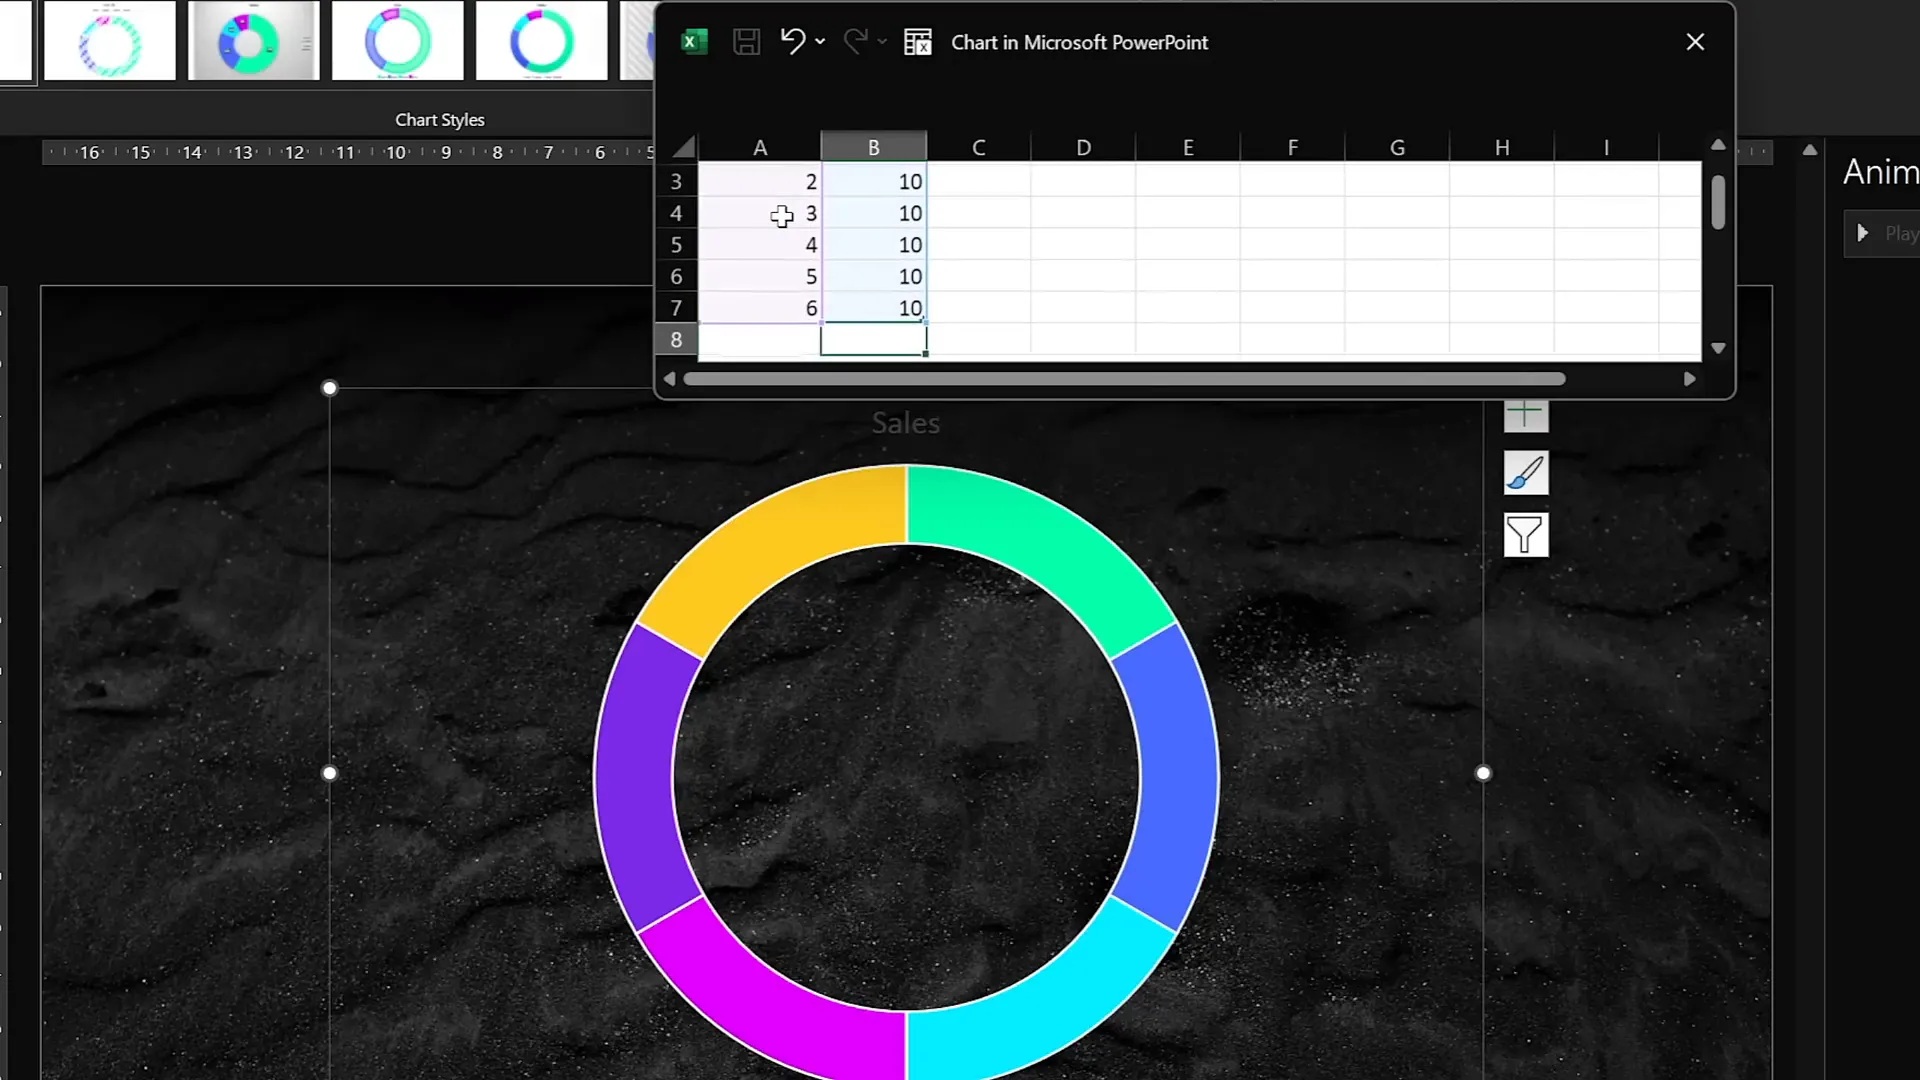
19. Divide Pie or Donut Charts into Equal Parts
Dividing charts into equal slices is useful for UI designs or infographics.
How to divide a donut chart into equal parts:
- Insert a donut chart.
- Add as many rows as slices you want (e.g., 6 rows for 6 slices).
- Enter the same value in each row (e.g., 10) so slices are equal.
- Remove unnecessary chart elements like title and legend.
- Adjust hole size as needed.
- Copy the chart, then use Paste Special > SVG to paste as vector.
- Convert SVG to shapes and ungroup to access individual slices.
To create gaps between slices:
- Insert narrow rectangles and position them as separators over the donut chart.
- Union the rectangles into one shape.
- Select the donut chart and subtract the rectangles to create gaps.
- Fragment the shapes with a white square behind to separate slices.
Now you have editable slices with gaps for stylized infographics.
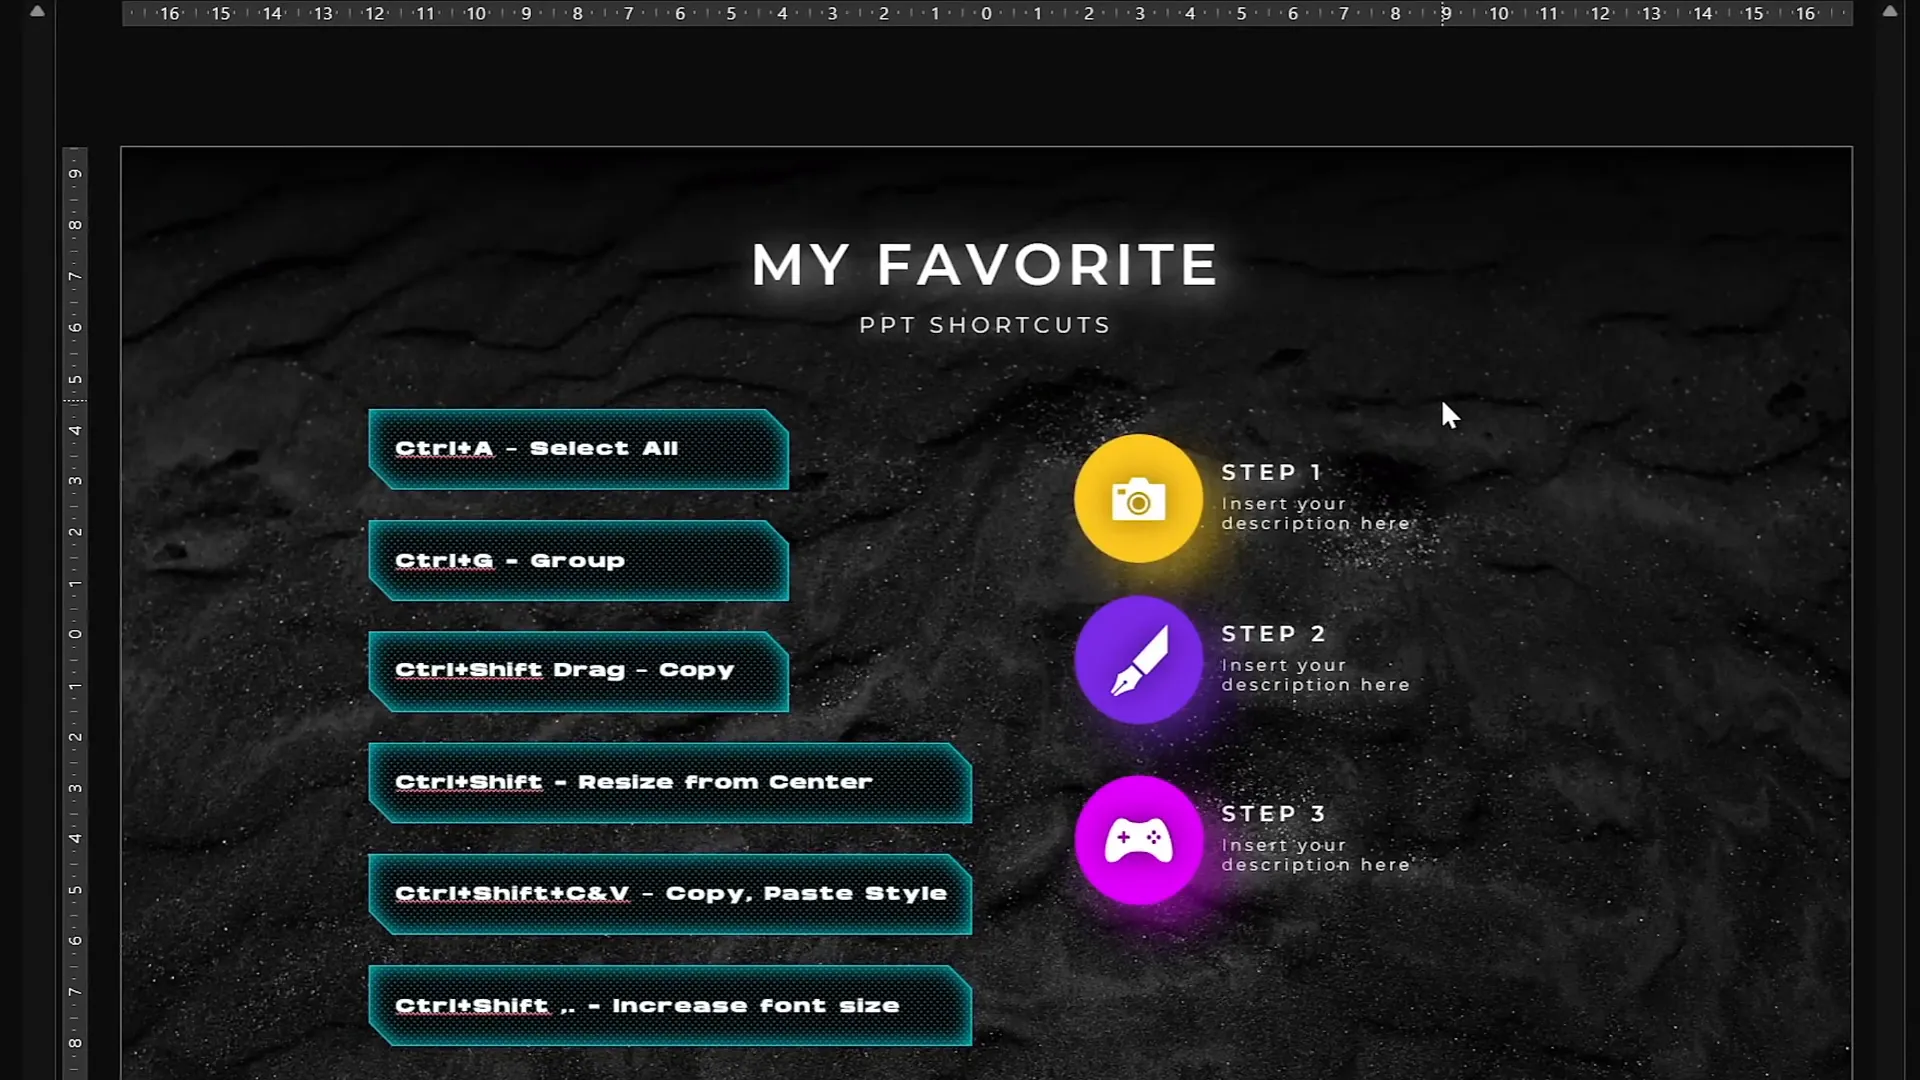
20. Essential PowerPoint Shortcuts to Boost Your Workflow
Mastering PowerPoint shortcuts is one of the fastest ways to speed up your design process and impress your audience.
| Shortcut | Function | Description |
|---|---|---|
| Ctrl + A | Select All | Selects all elements on the slide. Hold Shift and click to deselect specific items. |
| Ctrl + G | Group | Groups selected elements for easier movement and formatting. |
| Ctrl + C | Copy | Copies selected items. |
| Ctrl + V | Paste | Pastes copied items. |
| Ctrl + Drag | Duplicate | Hold Ctrl and drag an object to create a copy. |
| Ctrl + Shift + Drag | Duplicate in Straight Line | Hold Ctrl + Shift to duplicate objects in a perfectly straight line. |
| Ctrl + Shift + Resize | Resize from Center | Resizes shapes proportionally from the center point. |
| Ctrl + Shift + C | Copy Formatting | Copies the formatting of an object. |
| Ctrl + Shift + V | Paste Formatting | Applies copied formatting to another object. |
| Ctrl + Shift + . (Period) | Increase Font Size | Increases the font size of selected text quickly. |
Using these shortcuts regularly will help you work faster and keep your creative flow uninterrupted.
Frequently Asked Questions
What is the glassmorphic effect in PowerPoint?
The glassmorphic effect is a design style that uses transparency and blur to give shapes a frosted glass appearance. It adds modern elegance to presentations and is created by using blurred background images as fills for transparent shapes.
How can I insert images or videos into custom shapes?
Create your custom shape with PowerPoint’s shape tools, place the image or video over it, then use the Merge Shapes > Intersect function to clip the media into the shape.
Why should I use slide grids?
Slide grids ensure consistent alignment and spacing of elements, making your slides look professional and well-organized. They help avoid floating or unevenly placed content.
Can I create duotone effects directly in PowerPoint?
PowerPoint doesn’t currently support duotone effects natively, but you can use free online tools like duotone.shapefactory.co to generate duotone images and then insert them into your slides.
How do I extend animation durations beyond 59 seconds?
Double-click the animation to open the timing settings and manually enter the desired duration in seconds. The field may show “Auto,” but the animation will run for the specified time.
What are bookmark triggers and how do they help?
Bookmark triggers use audio bookmarks to loop complex animations with delays, allowing animations to repeat in sequence indefinitely until the slide changes.
How do I fix morph transitions that don’t work smoothly?
Rename the objects on both slides with the same name starting with double exclamation marks (e.g., !!objectName). This helps PowerPoint recognize them as the same object for smooth morphing.
What are the best PowerPoint shortcuts to learn?
Some essential shortcuts include Ctrl + A (select all), Ctrl + G (group), Ctrl + Shift + C / V (copy and paste formatting), and Ctrl + Shift + . (increase font size). These greatly improve your efficiency.
Can I create animated GIFs from PowerPoint slides?
Yes, PowerPoint allows exporting slides as animated GIFs via File > Export > Create Animated GIF. This is useful for sharing animations outside PowerPoint or embedding them as looping visuals.
How do I create auto-updating donut charts?
Use formulas in the chart data to calculate invisible parts based on visible values. For example, set invisible part = 100 – visible part. Updating the visible value updates the chart automatically.
Conclusion
Mastering these top 20 PowerPoint tips and tricks will not only improve your slide design but also enhance your workflow and presentation quality. From creative effects like glassmorphism and duotone to advanced animation techniques like bookmark triggers and slide master animations, you now have a powerful toolkit to impress any audience.
Don’t forget to incorporate the essential PowerPoint shortcuts into your daily routine to save time and keep your creative momentum. These small efficiency hacks compound into significant productivity gains over time.
With these skills, you’re ready to create presentations that are visually captivating, professionally aligned, and smoothly animated. Keep practicing and exploring PowerPoint’s features, and you’ll continue to elevate your presentation game.
Stay creative, stay efficient, and happy presenting!
Check out the full video: TOP 20 PowerPoint TIPS & TRICKS!😁✨


