
PowerPoint 2019 is a robust tool packed with advanced features that can elevate your presentations to professional standards. Whether you are preparing for an important business pitch, a classroom lecture, or a creative showcase, mastering these features will save you time, improve your design, and impress your audience. In this comprehensive guide, we’ll explore key advanced functionalities in PowerPoint, including Slide Masters, custom layouts, SmartArt, Zoom navigation, charts, animations, screen recording, and sharing options. This tutorial is designed to take your PowerPoint skills from basic to advanced with hands-on examples and practical tips.
Table of Contents
- Introduction to PowerPoint Advanced Features
- Understanding and Using the Slide Master
- Working with SmartArt Graphics
- Applying Transitions for Smooth Slide Changes
- Using Zoom for Interactive Navigation
- Inserting and Customizing Charts
- Collaborating with Comments
- Eyedropper Tool: Precise Color Matching
- Advanced Animations
- Screen Recording Directly in PowerPoint
- Hyperlinking to Enhance Interactivity
- Formatting Slide Backgrounds
- Sharing Your Presentations
- Frequently Asked Questions (FAQ)
- Conclusion
Introduction to PowerPoint Advanced Features
PowerPoint introduces several new and enhanced features aimed at improving user experience and presentation quality. From customizing slide layouts to interactive navigation, these capabilities allow you to build presentations efficiently while maintaining a polished, cohesive look.
Throughout this guide, you will learn how to:
- Leverage the Slide Master to control global slide design and create custom slide layouts.
- Use SmartArt to visually communicate ideas with ease and style.
- Utilize the Zoom feature for dynamic navigation within presentations.
- Insert and customize charts to effectively display data.
- Apply advanced animations and manage their timing and order.
- Record your screen directly within PowerPoint.
- Hyperlink to external resources and share your presentations in versatile formats.
Let’s dive into these features step-by-step, with detailed explanations and practical examples.
Understanding and Using the Slide Master
What is the Slide Master?
The Slide Master is the backbone of your PowerPoint presentation’s design. It controls the look and feel of your entire presentation by managing themes, fonts, colors, and layouts globally. Instead of customizing each slide individually, the Slide Master allows you to make mass edits that apply to all slides linked to a particular layout.
At the top of the Slide Master view is the Master Slide, which affects all slide layouts beneath it. Adjusting the Master Slide lets you set universal properties such as font styles, background colors, and effects.
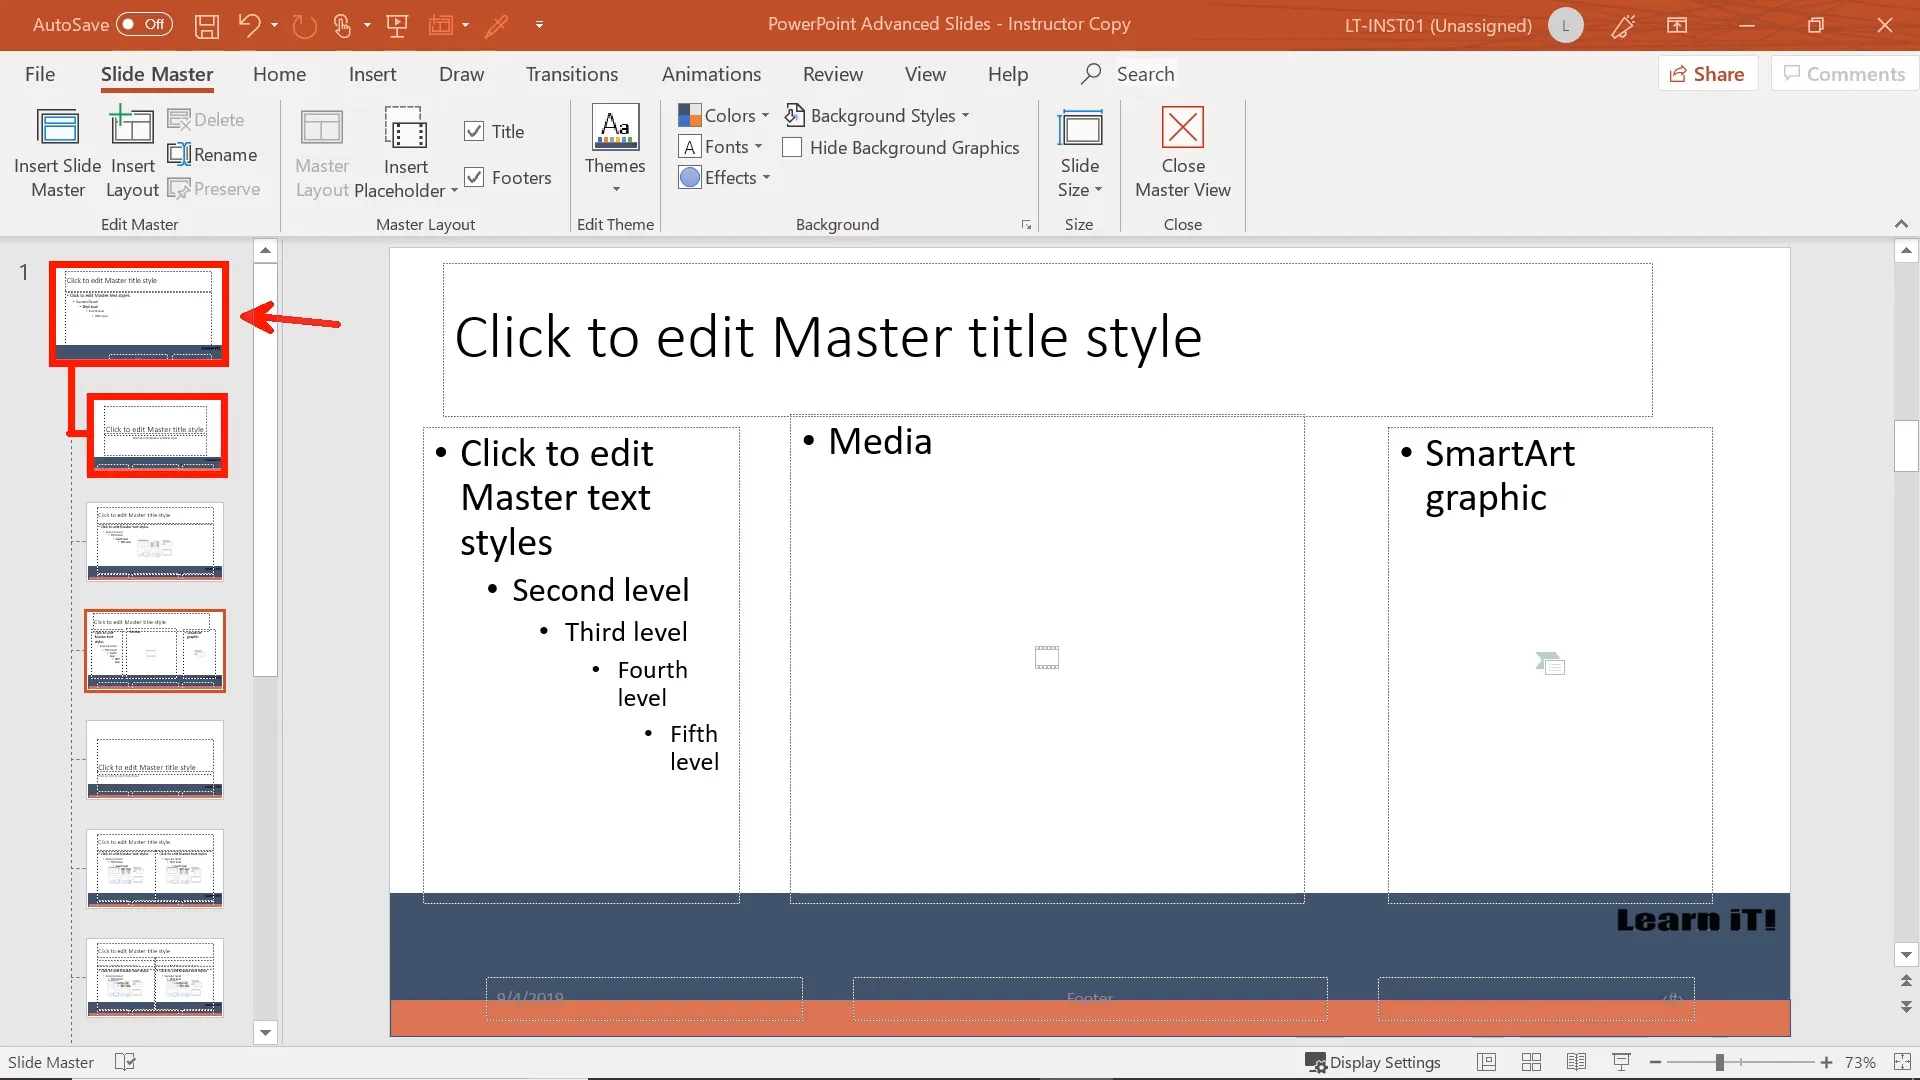
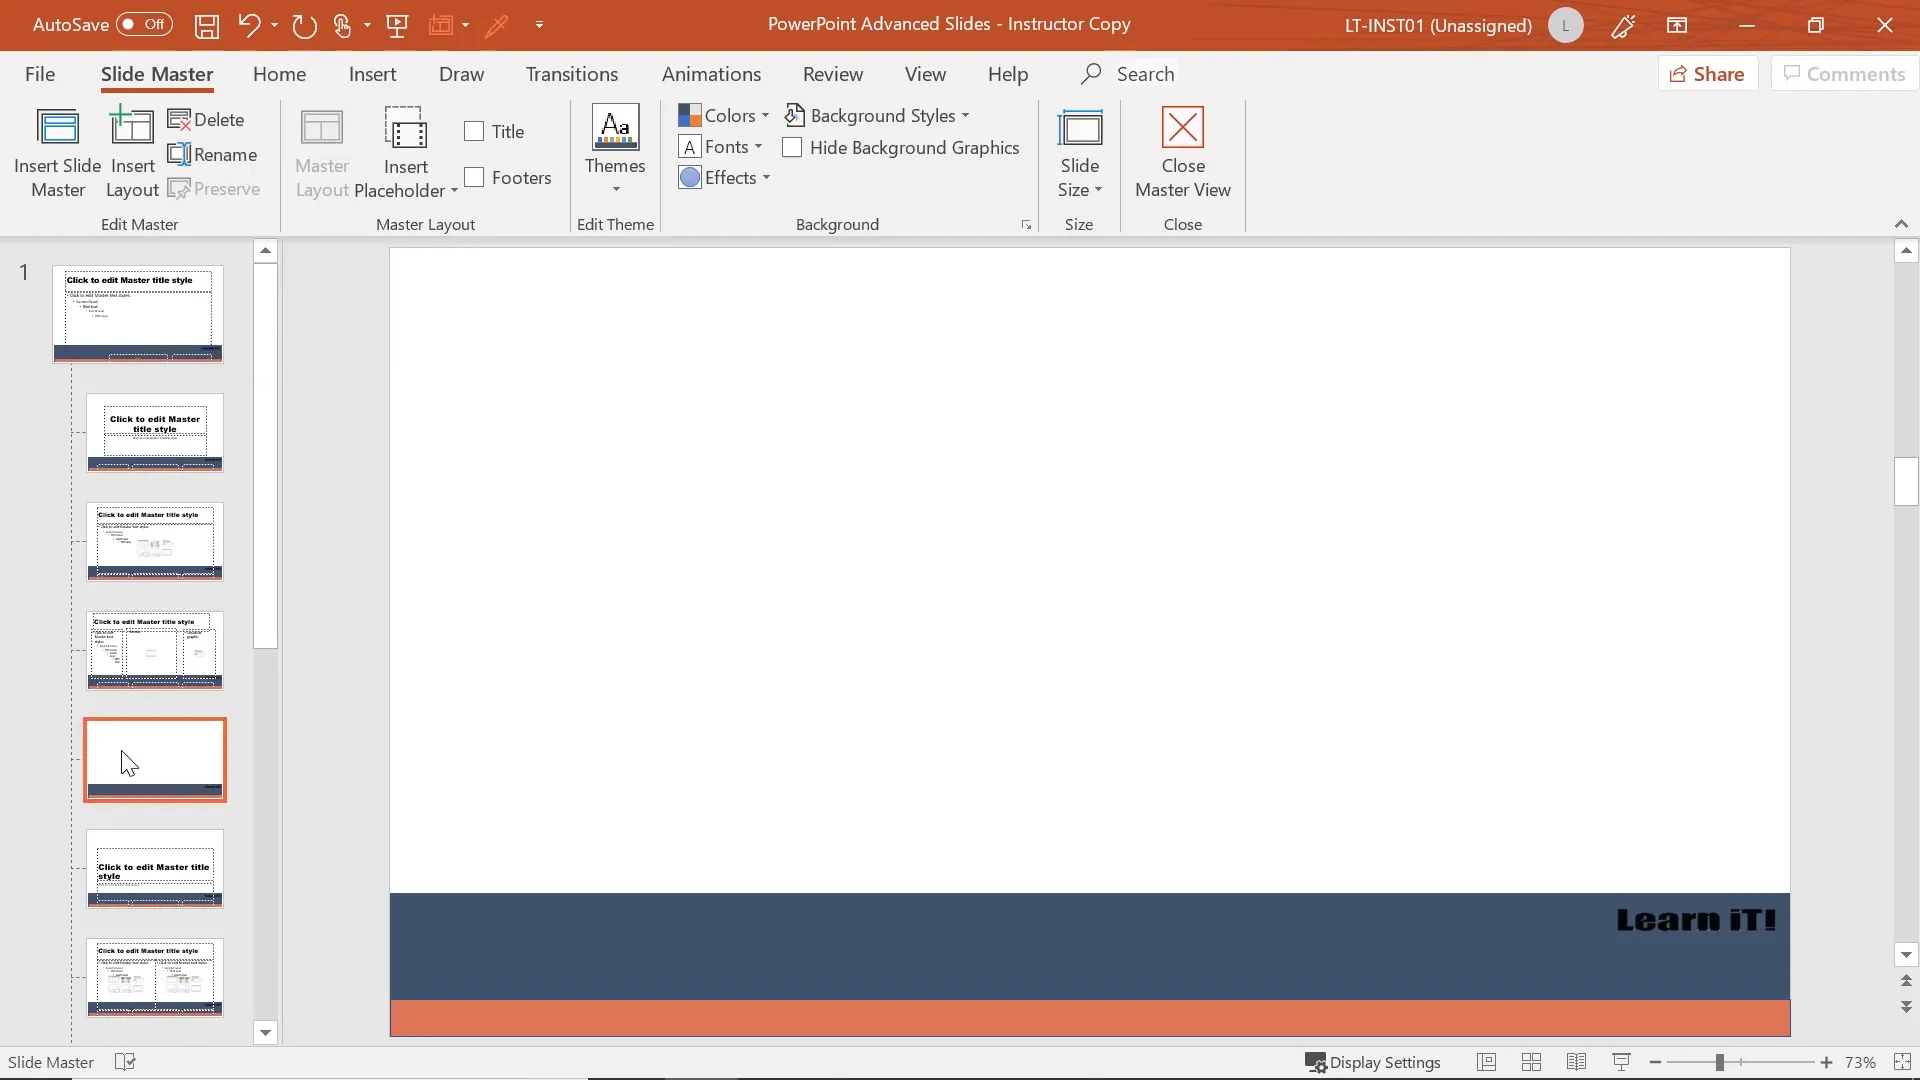
Accessing the Slide Master View
To access the Slide Master, go to the View tab and click on Slide Master. This switches your view from the normal slide editing mode to the Slide Master mode, where you’ll see the master slide at the top and all associated slide layouts below it.
When entering Slide Master view, it’s a good practice to scroll to the top to start with the Master Slide, ensuring you make global changes accurately.
Customizing the Master Slide
In the Master Slide, you can control:
- Theme colors and fonts
- Background styles and images
- Effect styles
- Placeholders and layout elements
For example, if you want all slide titles to use a bold Arial Black font at 20-point size, you can set this on the Master Slide, and it will apply to every slide using that layout.
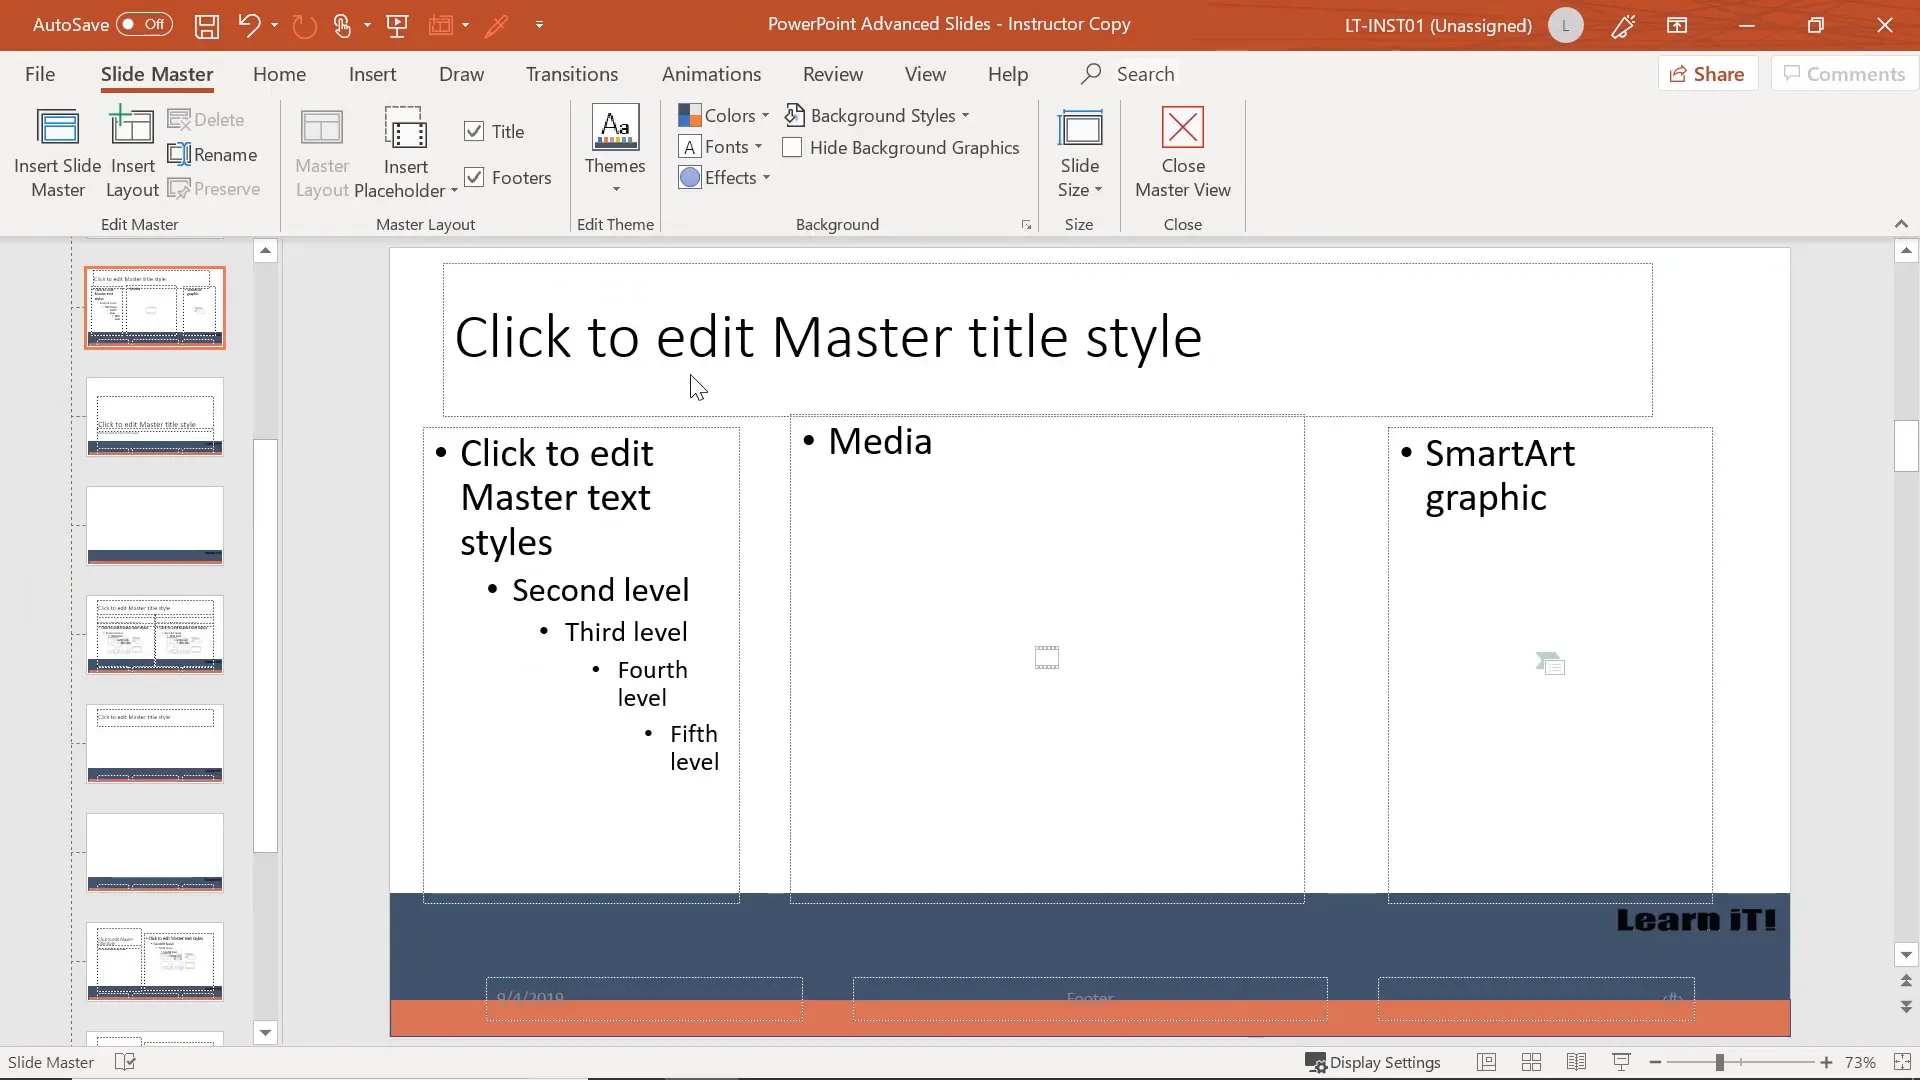
Editing Slide Layouts
Below the Master Slide are the individual slide layouts, such as Title Slide, Title and Content, Two Content, Comparison, and Blank. These layouts dictate how content is arranged on each slide.
You can modify these layouts by adding or removing placeholders, changing positions of text boxes, images, charts, and more. Any changes here affect only the slides using that specific layout.
Creating Custom Slide Layouts
Sometimes the built-in layouts don’t fit your unique presentation needs. PowerPoint allows you to create custom slide layouts within the Slide Master view.
To create a new layout:
- In Slide Master view, click Insert Layout.
- Remove unwanted placeholders like title or footer if needed.
- Rename the layout to something descriptive, such as “PowerPoint Custom Class Layout”.
- Add placeholders for text, pictures, SmartArt, media, charts, etc., positioning them exactly where you want.
For example, you can create a layout with a large text area on the left, three picture placeholders on the right, and a SmartArt placeholder below. This allows users to quickly add content without rearranging elements manually.
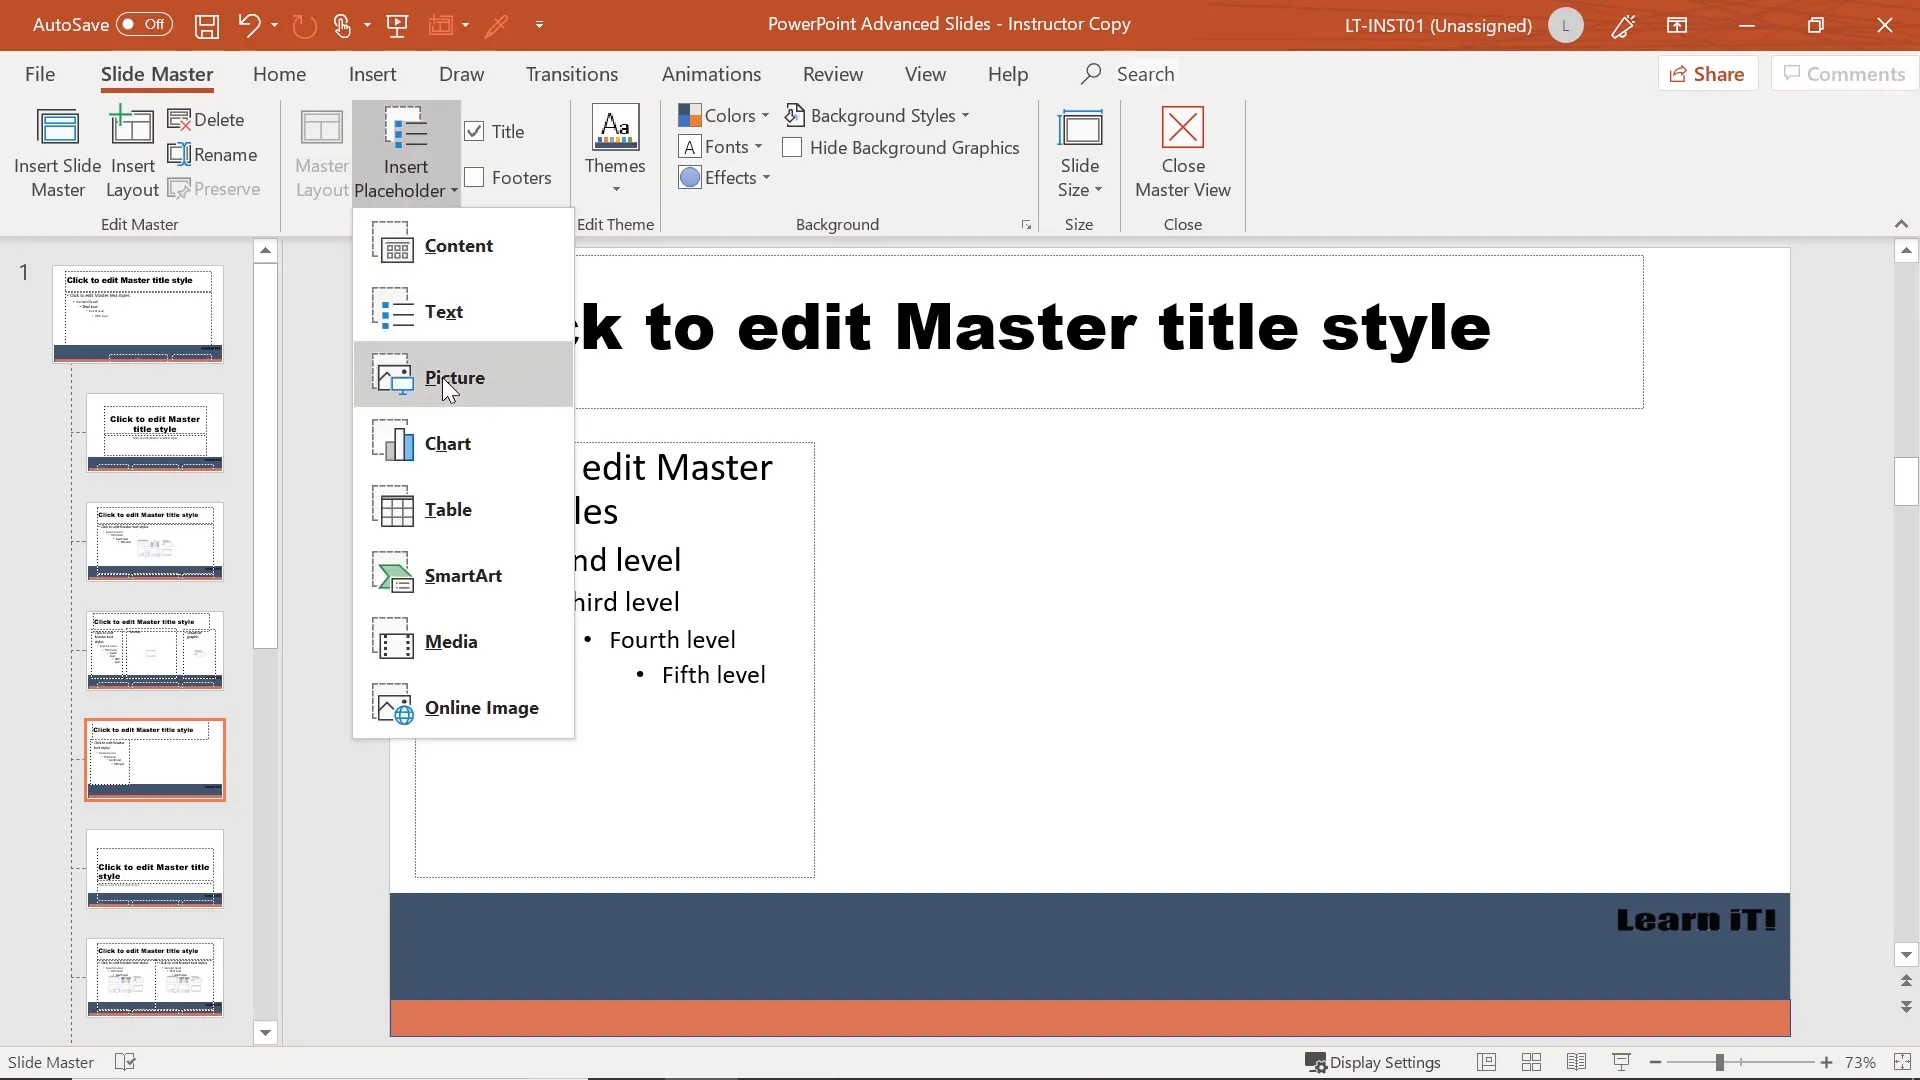
Adding Placeholders
Placeholders are predefined areas where content can be inserted. In your custom layout, use the Insert Placeholder option to add:
- Text
- Picture
- Chart
- Table
- SmartArt
- Media
- Online Video
Adjust the size and position of each placeholder to suit your design. For instance, adding three picture placeholders side-by-side is useful for showcasing product images or team photos.
Applying and Using Custom Layouts
Once you close Slide Master view, your custom layouts become available in the slide New Slide dropdown menu. You can select your “PowerPoint Custom Class Layout” and start adding content immediately with the predefined structure.

Saving Your Presentation as a Template
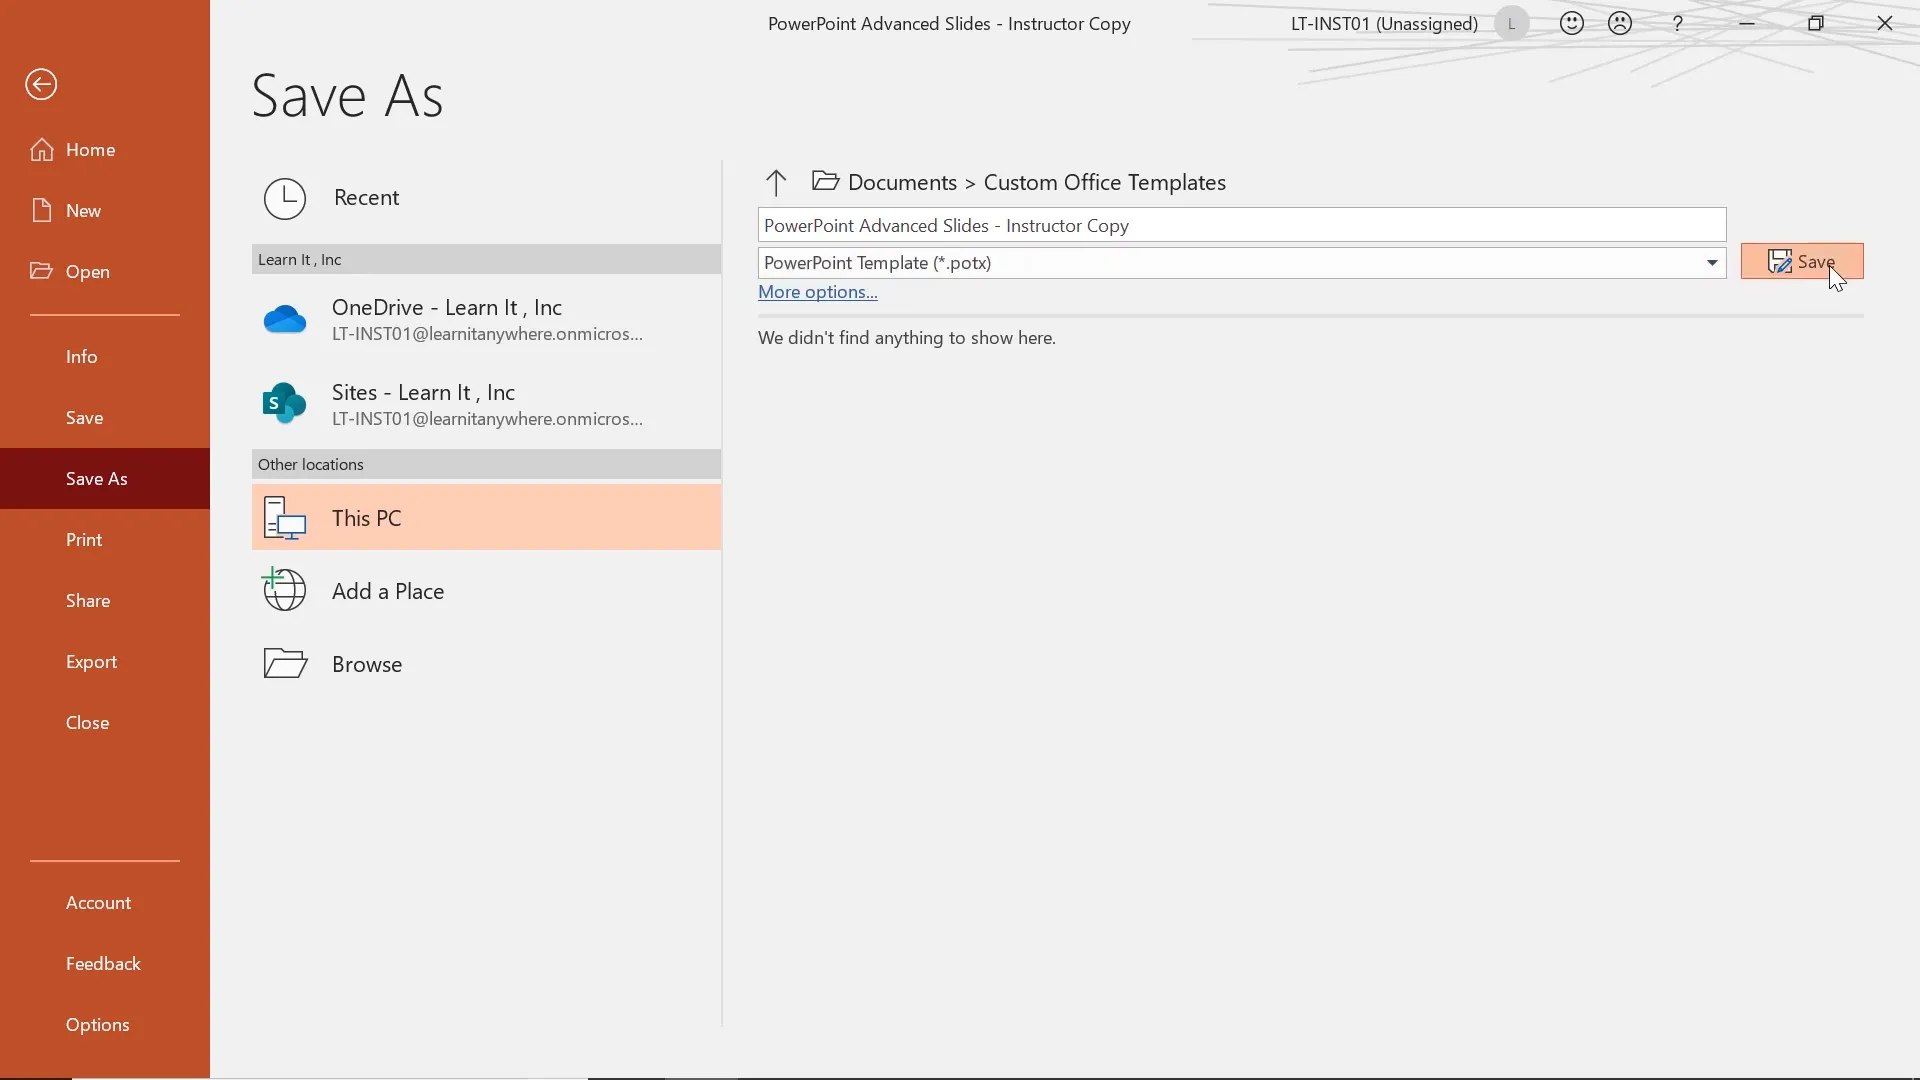
To reuse your custom layouts and styles, save your presentation as a PowerPoint Template (.potx):
- Go to File > Save As.
- Choose the location (must be the default template folder for PowerPoint to recognize it).
- Select PowerPoint Template (*.potx) from the file type dropdown.
- Save the file.
This template will appear in your New tab when creating presentations, allowing you to start with your custom layouts and branding instantly.
Working with SmartArt Graphics
What is SmartArt?
SmartArt is a feature that combines shapes and text into visually appealing diagrams, lists, processes, hierarchies, and more. It helps transform plain bullet points into engaging graphics that enhance audience understanding.
SmartArt has been improved over the years and continues to offer a variety of customizable options.

Creating and Customizing SmartArt
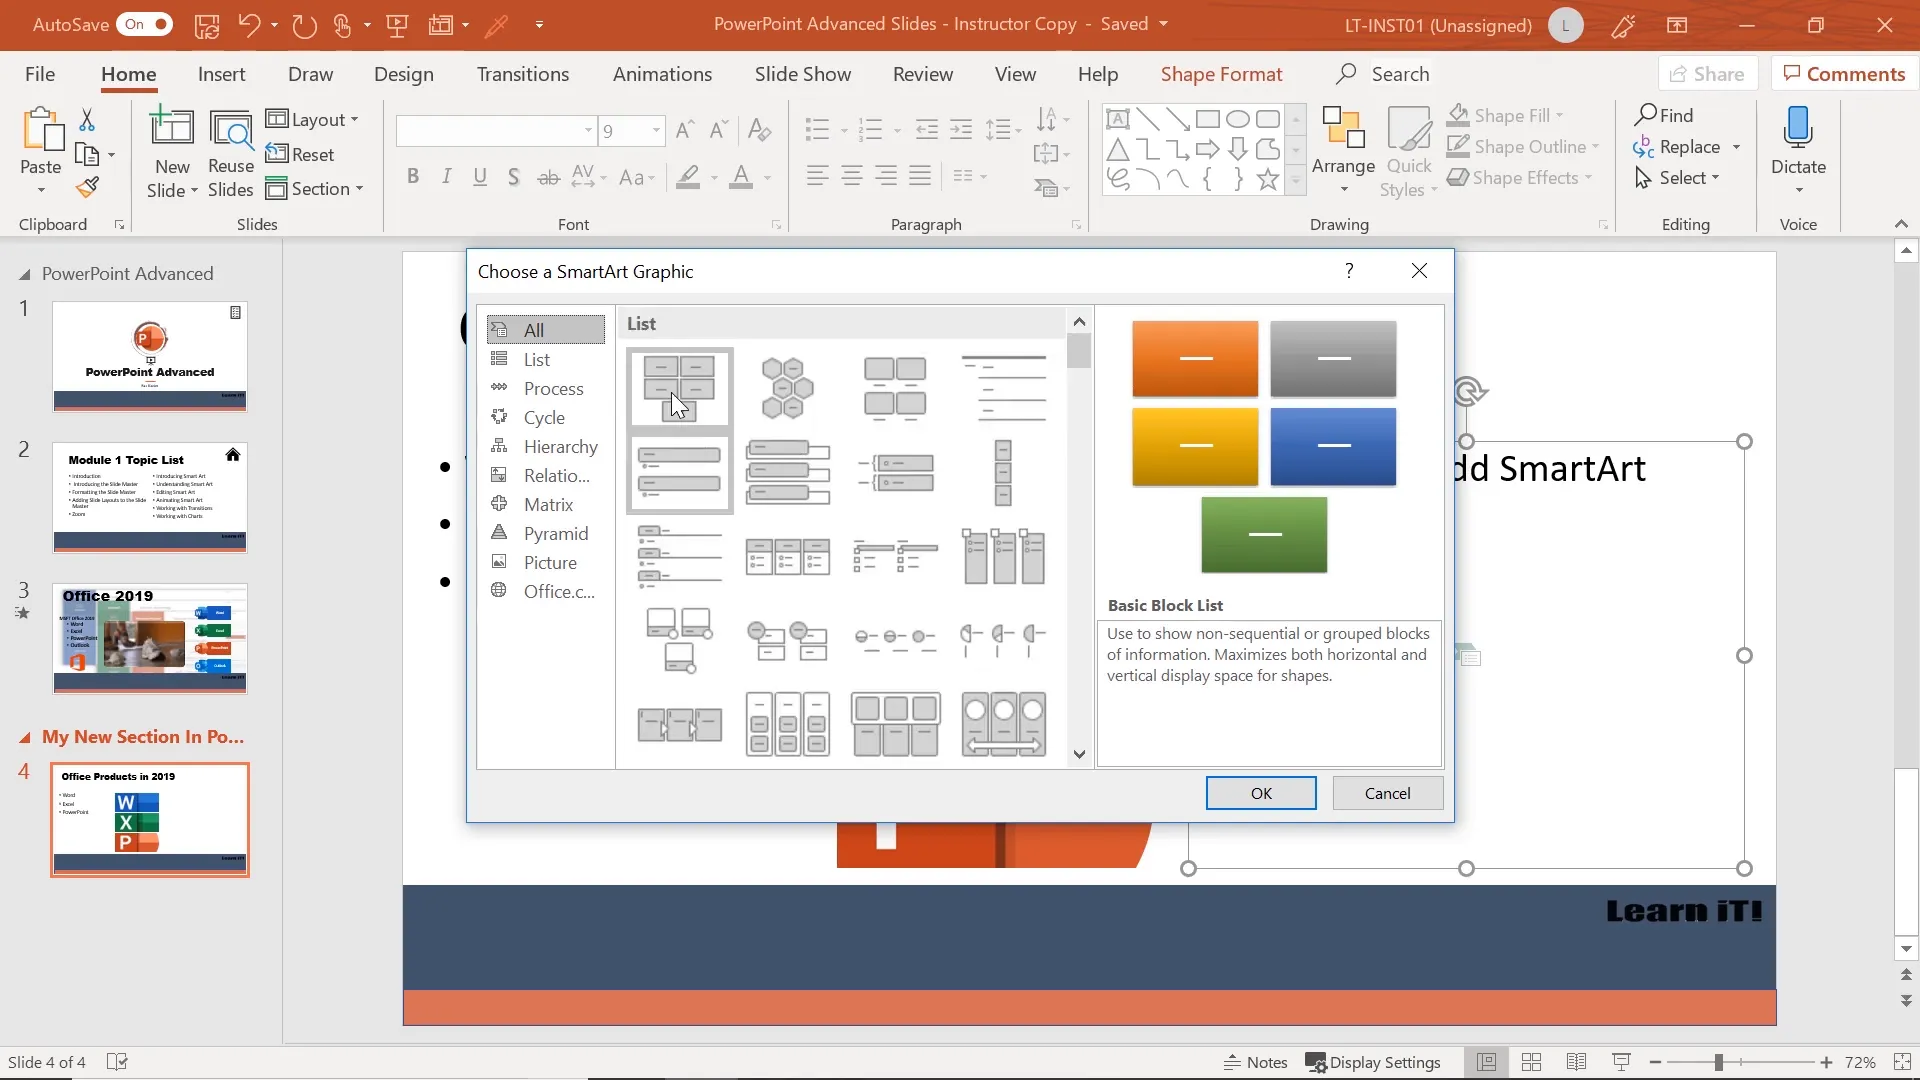
To insert SmartArt:
- Go to the slide and click the SmartArt icon in a placeholder or the Insert tab.
- Choose a category and layout (e.g., List, Process, Cycle, Hierarchy).
- Enter your text in the text pane, which can be expanded or collapsed.
You can customize colors and styles through the SmartArt Design tab, including individual shape fills, outlines, and effects.
Converting Bulleted Lists to SmartArt
If you already have bulleted lists, you can convert them to SmartArt quickly:
- Select the bulleted text.
- Right-click and choose Convert to SmartArt or use the Home tab option.
This feature saves time and improves the visual appeal of your content.
Editing and Animating SmartArt
SmartArt graphics are grouped objects combining shapes and text. You can:
- Convert SmartArt to individual shapes for more granular editing.
- Ungroup shapes to move or animate them separately.
When animating SmartArt:
- Animating the SmartArt as a whole moves it as one object.
- Converting to shapes and ungrouping allows animating individual components one by one.
Using the animation pane helps manage multiple animations efficiently, adjusting their order, timing, and triggers.
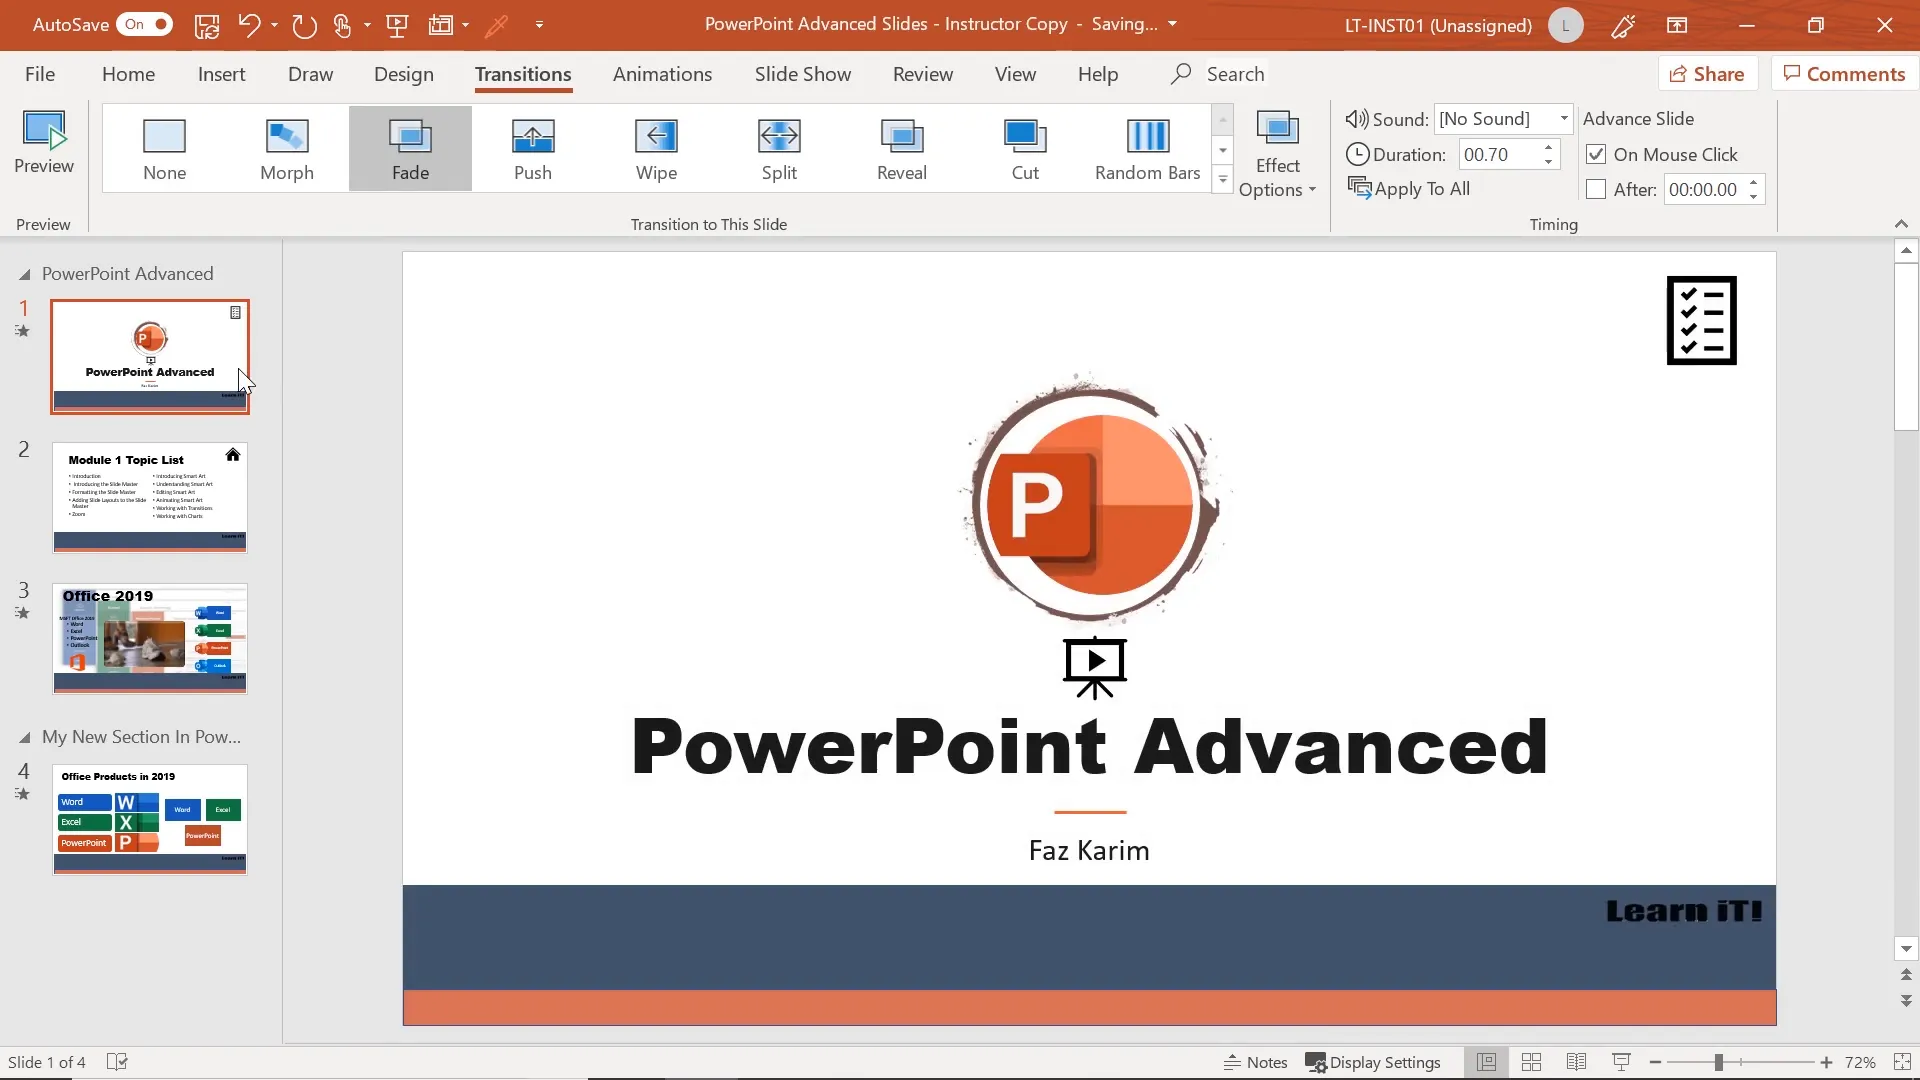
Applying Transitions for Smooth Slide Changes
Transitions add subtle animations between slides, enhancing the flow of your presentation. PowerPoint offers various transition effects, including fades, flashes, drapes, and uncovers.
To apply transitions:
- Select a slide and go to the Transitions tab.
- Choose a transition effect and customize options such as direction and duration.
- Set the timing for transitioning on mouse click or after a specified delay.
- Use Apply to All to maintain consistency across slides.
Transitions can be subtle yet impactful when used appropriately, setting the tone for your presentation.
Using Zoom for Interactive Navigation
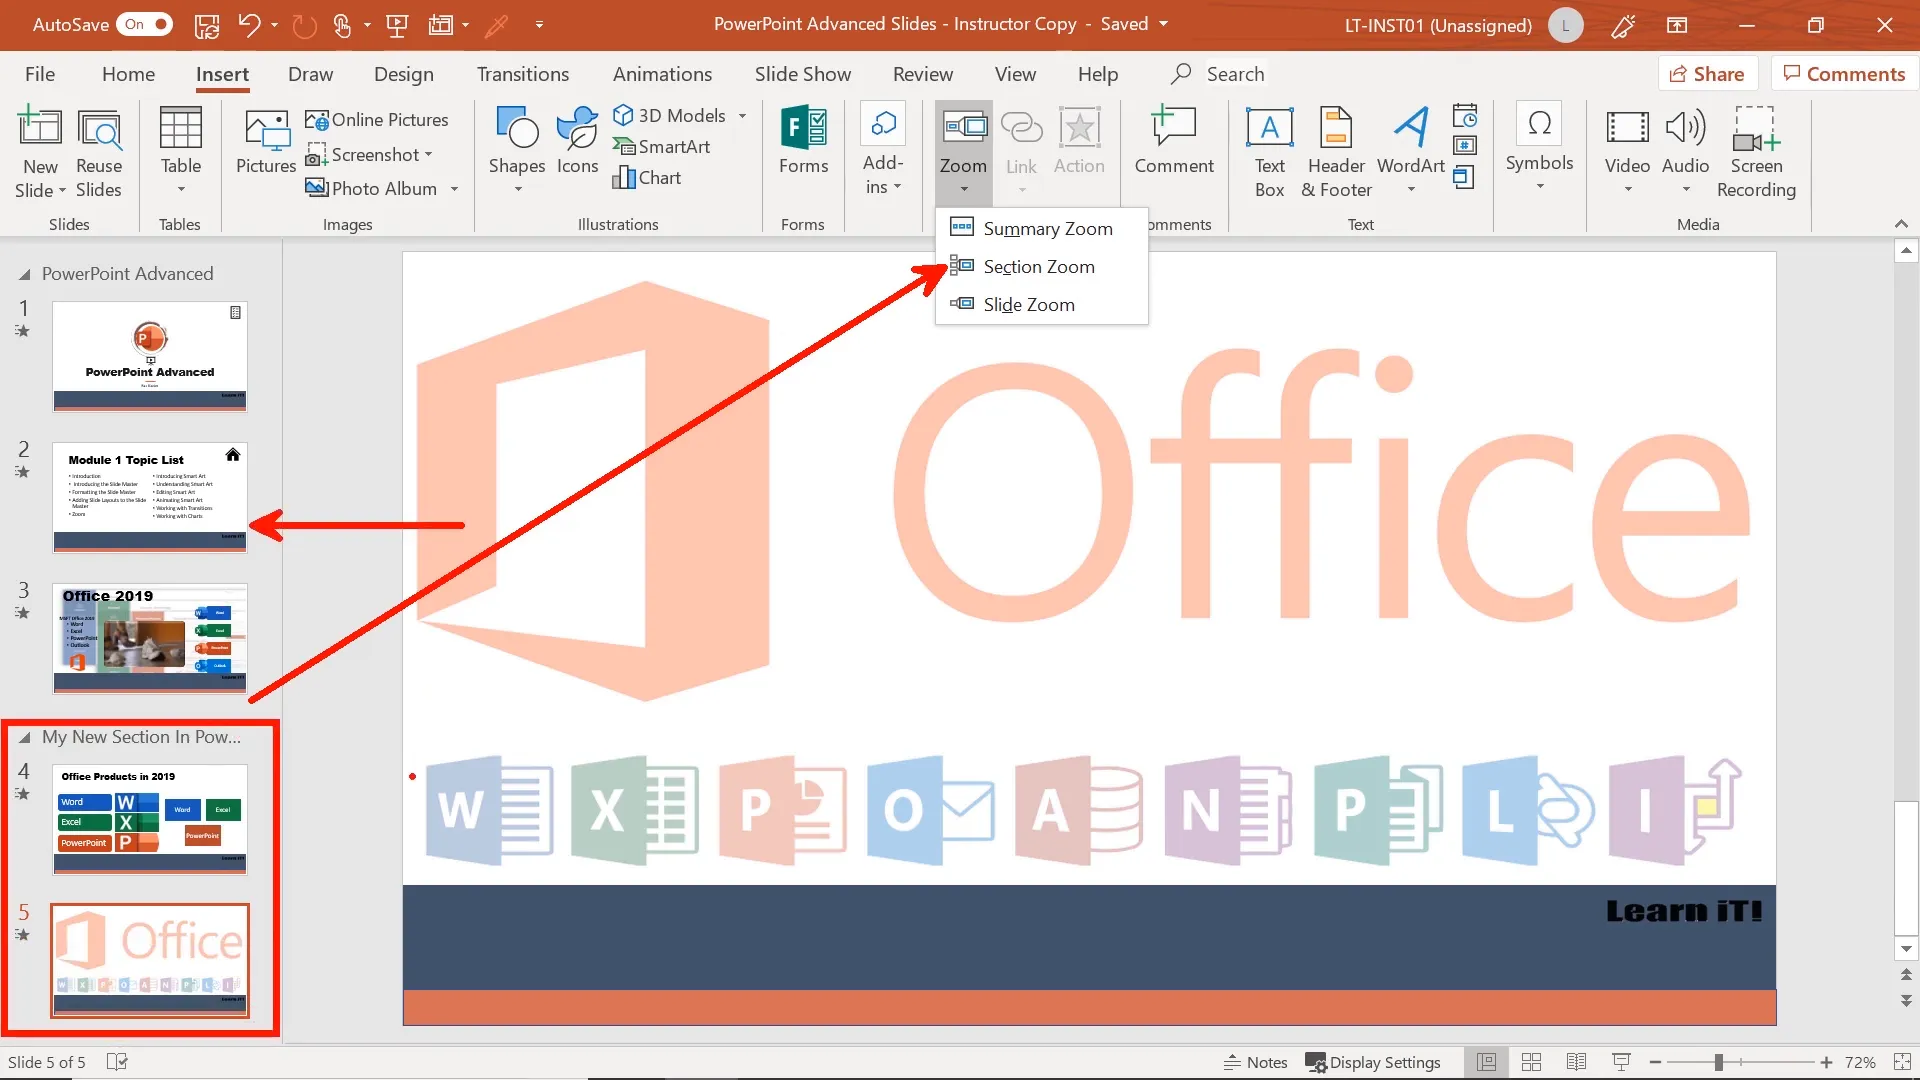
What is Zoom in PowerPoint 2019?
Zoom is a powerful feature that allows you to create interactive, non-linear presentations by zooming into specific slides or sections directly from a summary or table of contents slide.
You can insert three types of Zooms:
- Slide Zoom: Zoom into a specific slide.
- Section Zoom: Zoom into an entire section of slides.
- Summary Zoom: Create a summary slide with zoom links to multiple sections or slides.
Customizing Zoom Objects
After inserting a Zoom, you can customize the thumbnail image by changing it to an icon or online picture. This enhances the visual appeal and helps intuitively guide your audience.
Alignment tools help position your zoom objects neatly on the slide.
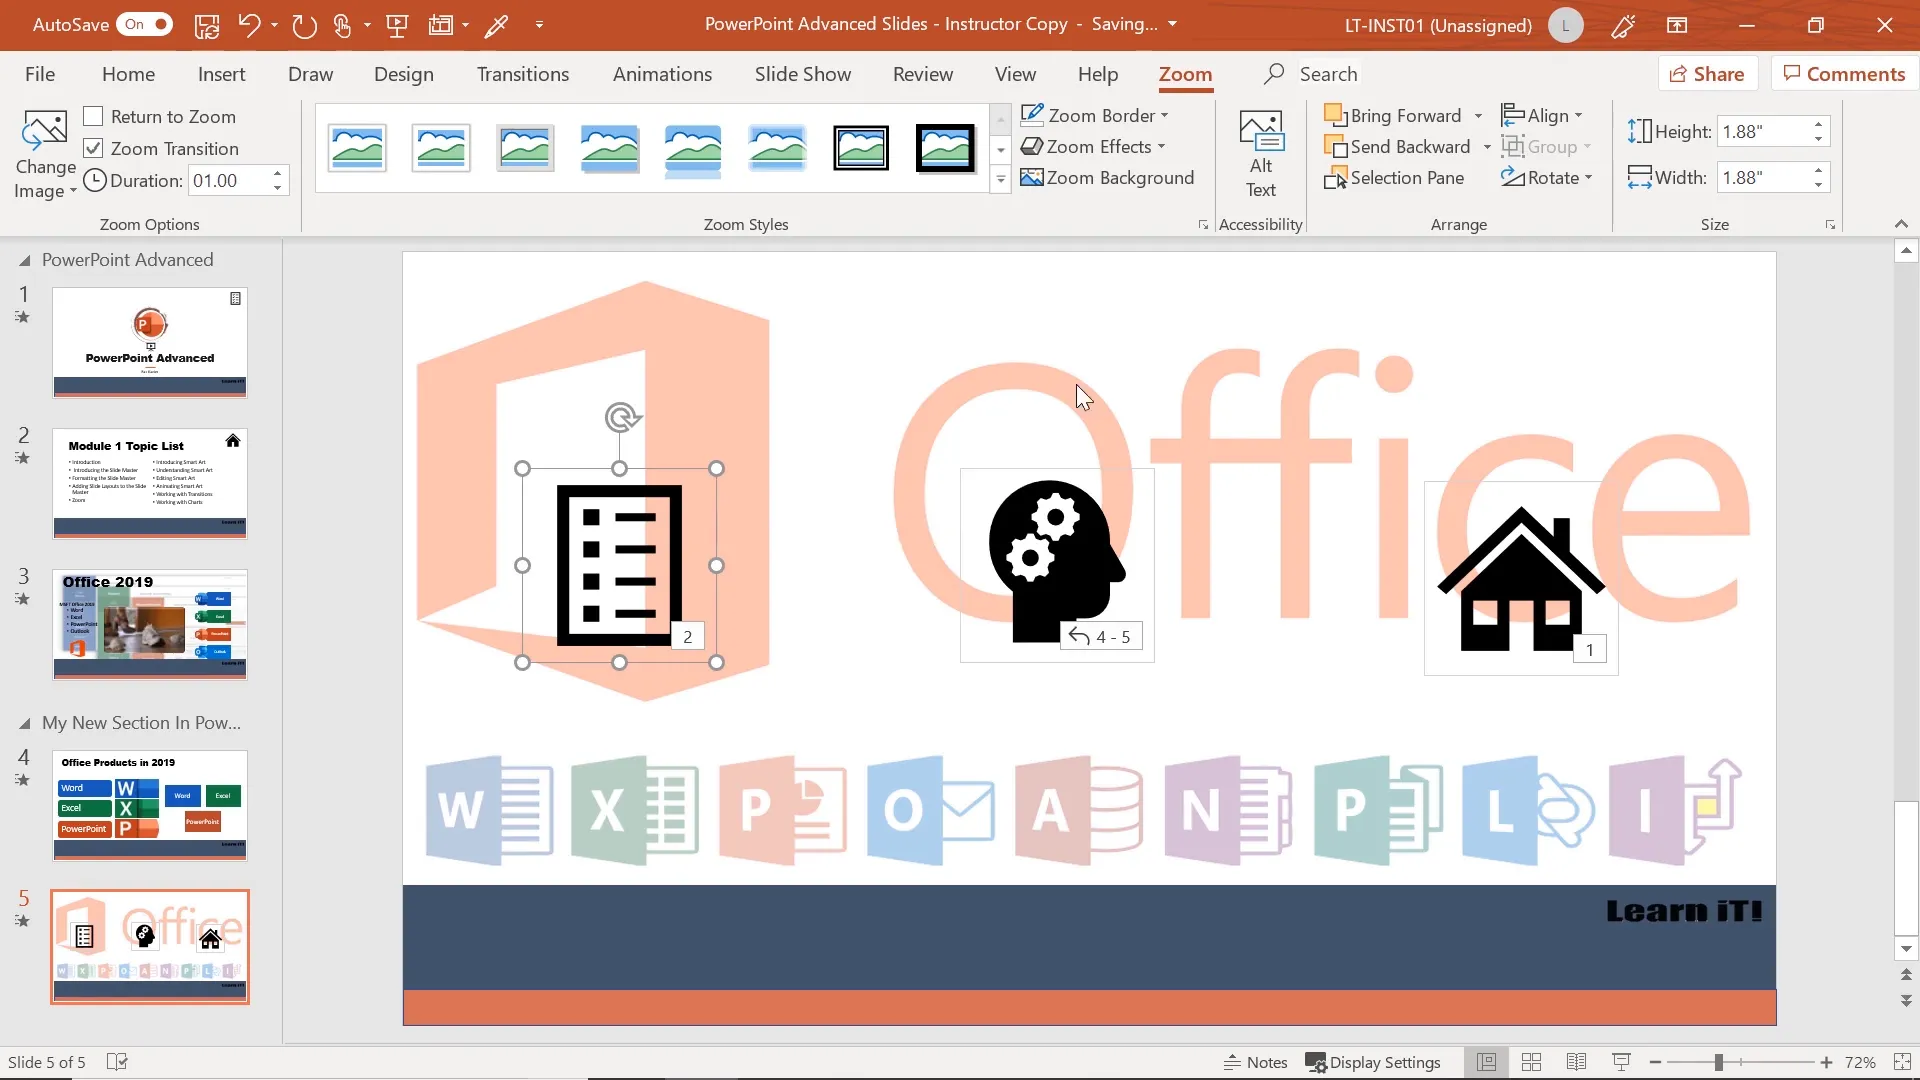
Using Zoom During Presentation
In Presenter View, clicking on a Zoom object animates and navigates to the linked slide or section, providing a dynamic and engaging presentation experience.
This feature is especially useful for large presentations or interactive meetings where you want to jump between topics freely.
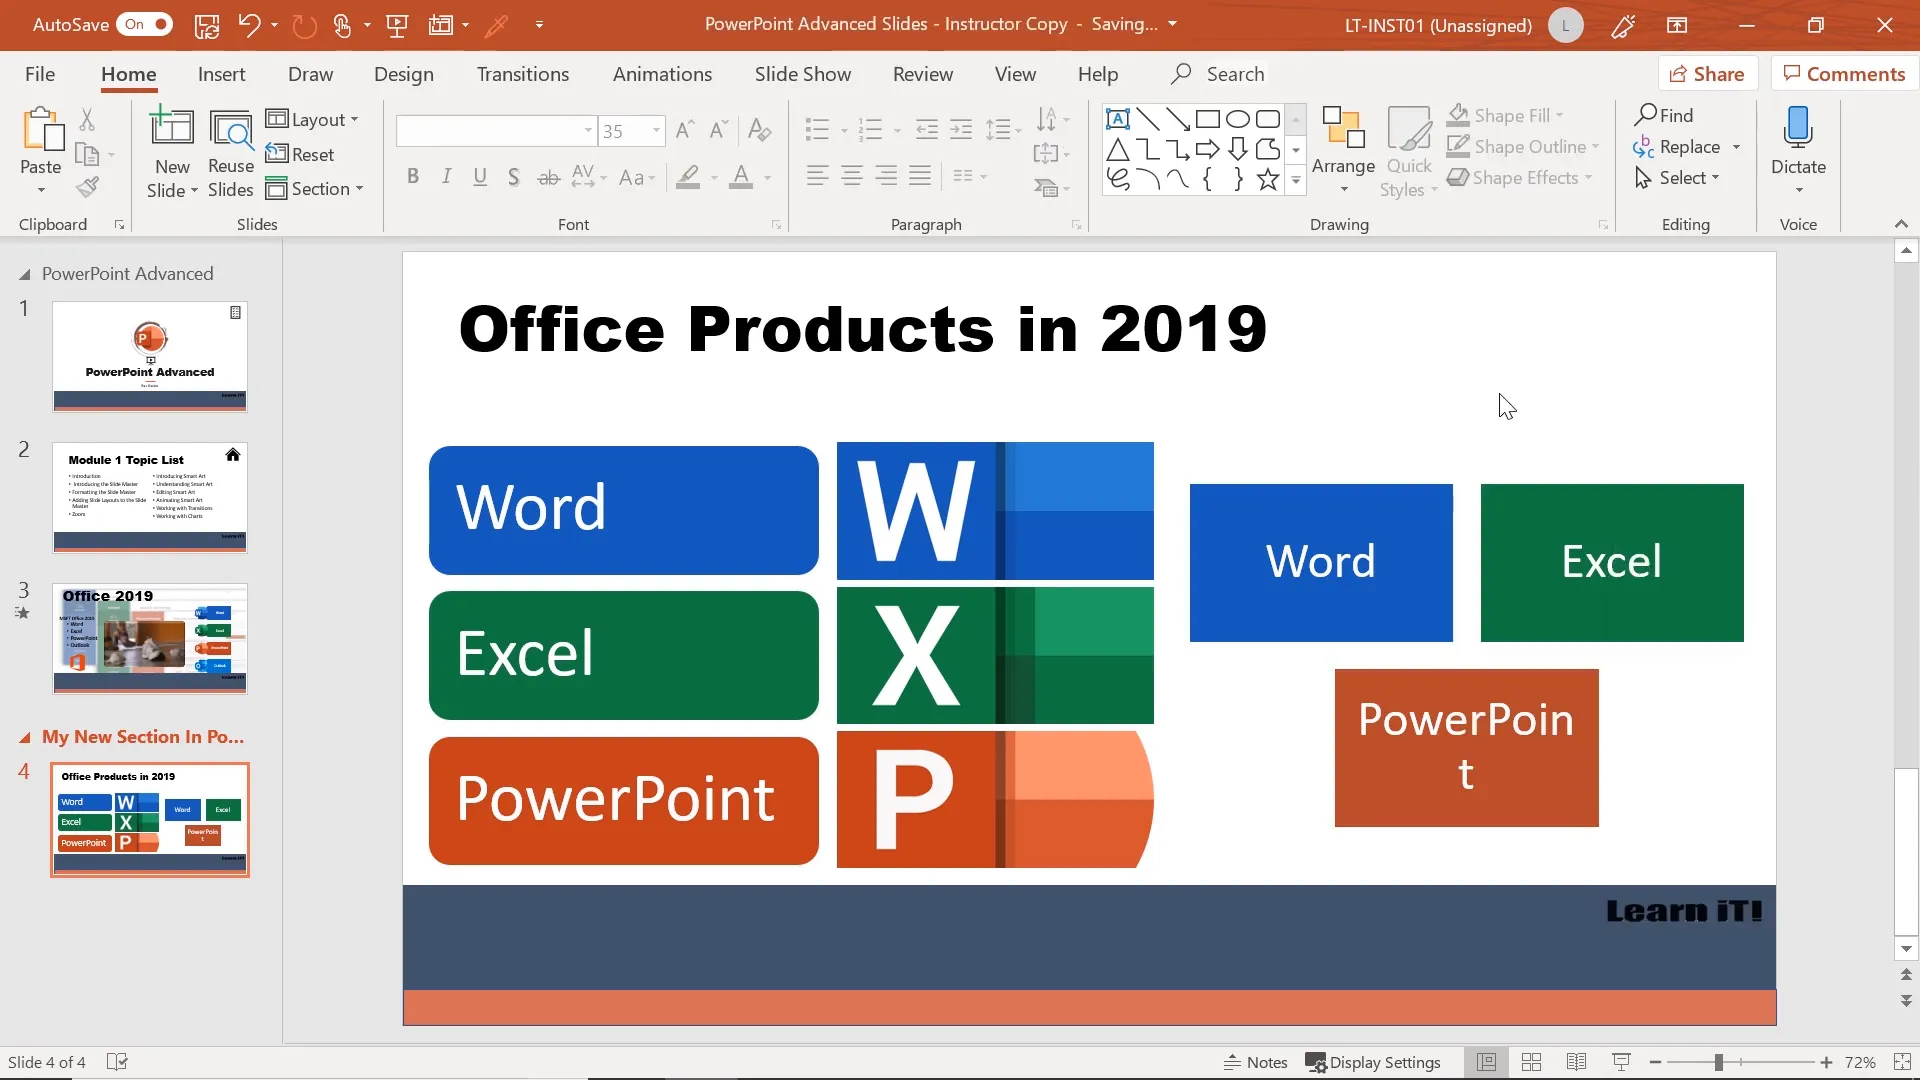
Inserting and Customizing Charts
Why Use Charts in Presentations?
Charts are essential for visually representing data, making complex numbers easier to understand. PowerPoint 2019 offers built-in chart tools, as well as the ability to import charts from Excel.
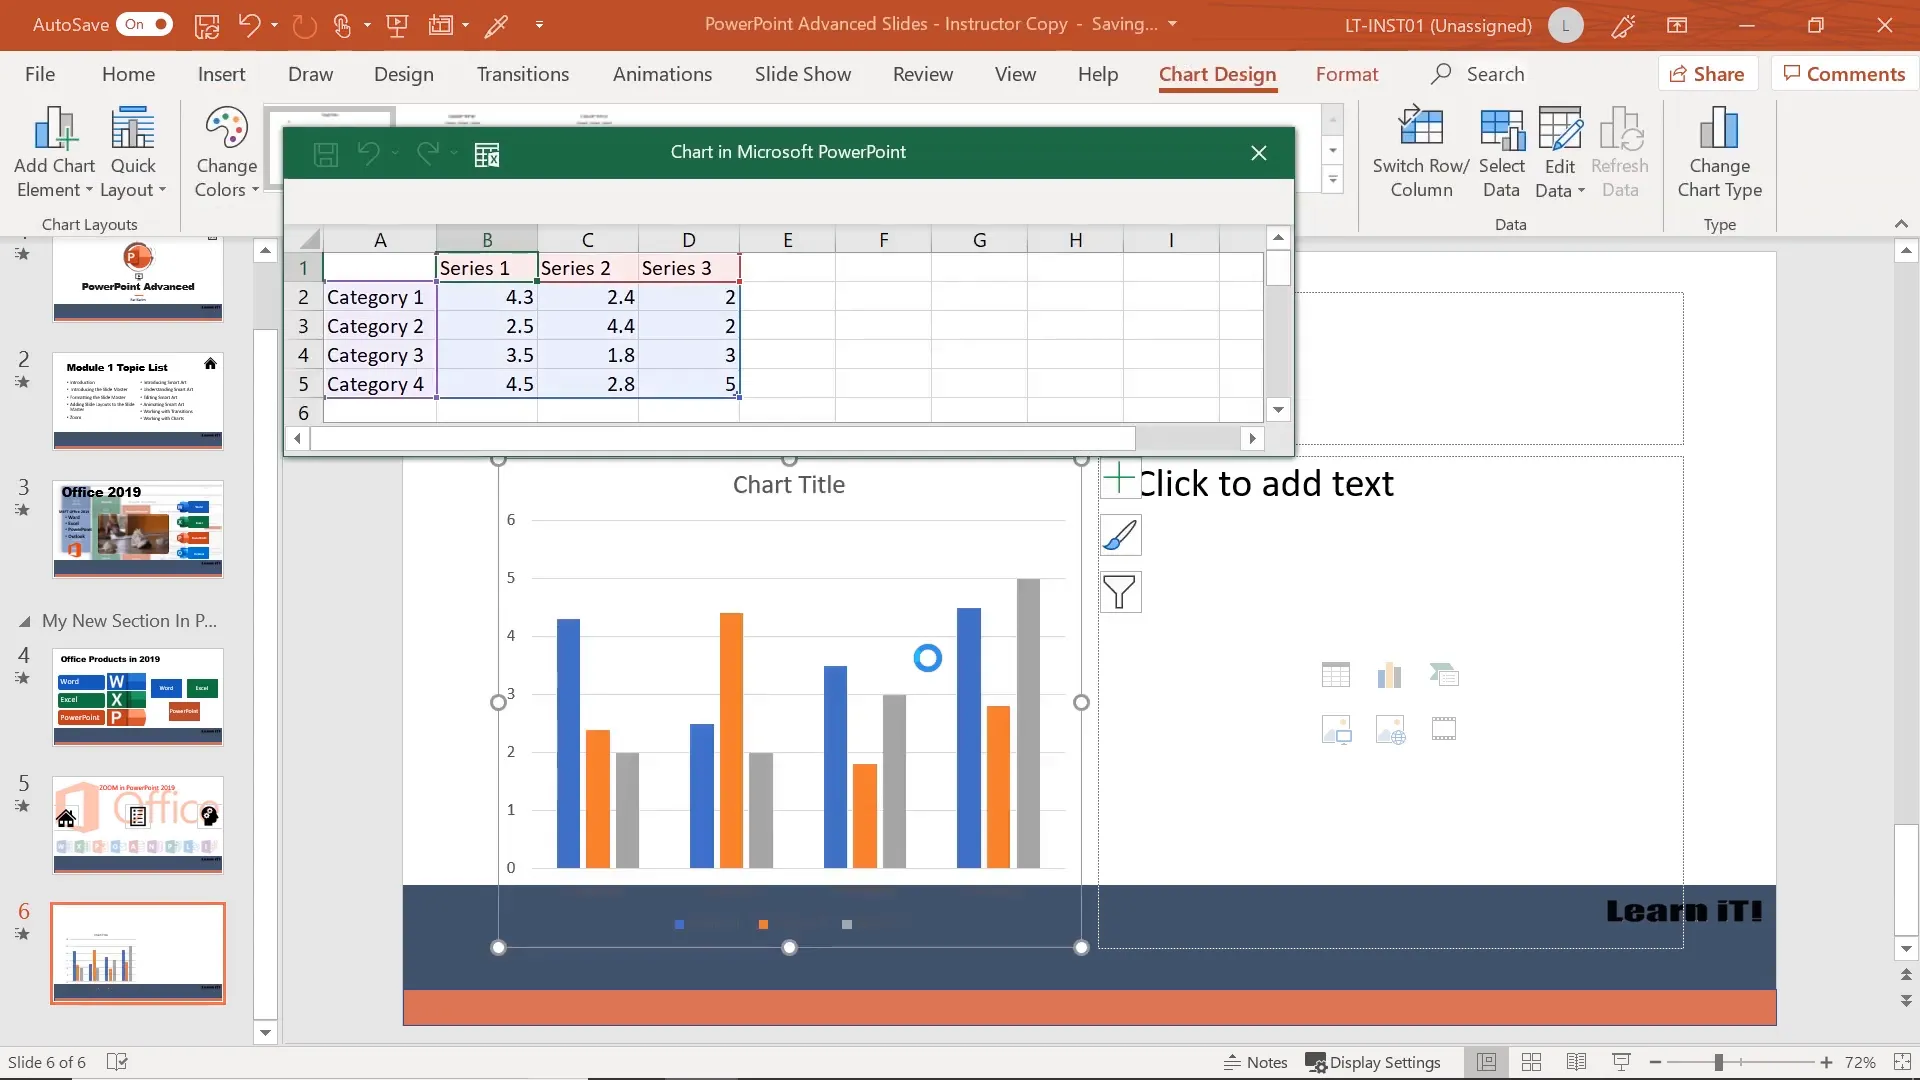
Creating Charts in PowerPoint
To insert a chart:
- Insert a new slide with a content placeholder or go to Insert > Chart.
- Choose the chart type (e.g., clustered column, line, pie).
- Fill in the data in the embedded Excel worksheet.
- Close the worksheet to see the chart on your slide.
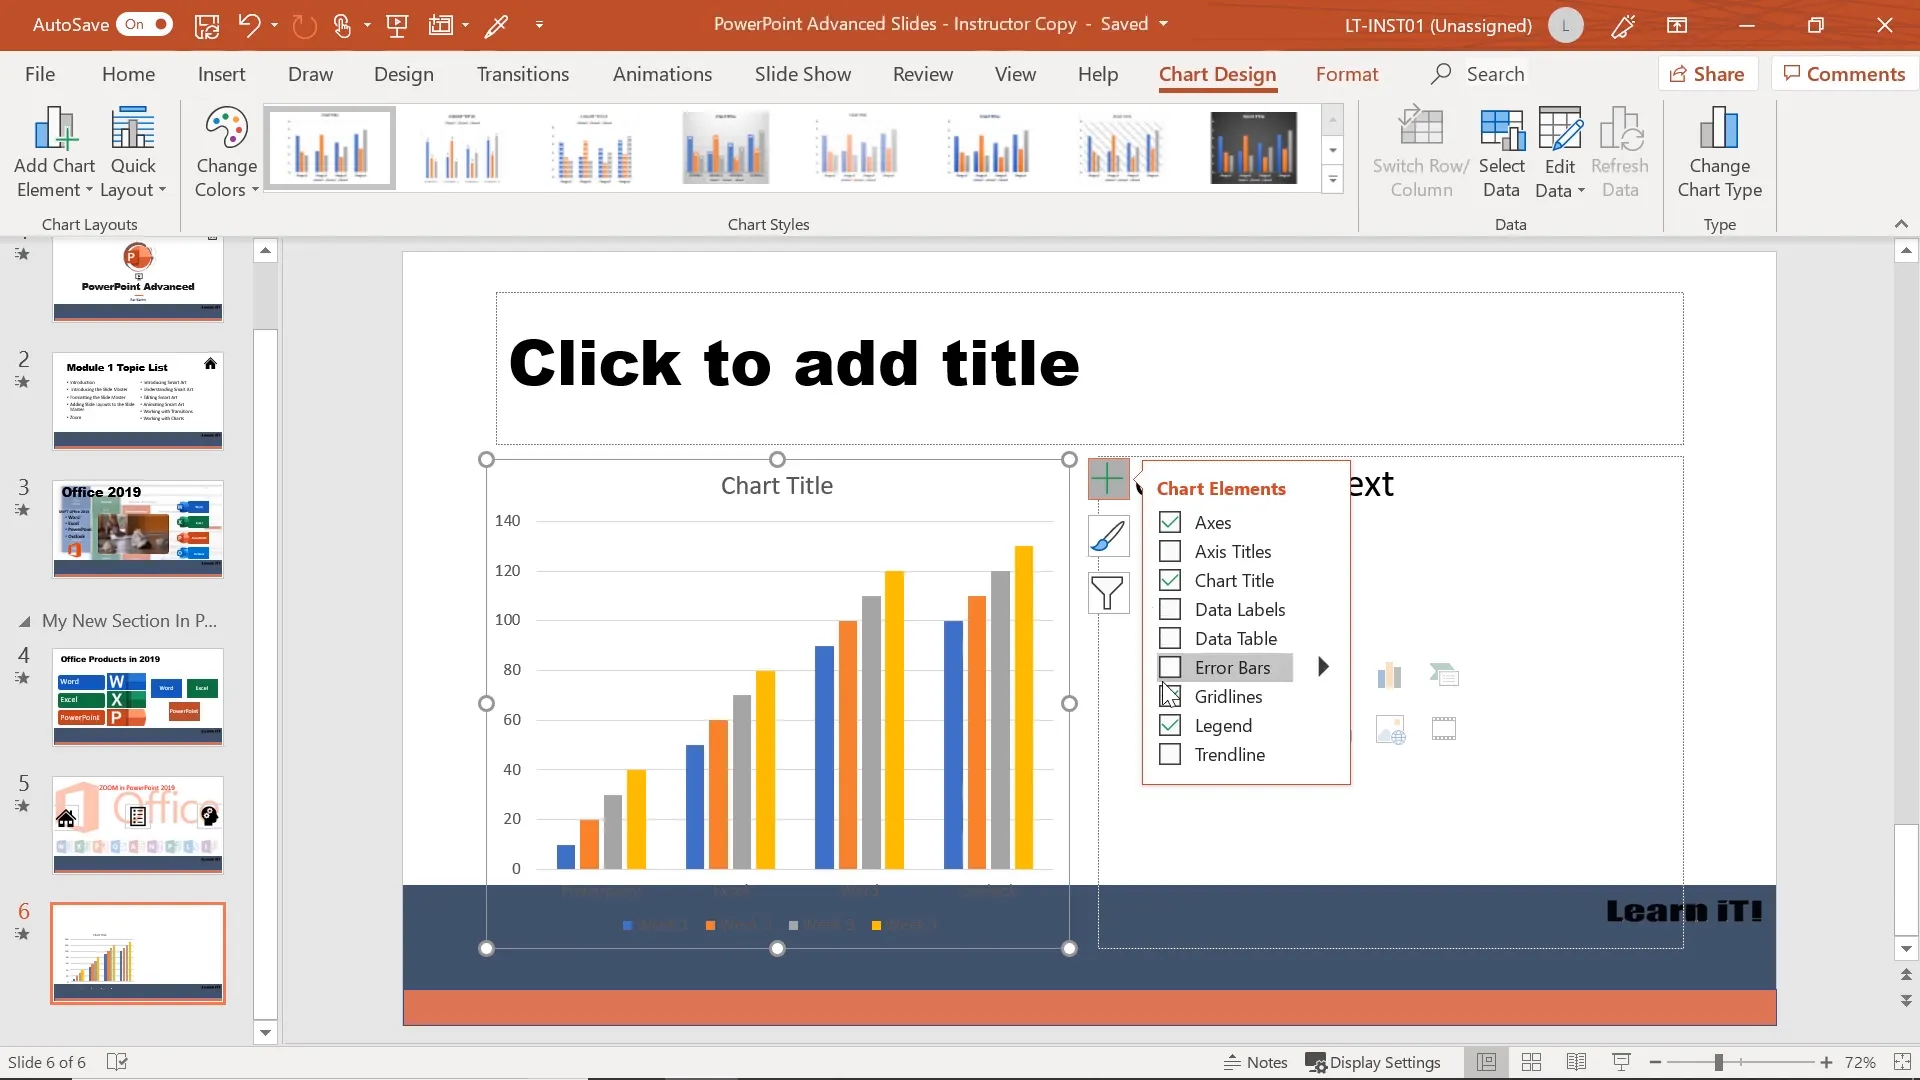
Customizing Charts
Use chart tools to:
- Remove gridlines for a cleaner look.
- Move the legend to a prominent position, such as the top.
- Remove the chart title if the slide already has a title.
- Change chart styles and colors to match your theme.
- Filter data to focus on specific series or categories.
Importing Excel Charts
If you already have charts prepared in Excel, simply copy and paste them into PowerPoint. This maintains the original formatting and allows for quick integration.
Collaborating with Comments
Comments are a vital collaboration tool, allowing reviewers to leave feedback directly on slides or specific objects. This eliminates the need for printed notes or separate emails, streamlining the review process.

To add comments:
- Select the slide or object.
- Go to the Review tab and click New Comment.
- Type your feedback in the comment pane.
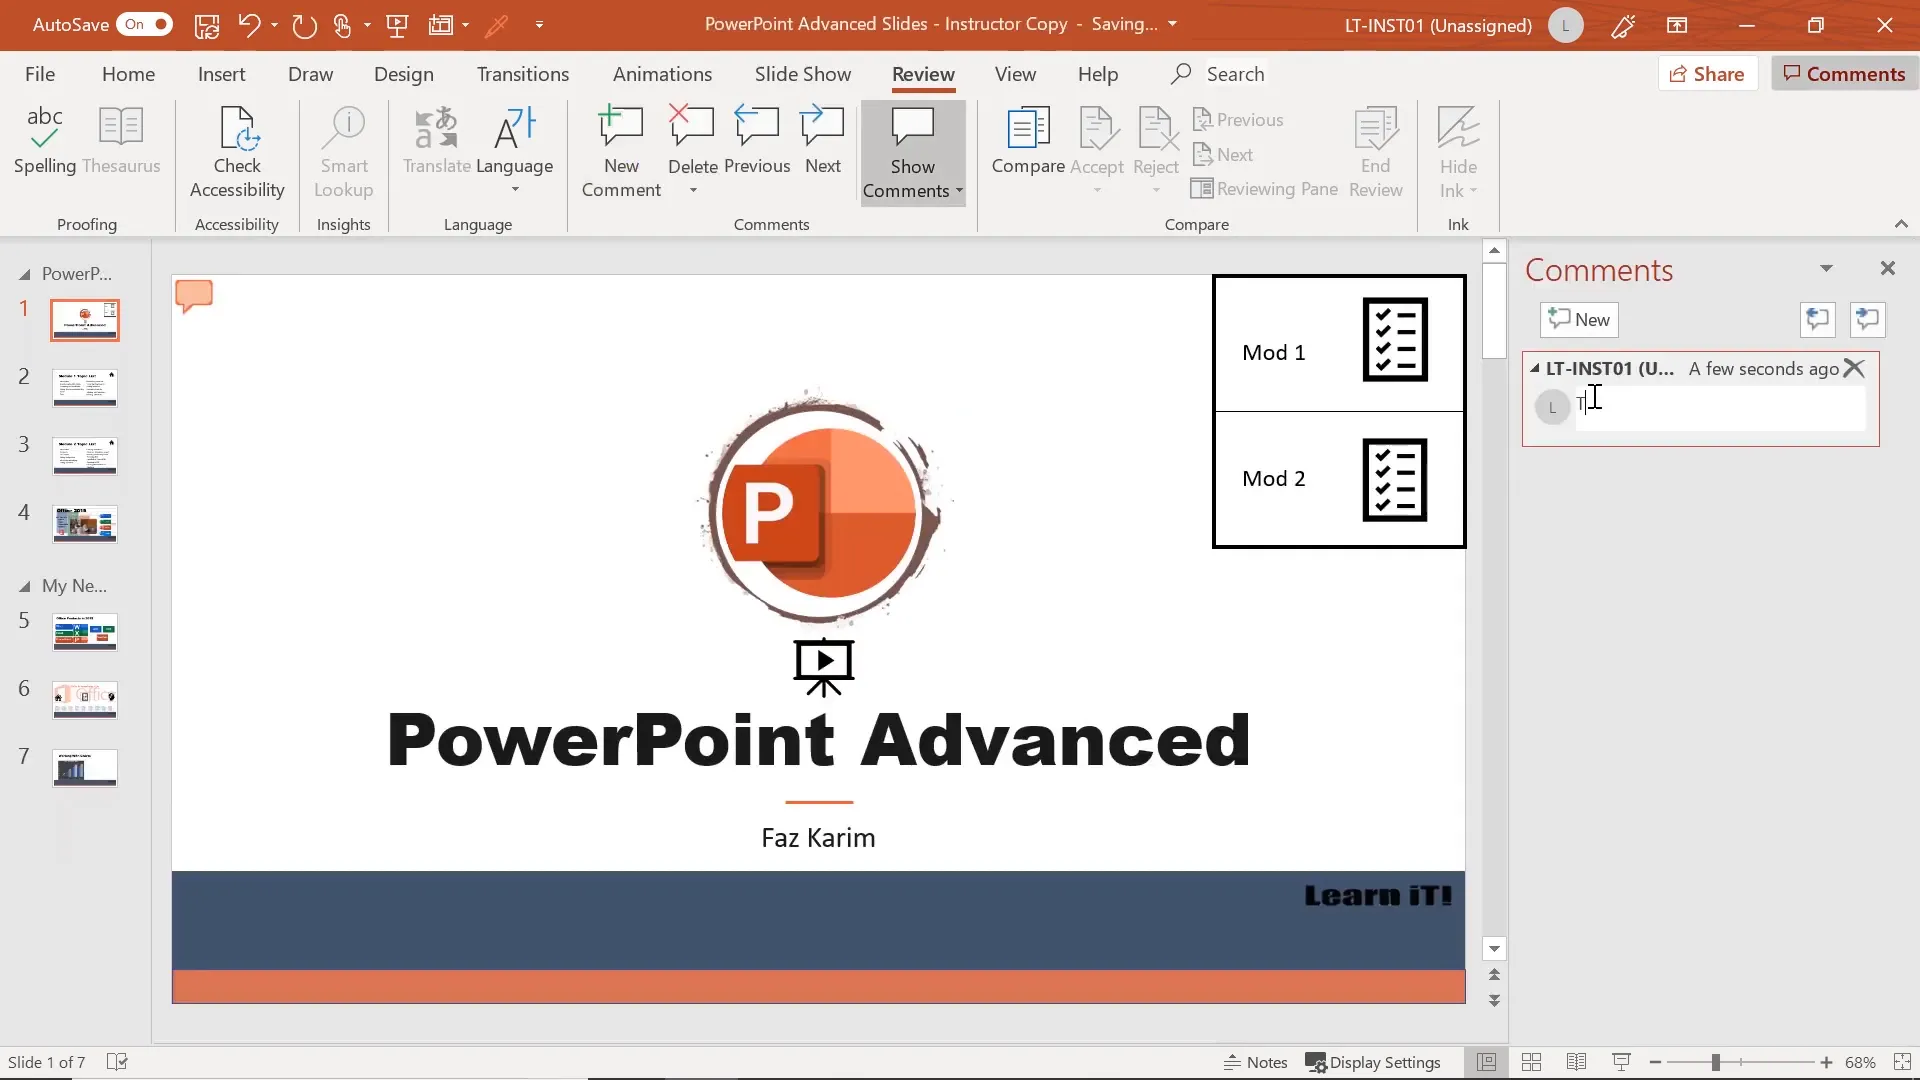
Comments do not appear during slideshow mode, ensuring they are only visible to editors and reviewers.
To manage comments:
- Use the Next and Previous buttons to cycle through comments.
- Open the comments pane to view all comments at once.
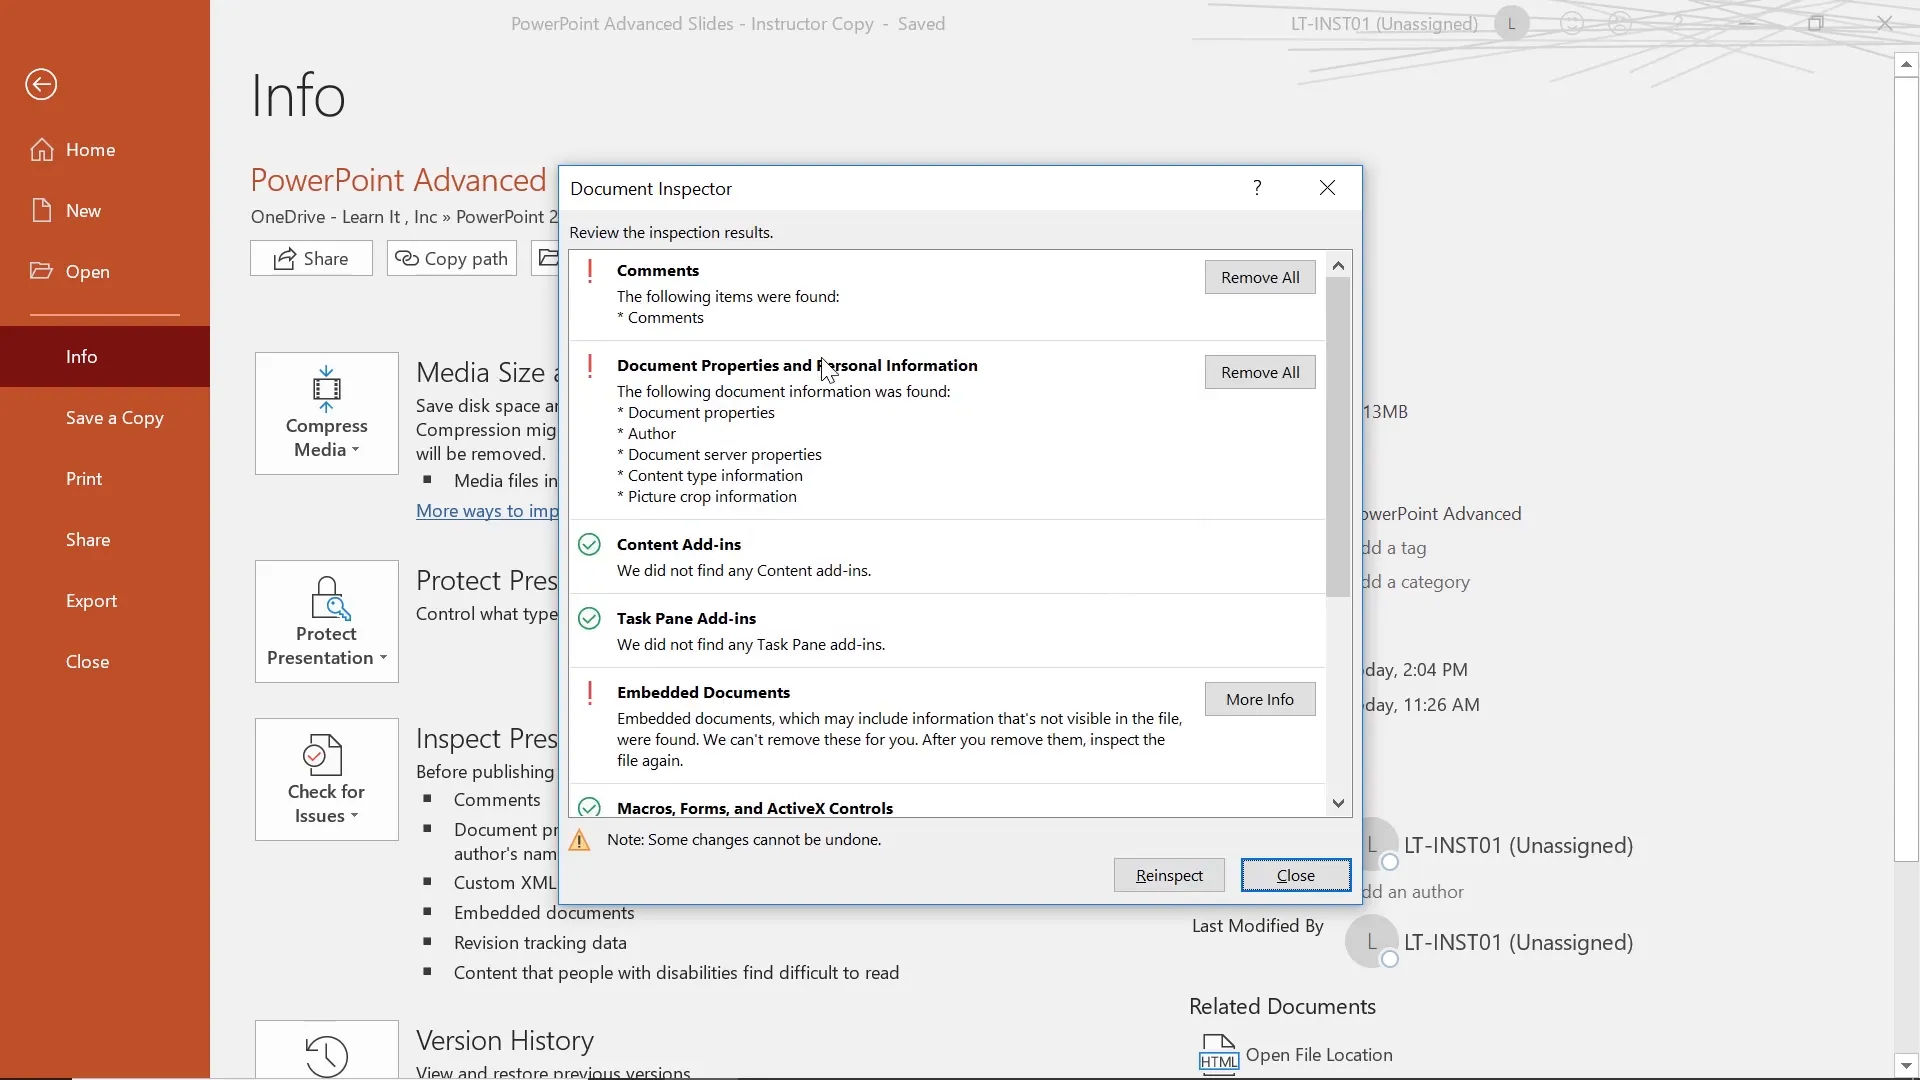
- Delete unwanted comments individually or use the Inspect Document feature to remove all comments before finalizing.
Eyedropper Tool: Precise Color Matching
The Eyedropper tool is a handy feature for graphic design, allowing you to pick exact colors from anywhere on your slide or even outside PowerPoint.
To use the Eyedropper:
- Select a shape or text.
- Go to Shape Fill or Font Color and select Eyedropper.
- Click and hold the left mouse button, then drag outside the slide area to pick colors from other parts of your screen.
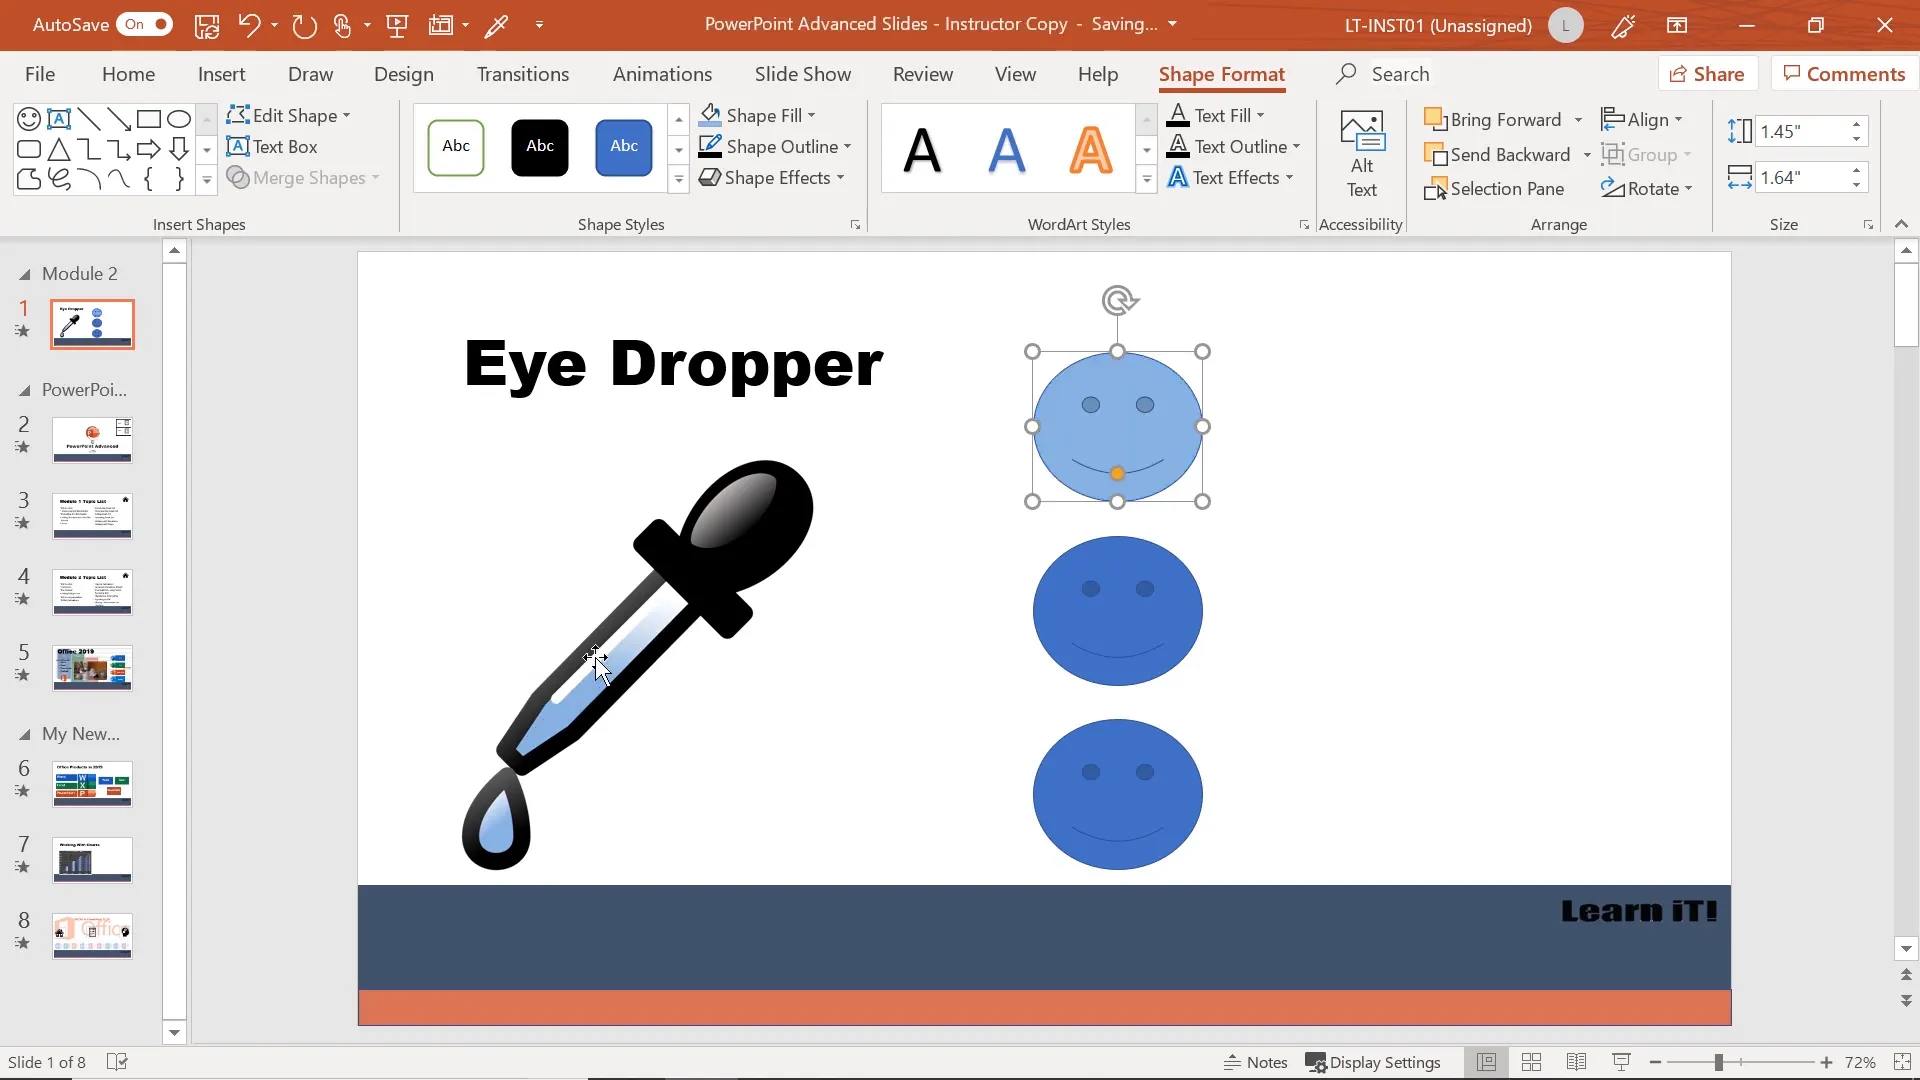
This is especially useful for matching corporate branding colors or coordinating your presentation colors with images.
Advanced Animations
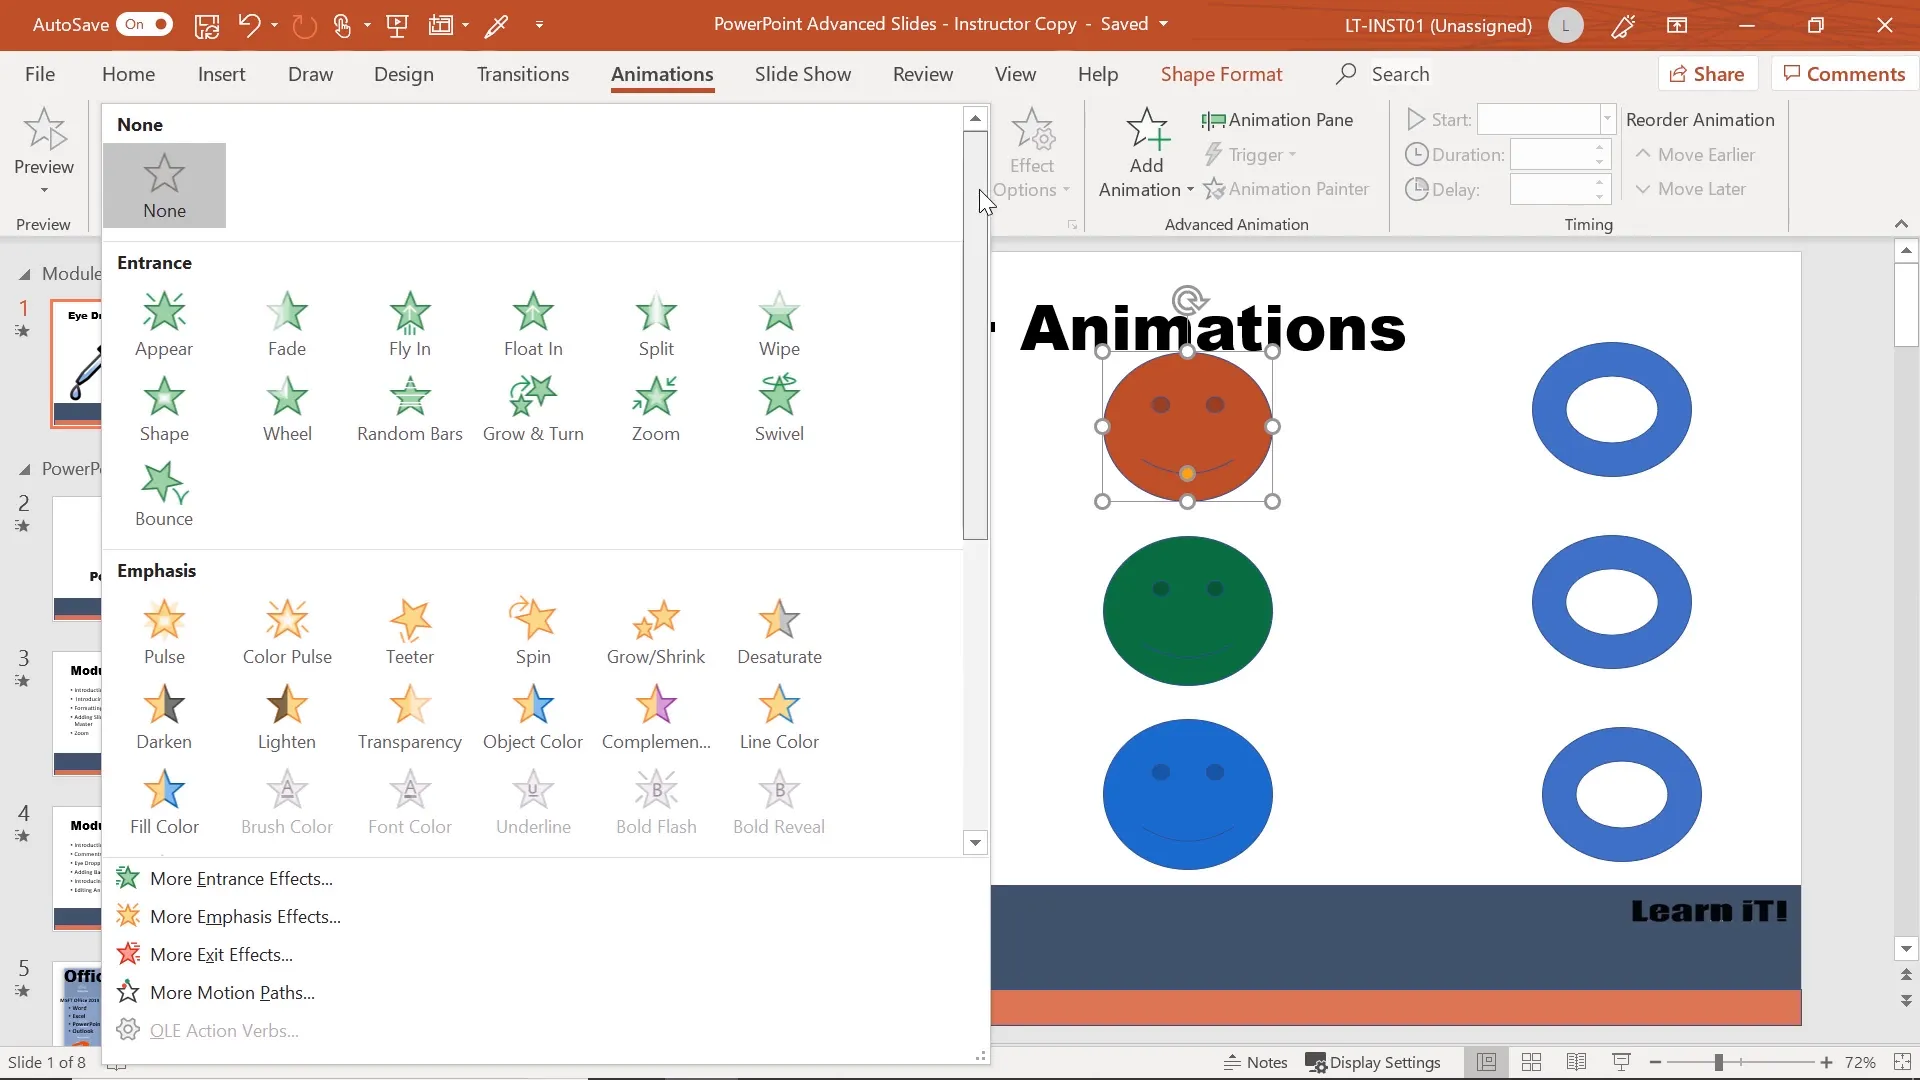
Applying Multiple Animations
Animations bring your slides to life. PowerPoint 2019 allows you to add multiple animations to a single object.
To add multiple animations:
- Select the object.
- Use the Add Animation button instead of replacing existing animations.
Common animation types include entrances, emphasis, exits, and motion paths.
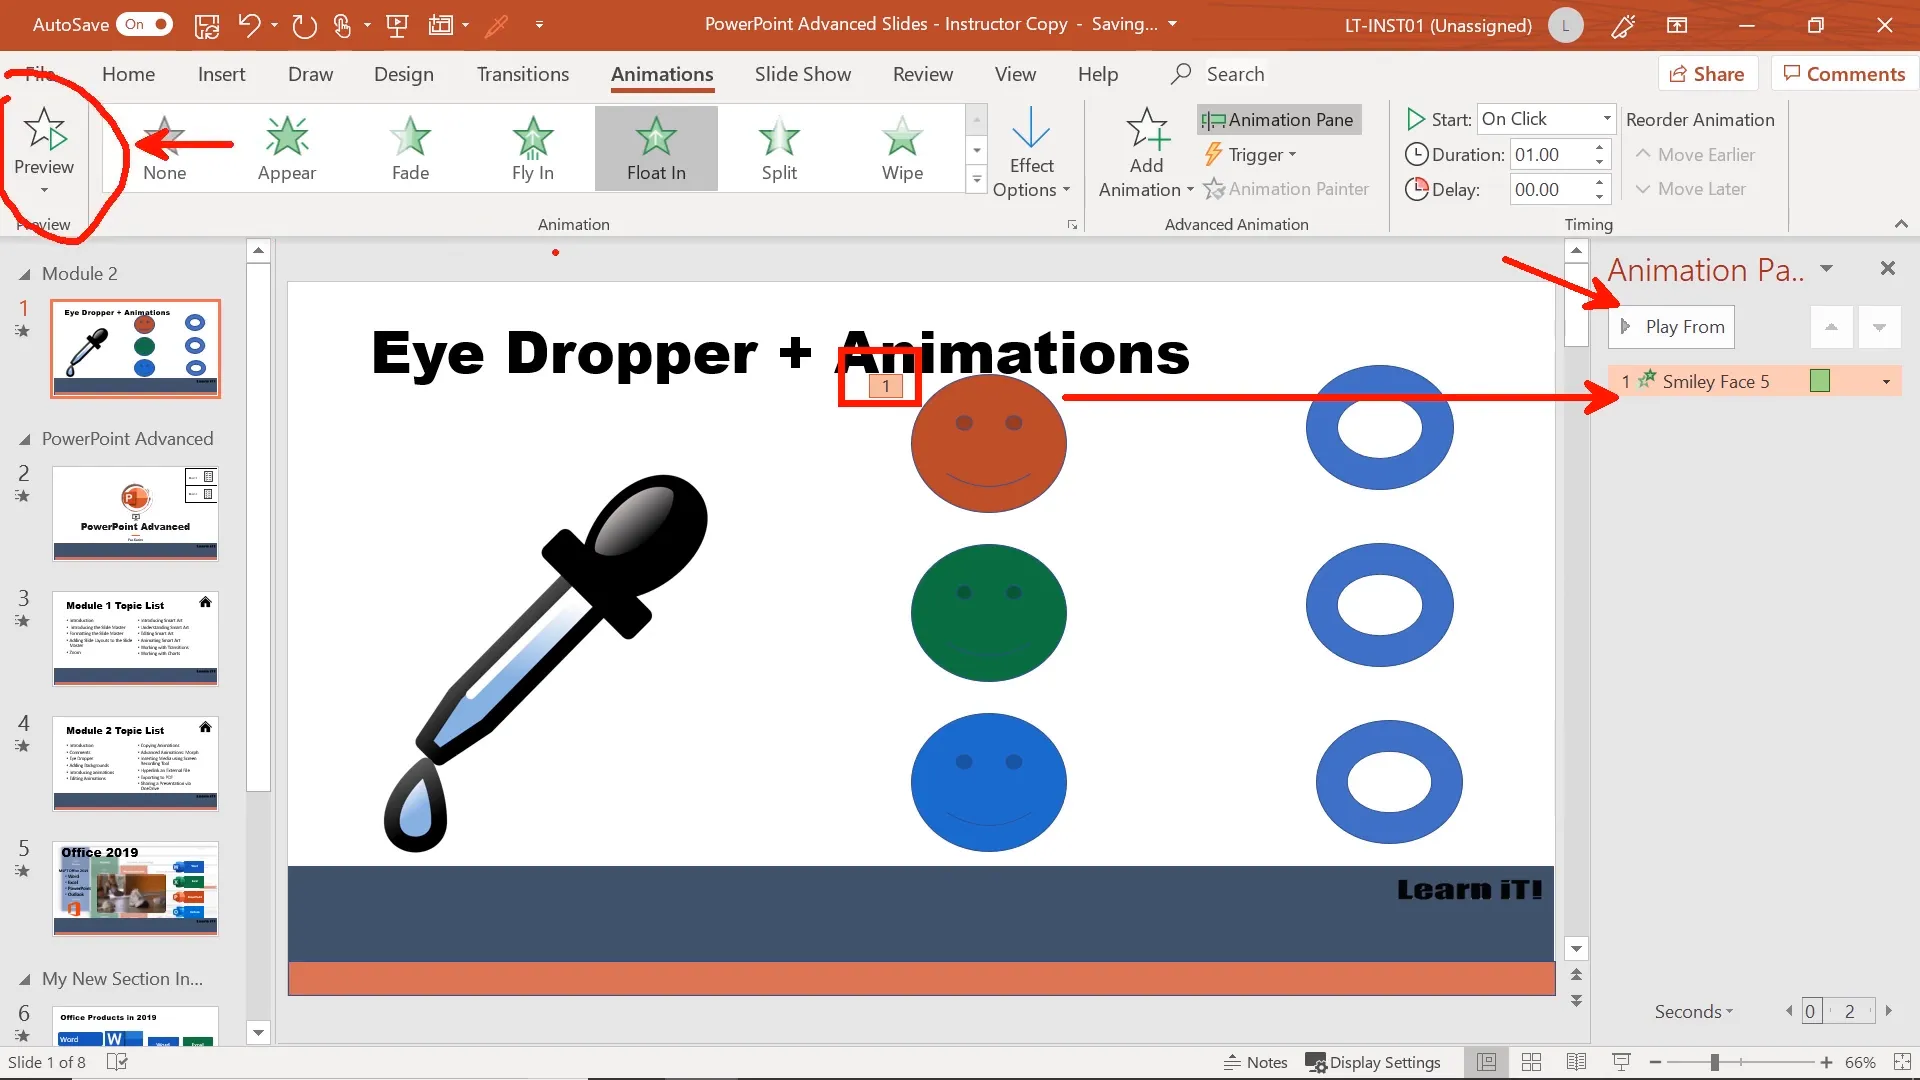
Managing Animations with the Animation Pane
The Animation Pane is a powerful tool for organizing animations. It allows you to:
- View all animations on the slide.
- Change the order by dragging or using move earlier/later commands.
- Adjust timing, duration, and delays.
- Preview animations to fine-tune effects.
Tips for Effective Animation
- Keep animation durations short (around 1 second) to maintain audience attention.
- Use delays to time animations with your speech or slide content.
- Consider grouping animations to run simultaneously or sequentially.
- Use the Animation Painter to copy animation effects from one object to others quickly.
Screen Recording Directly in PowerPoint
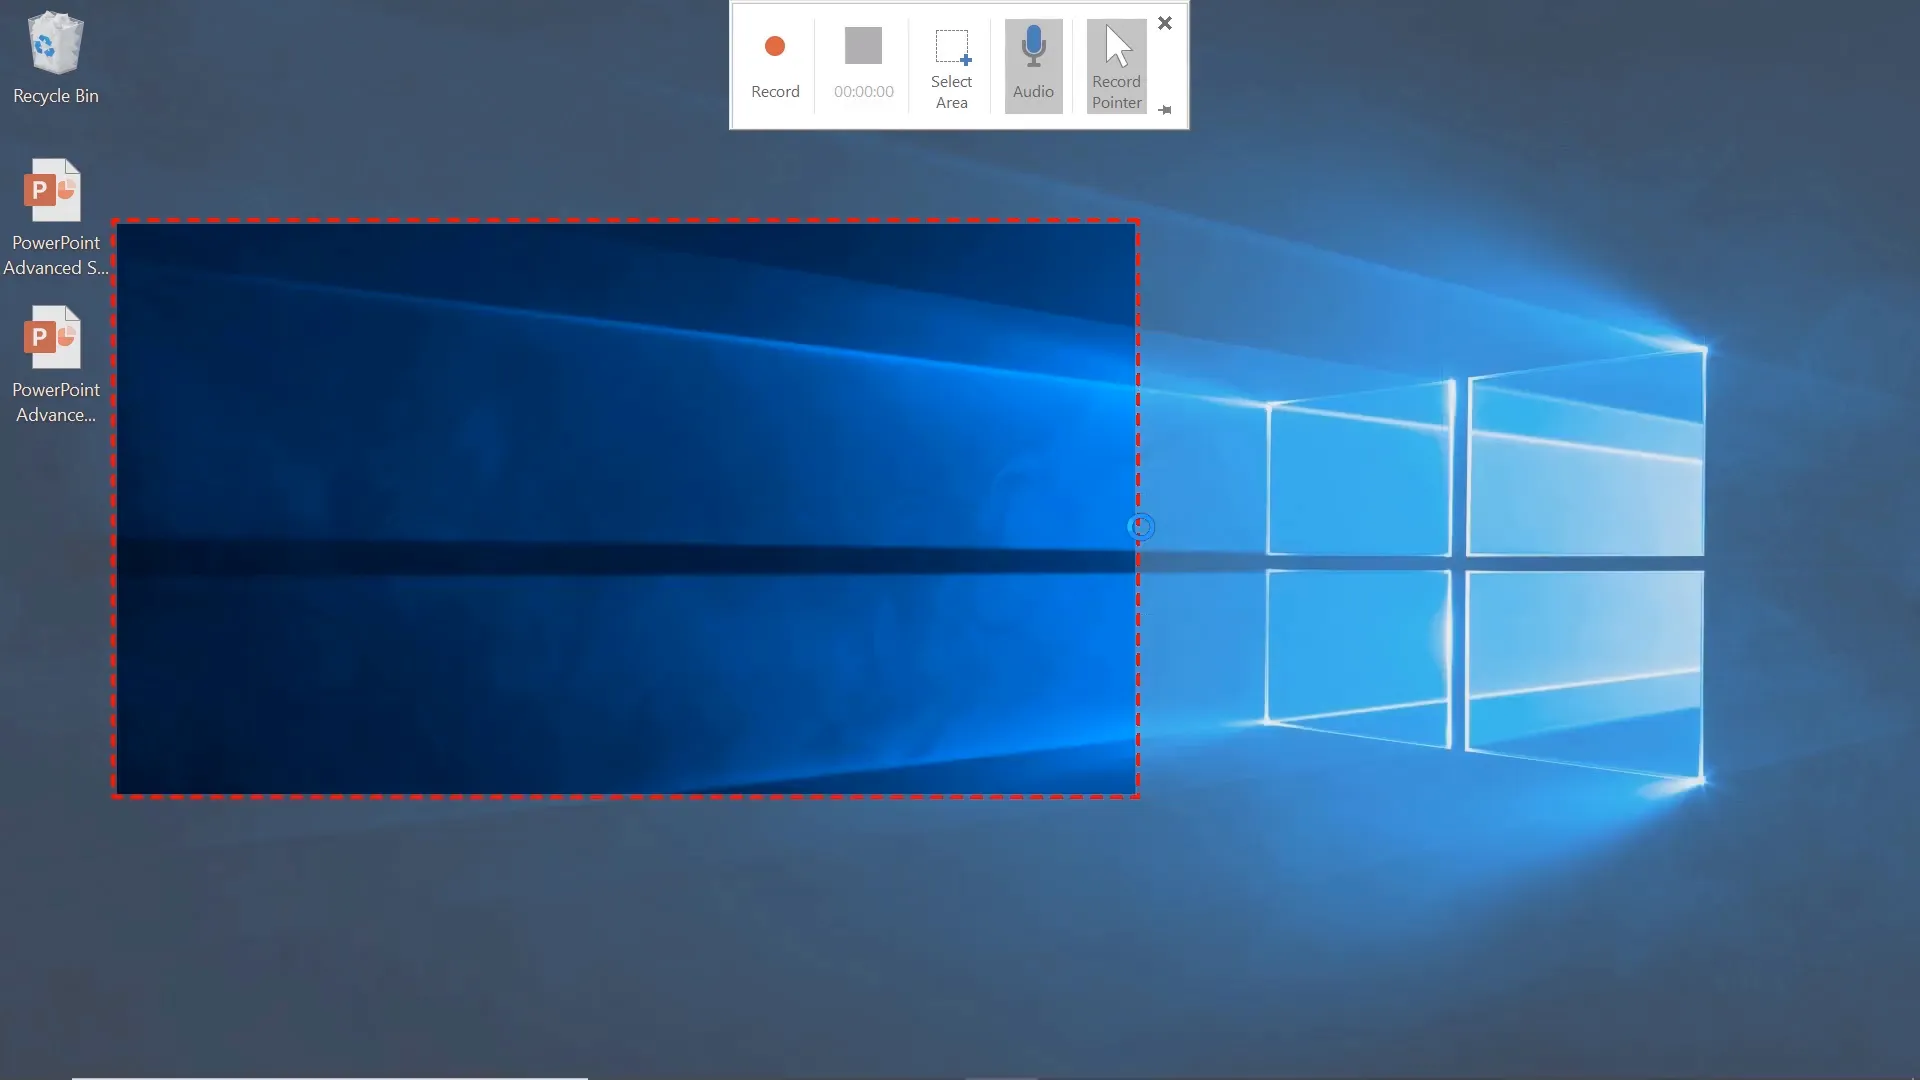
PowerPoint 2019 includes a built-in screen recording tool, allowing you to record your desktop or a selected area without needing third-party software.
To use screen recording:
- Go to Insert > Media > Screen Recording.
- Select the area of the screen you want to record.
- Choose whether to record audio and/or mouse pointer.
- Click Record, and press Windows + Shift + Q to stop recording.
- The recording is automatically embedded in your slide.
You can right-click the video to save it as an MP4 file if you want to use it outside PowerPoint.
Note that editing options are limited to trimming the start and end; for more advanced editing, use dedicated video software.
Hyperlinking to Enhance Interactivity
Hyperlinks help you connect your presentation to external websites, documents, or other slides within your presentation.
To add a hyperlink:
- Select the text, image, or object.
- Right-click and choose Link or use the Insert > Link option.
- Choose to link to a web page, another slide, a file, or an email address.
- Enter the destination URL or select the target slide/file.
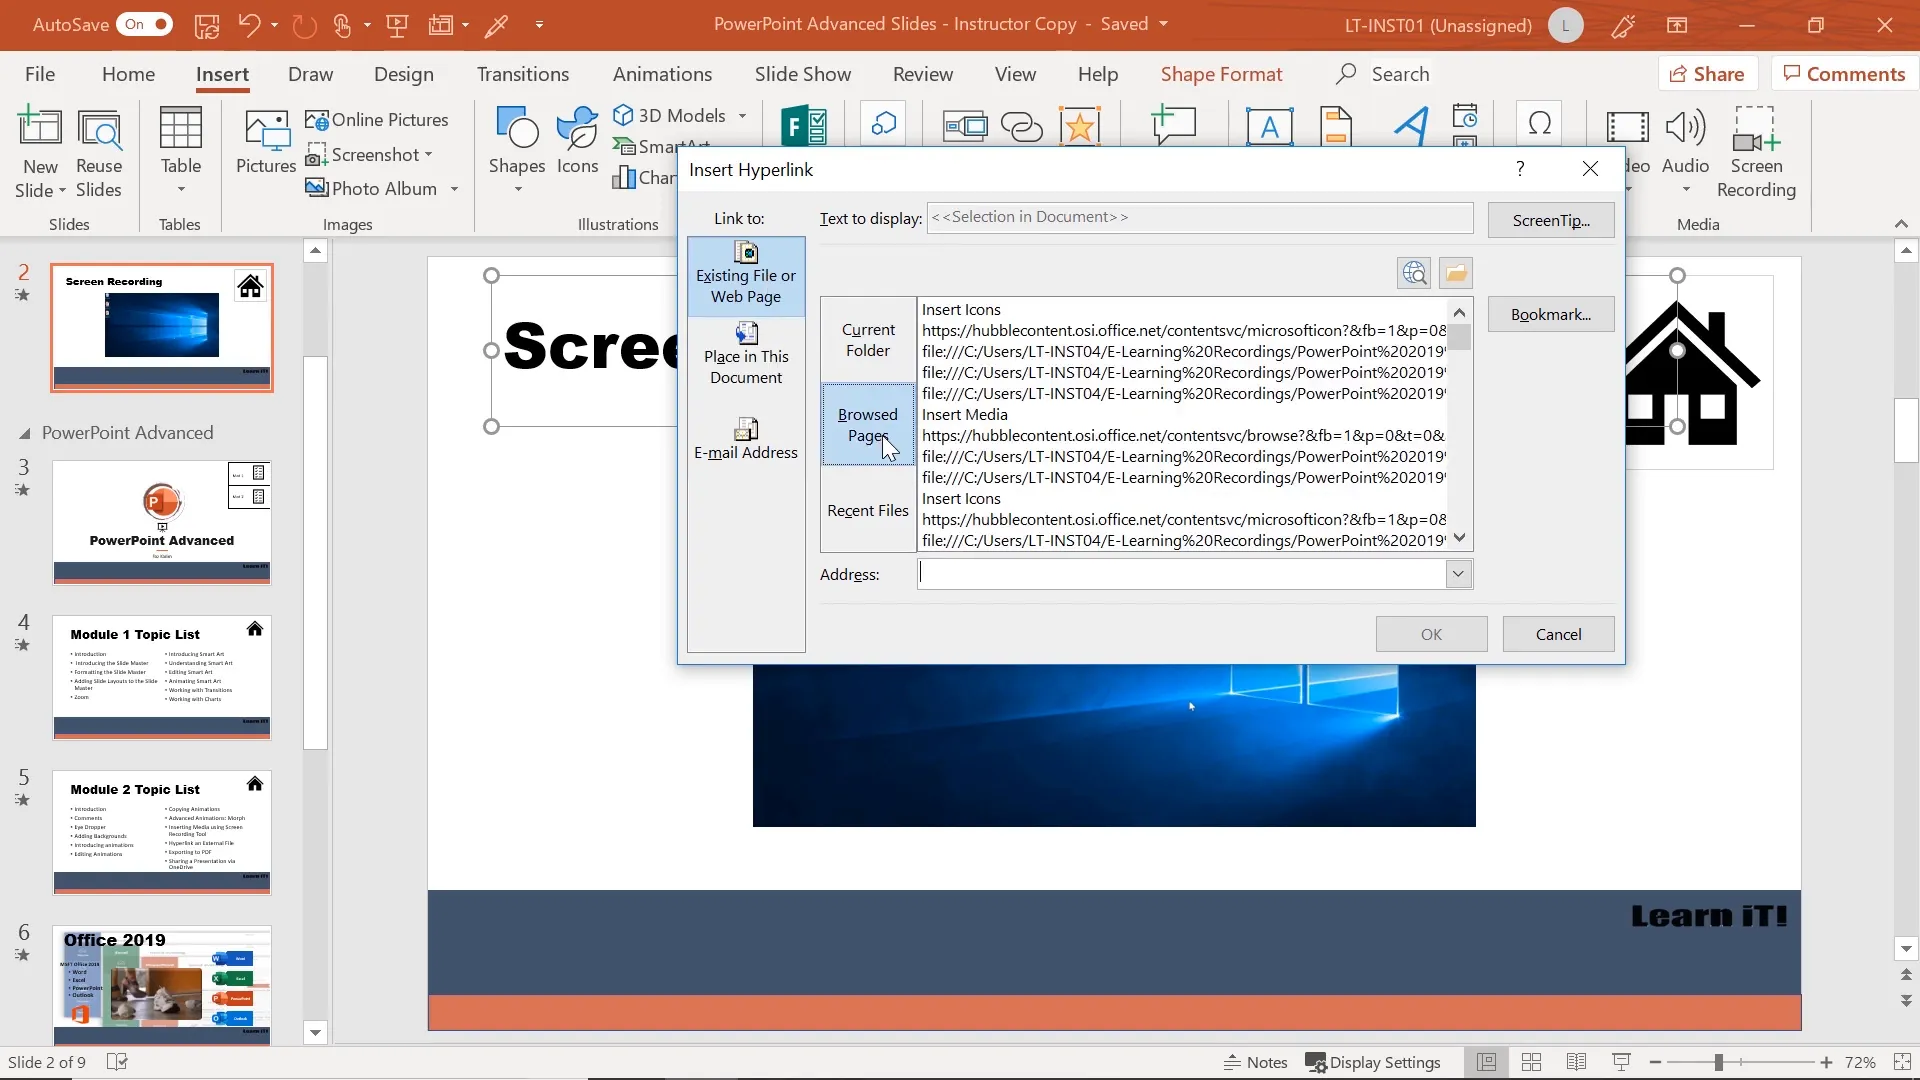
Note that hyperlinks to local files may not work if shared with others who don’t have access to those files.
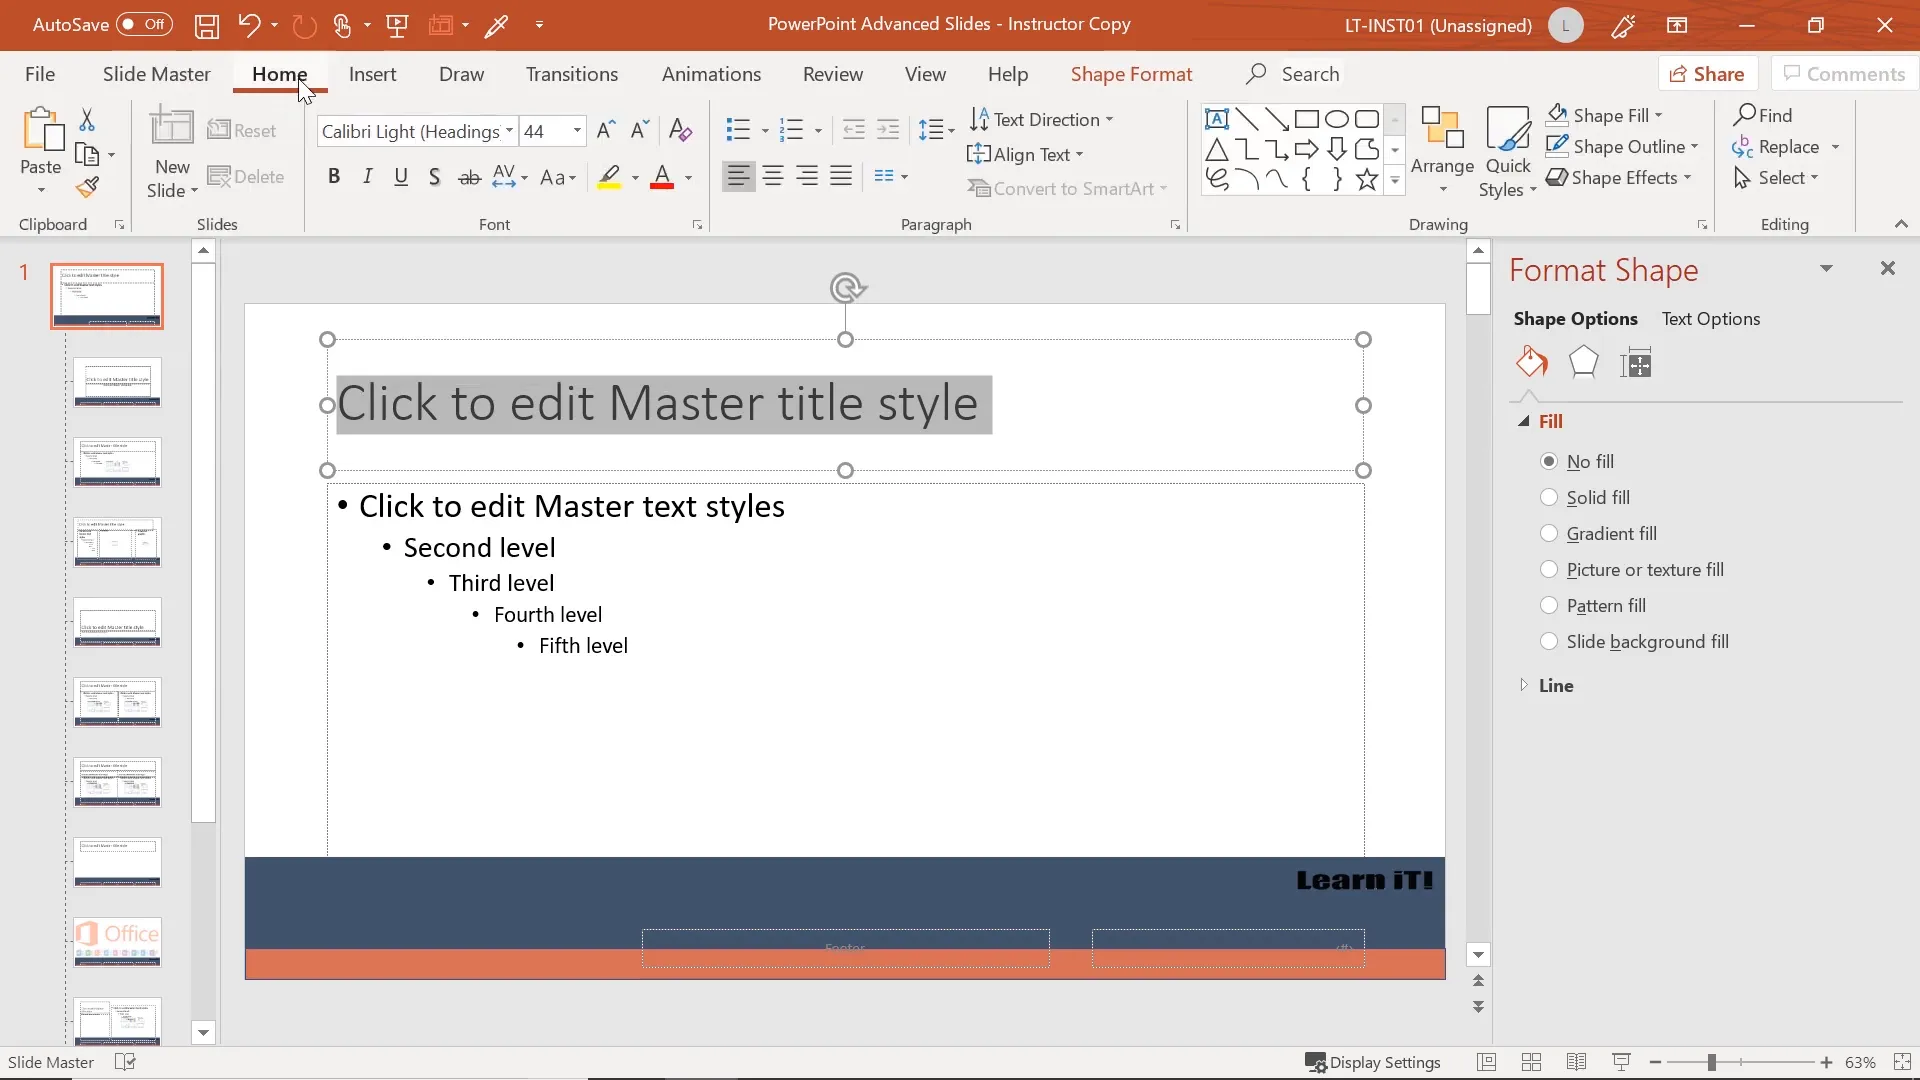
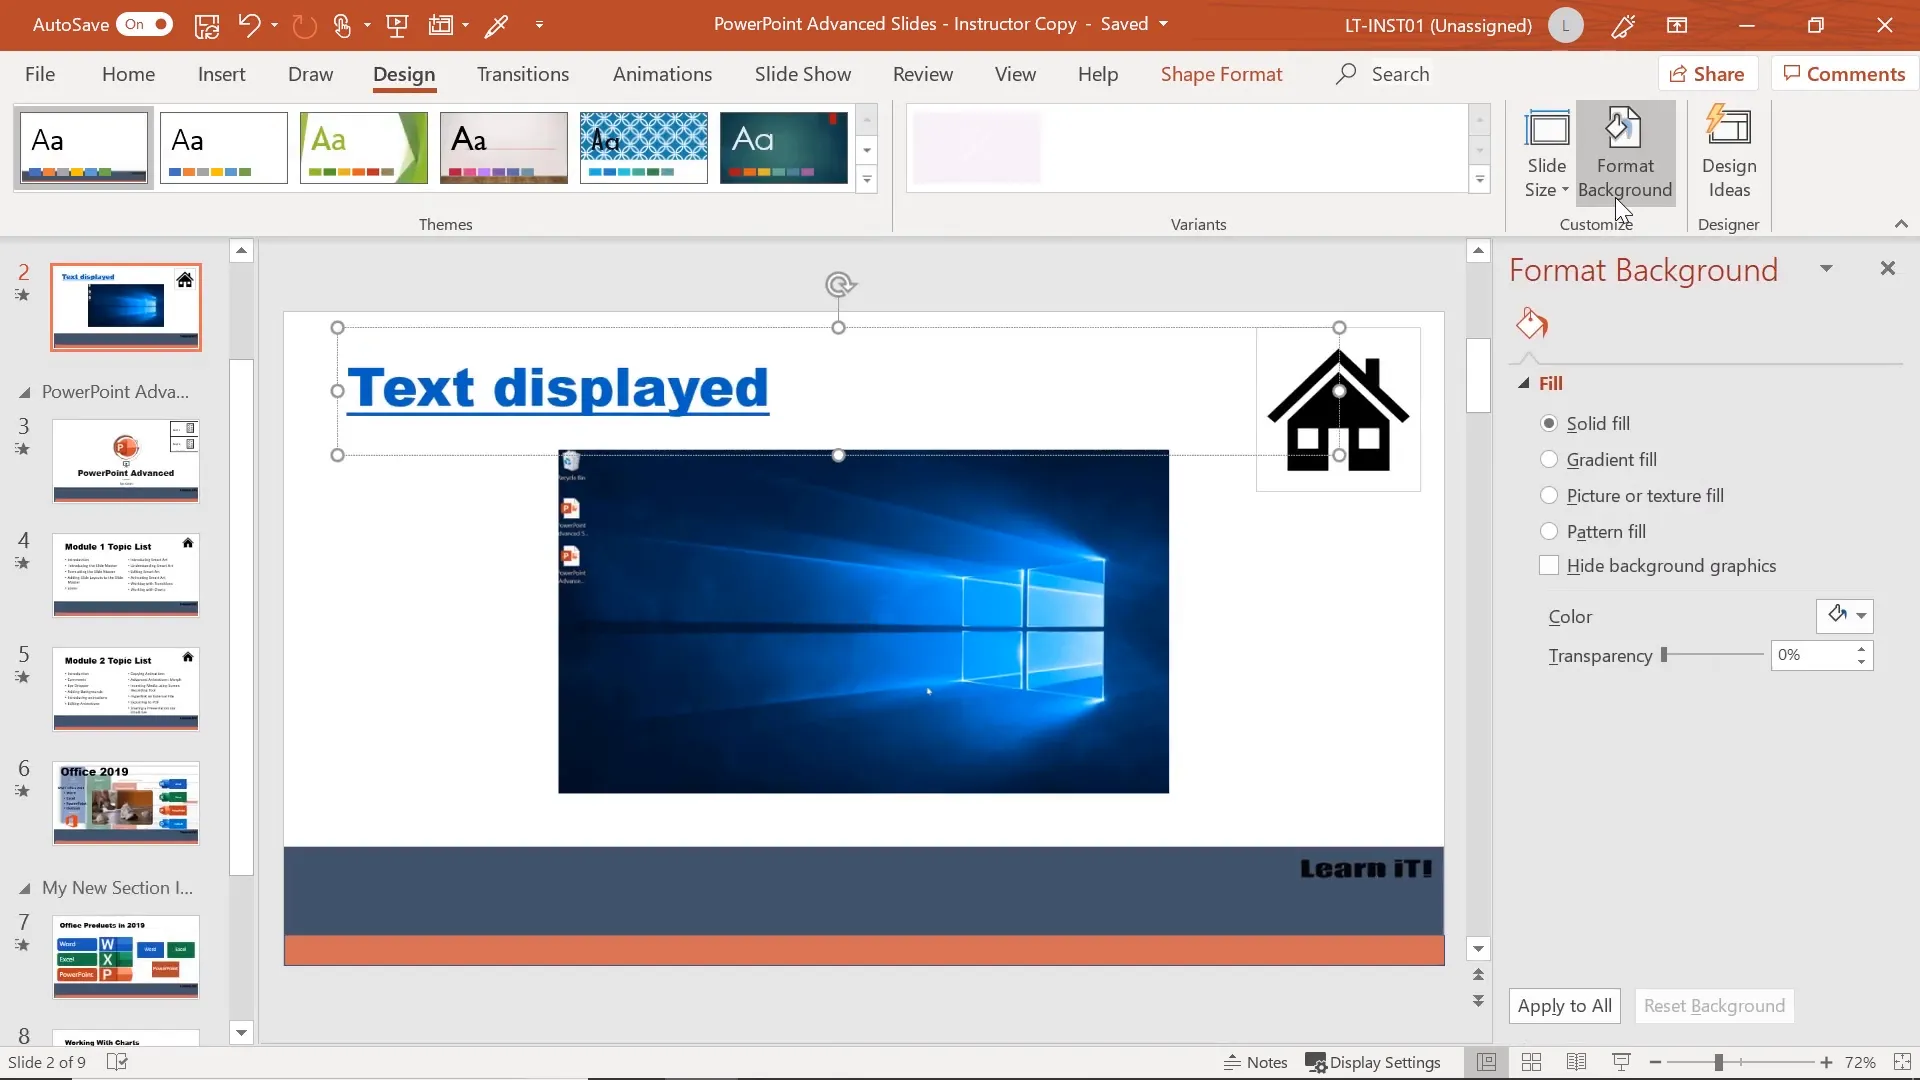
Formatting Slide Backgrounds
Backgrounds set the tone of your slides and can be customized with:
- Solid fills
- Gradient fills
- Picture or texture fills
- Pattern fills
Using the Design > Format Background pane, you can insert images from your computer or online and adjust transparency to create subtle or bold effects.
Sharing Your Presentations
Exporting as PDF
For recipients without PowerPoint, exporting your presentation as a PDF is a reliable option. PDFs preserve layout and content but are not editable.
To export as PDF:
- Go to File > Export.
- Choose Create PDF/XPS Document.
- Save to your desired location.
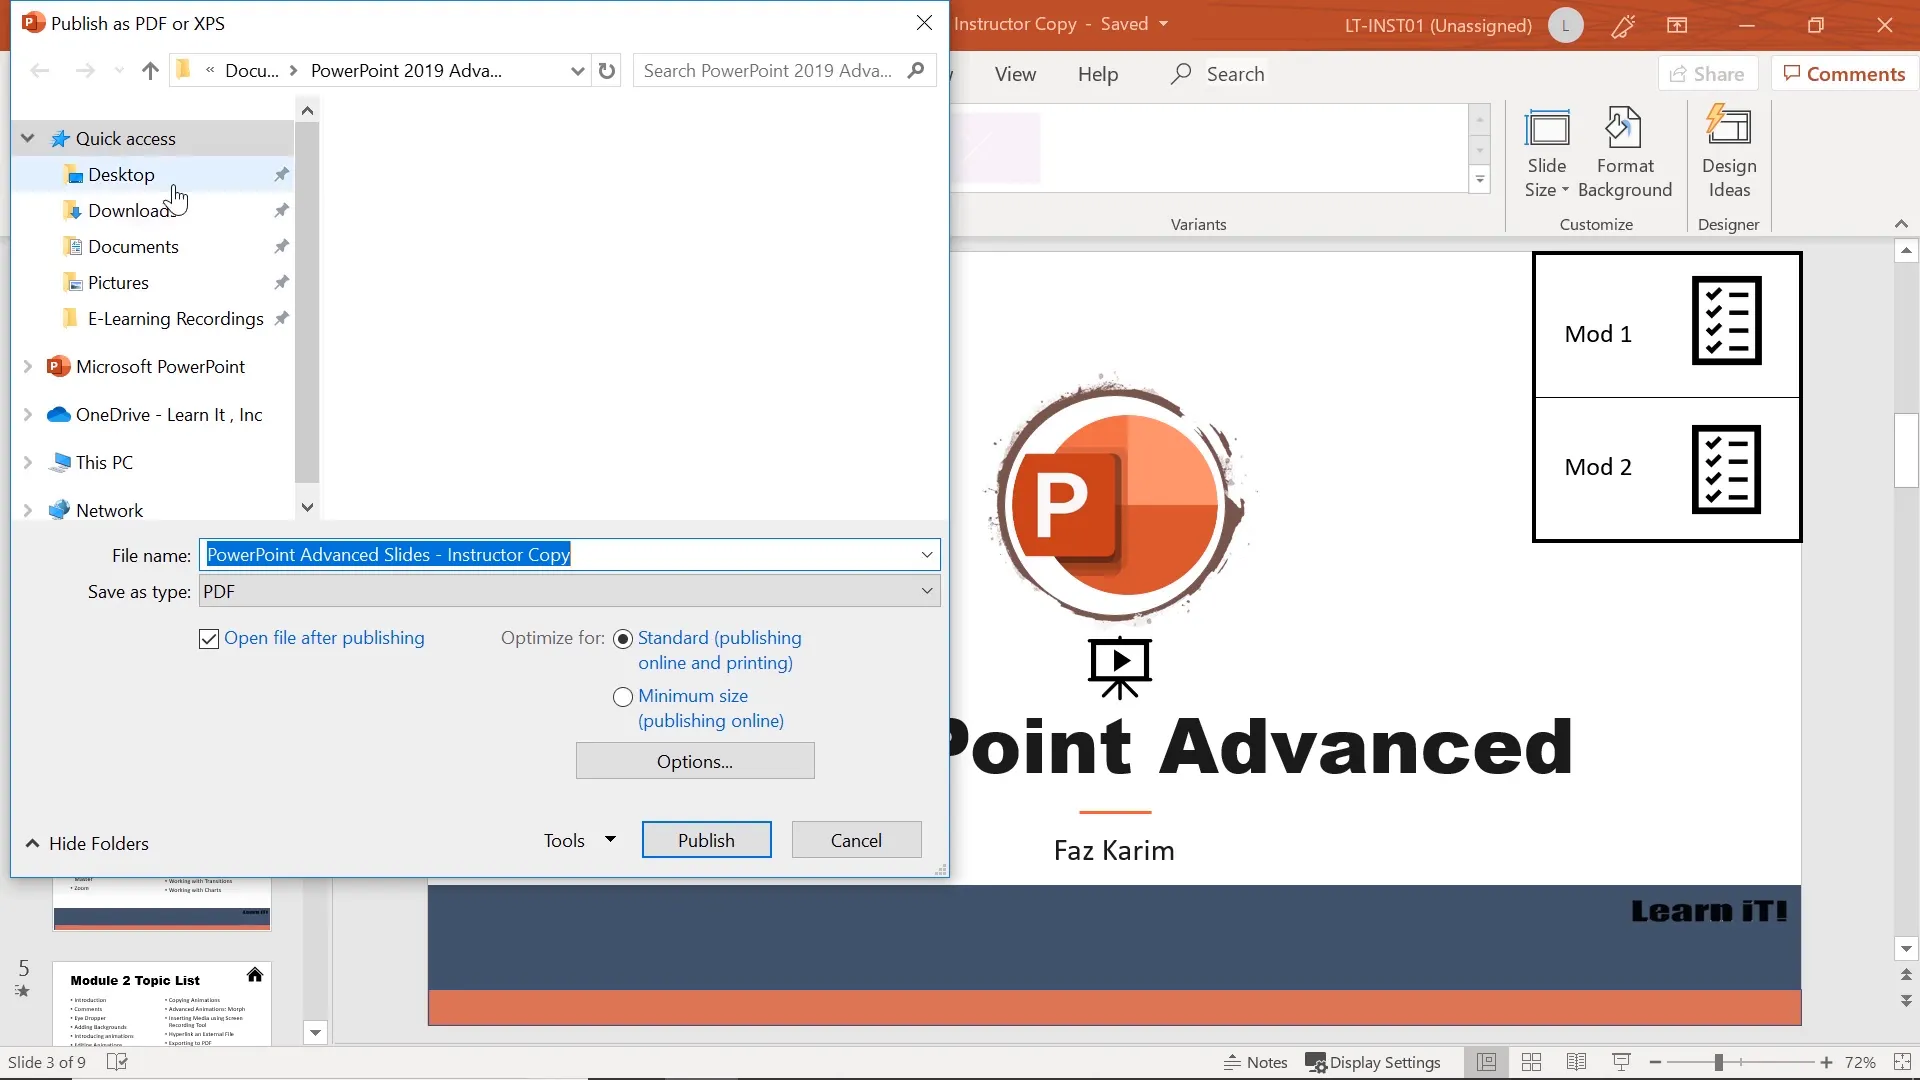
Zoom links and internal navigation still work in PDFs, making them interactive for viewers.
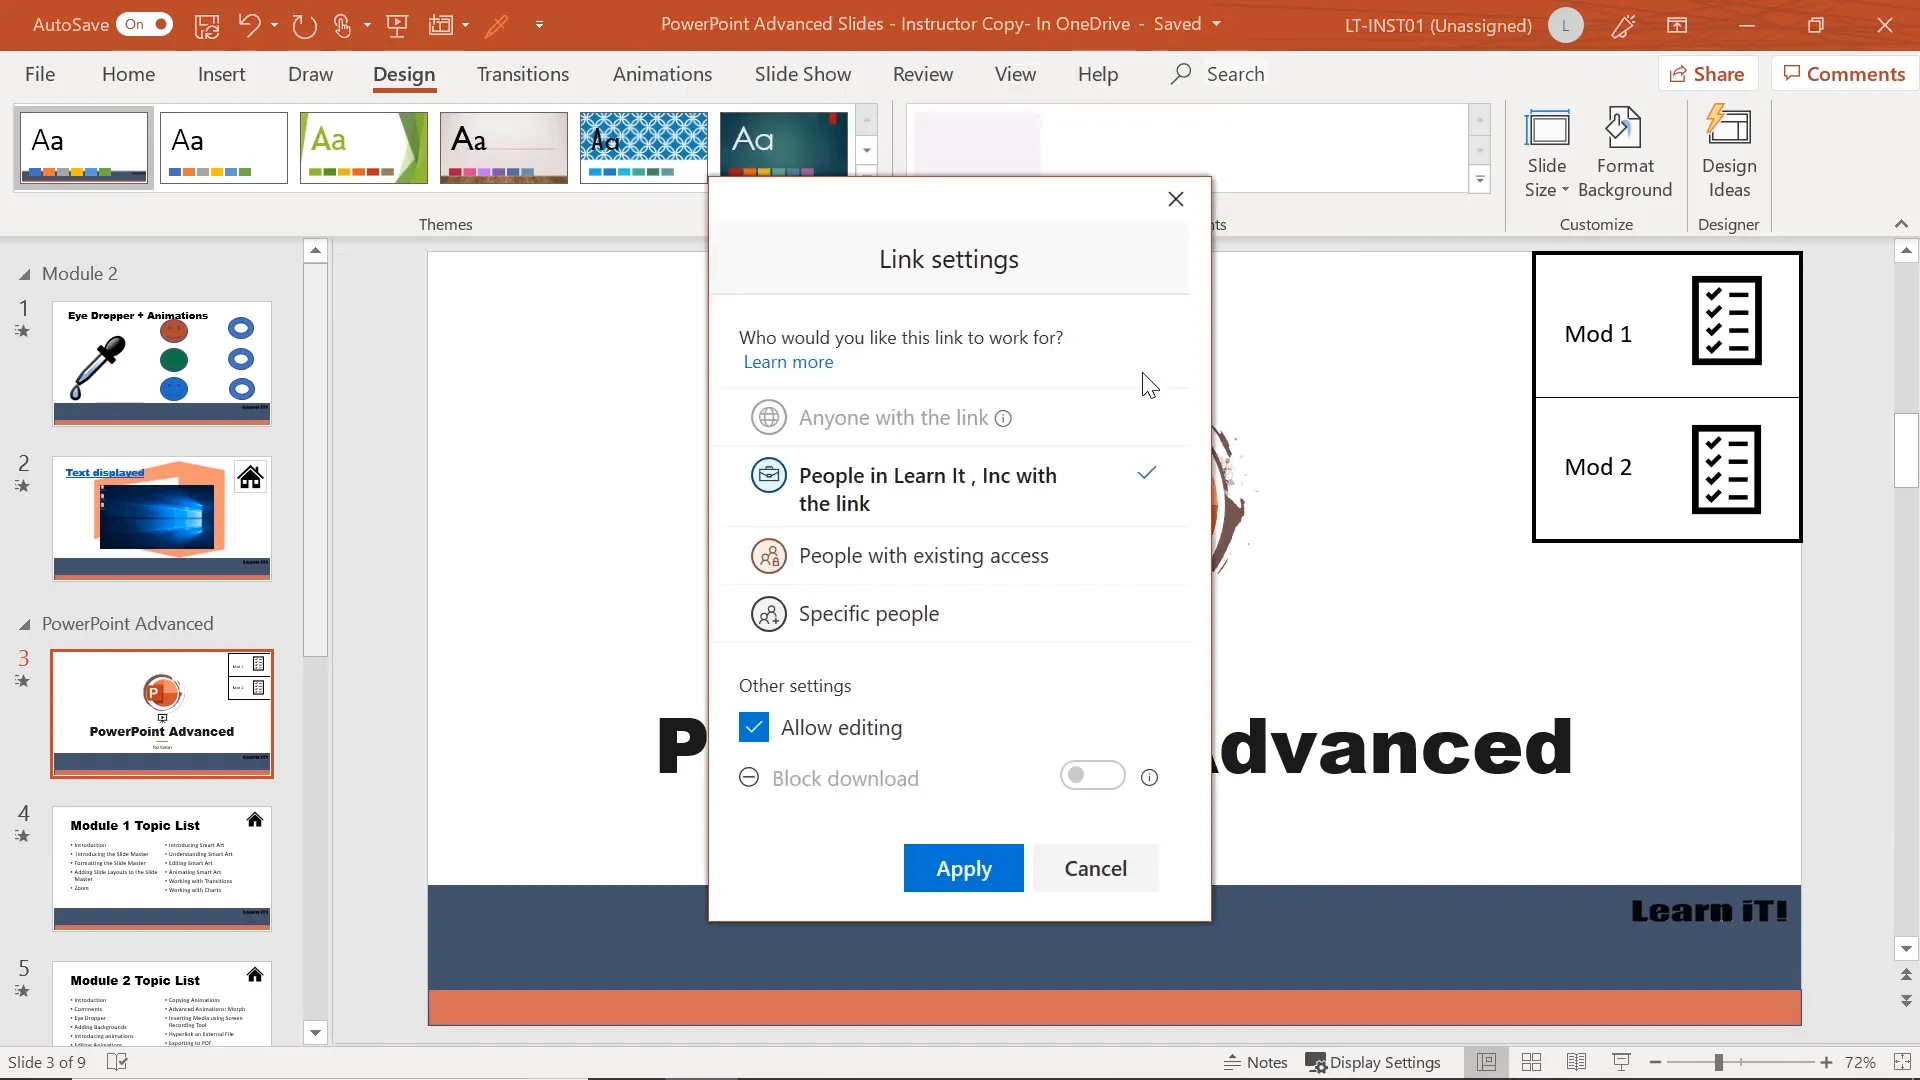
Uploading and Sharing via OneDrive
OneDrive integration allows you to save presentations in the cloud and share them easily.
Benefits include:
- Access from any device with internet.
- Real-time autosave of changes.
- Sharing with specific people or via link.
- Version history to restore previous file versions.
To save to OneDrive:
- Go to File > Save As.
- Select your OneDrive folder.
- Name and save your file.
You can then share directly from PowerPoint by inviting others to view or edit.
Frequently Asked Questions (FAQ)
What is the advantage of using Slide Master?
The Slide Master allows you to make global changes to your presentation’s design, ensuring consistency and saving time by avoiding repetitive edits on individual slides.
Can I create my own slide layouts?
Yes, PowerPoint allows you to create custom slide layouts within Slide Master view, where you can define placeholders and design elements to fit your specific needs.
How does SmartArt improve presentations?
SmartArt transforms plain text into visually engaging diagrams and graphics, making complex information easier to understand and more appealing to audiences.
What is the Zoom feature in PowerPoint?
Zoom enables interactive navigation by linking to specific slides or sections within your presentation, allowing non-linear, dynamic presentations.
Can I animate individual parts of SmartArt?
Yes, by converting SmartArt to shapes and ungrouping them, you can animate individual components separately for finer control.
How do I share presentations with people who don’t have PowerPoint?
Export your presentation as a PDF to ensure compatibility across devices and platforms. Alternatively, upload the presentation to OneDrive and share a link.
Is it possible to record my screen using PowerPoint?
Yes, PowerPoint 2019 includes a built-in screen recording tool that lets you capture your desktop or selected areas directly within your presentation.
How can I manage multiple animations on one object?
Use the Add Animation option to apply multiple animations without overwriting existing ones, and manage them efficiently with the Animation Pane.
Can I save my custom slide layouts for future use?
Absolutely! Save your presentation as a PowerPoint Template (.potx) to reuse your custom layouts and styles in new presentations.
What is the best practice for using transitions?
Keep transitions subtle and consistent by applying them across all slides, and use appropriate timing to maintain smooth flow without distracting the audience.
Conclusion
Mastering the advanced features of PowerPoint 2019 can significantly enhance your presentation skills and productivity. Using the Slide Master to control design, creating custom layouts, leveraging SmartArt for visual storytelling, and utilizing Zoom for interactive navigation are all powerful tools at your disposal.
Additionally, understanding how to work with charts, apply sophisticated animations, record your screen, and share your presentations effectively ensures you can deliver compelling content in any context.
By incorporating these techniques, you will save time, maintain consistency, and captivate your audience with professional-quality presentations.
Remember, practice is key—experiment with these features, explore their options, and tailor them to your unique presentation style. Happy presenting!
Check out the full video: PowerPoint 2019 Advanced Tutorial


